Connect with us

Survivalism

Preppers Food List: What to Buy and Store for Emergencies!

In emergencies, secure your survival with essential foods like rice, beans, and spices – discover expert tips for stocking your pantry!

Published

on

emergency food storage guide

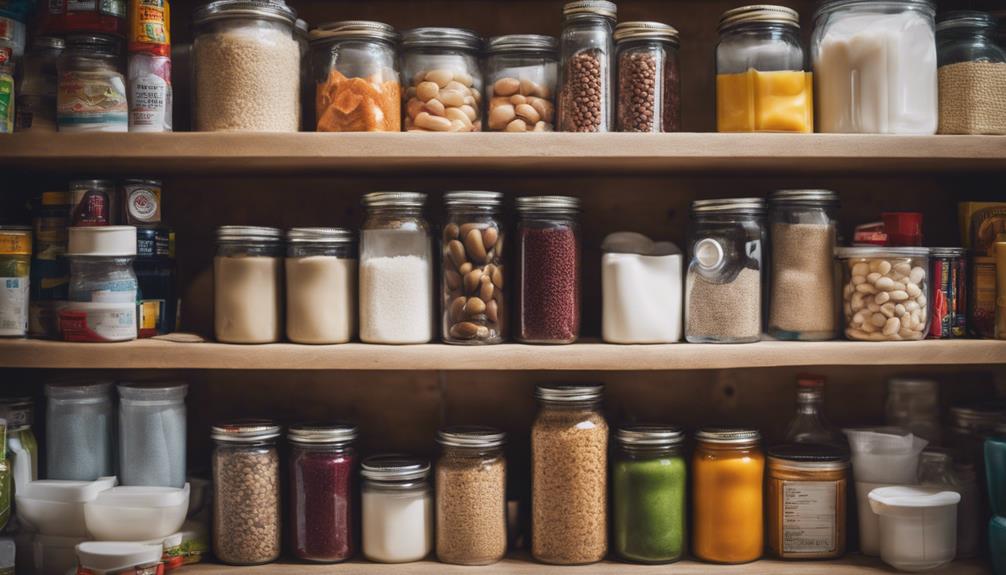
During emergencies, secure your survival with these essential foods: stock up on rice, pasta, beans like pinto, black, and kidney, plus healthy fats such as olive oil and nut butters. Spice up your meals with garlic, cumin, and paprika. Don't forget baking staples: flour, sugar, and yeast. Preserve fruits and vegetables by canning or freezing. Stay hydrated with bottled water and shelf-stable drinks. Follow guidelines for what not to store and maintain an organized pantry. Your food choices can make all the difference in times of crisis.

Key Takeaways

  • Stock up on emergency food staples like rice, pasta, and beans for sustenance.
  • Include healthy fats and proteins such as olive oil and nut butters for balanced nutrition.
  • Essential spices like salt and cumin enhance flavor in stored foods.
  • Preserve foods by canning, freezing, or blanching to extend shelf life.
  • Follow proper storage guidelines like FIFO system and labeling for efficient organization.

Essential Grains for Emergency Preparedness

When preparing for emergencies, you must prioritize stocking up on essential grains like rice, pasta, oats, dried corn, and whole wheat flour. These whole grains are important for your emergency food supply due to their long shelf life, providing sustenance when other options may not be available.

Rice and pasta, in particular, offer versatility in meal preparation and can be stored for extended periods, making them reliable choices for emergency situations. Whole wheat flour, on the other hand, allows you to bake bread, ensuring a balanced food supply during times of need.

Including a variety of grains in your emergency preparedness plans is necessary for maintaining a sustainable food source. By stocking up on these grains for storage, you aren't only ensuring a longer-term food solution but also guaranteeing a well-rounded and nutritious diet in challenging circumstances.

Prioritizing these essential staples will contribute significantly to your overall readiness for unexpected events.

Stocking Up on Beans and Legumes

bean and legume surplus

How can beans and legumes enhance your emergency food supply strategy? Beans and legumes are essential components of a well-rounded emergency food supply due to their high plant-based protein and fiber content. These pantry staples, including varieties like pinto beans, black beans, kidney beans, garbanzo beans, and lima beans, offer versatility in meal preparation, guaranteeing you have nutritious options during emergencies. Their long shelf life and easy storage in airtight containers make them ideal for stockpiling.

Here is a comparison table to help you understand the benefits of stocking up on beans and legumes:

Advertisement
BenefitsBeansLegumes
Plant-Based ProteinHigh protein contentRich in plant protein
Fiber ContentExcellent source of fiberHigh fiber content
Shelf LifeLong shelf lifeExtended shelf life
ConvenienceCanned options availableEasy to store and prepare

Additionally, canned beans provide a convenient option that requires minimal preparation and can be consumed straight from the can if needed. Incorporating beans and legumes into your emergency food supply guarantees you have essential nutrients and sustenance during crisis situations.

Smart Fats Choices for Longevity

healthy fats for longevity

Considering the importance of incorporating healthy fats into your emergency food supply, smart choices like olive oil, coconut oil, and nut butters offer essential nutrients and sustained energy for long-term survival.

In times of crisis, these shelf-stable fats play an essential role in maintaining satiety and providing necessary calories. Peanut butter, a versatile option, is a long-lasting source of protein and healthy fats, ensuring sustained energy levels during emergencies.

Opting for oils and nut butters that don't require refrigeration enhances convenience and longevity in storing your emergency food supply. These fats are critical for absorbing fat-soluble vitamins, supporting overall health, and boosting immunity when facing challenging situations.

Must-Have Spices for Flavor Boost

spice up your cooking

When it comes to stocking your emergency pantry, having the right spices can make a world of difference in elevating the taste of your meals.

Essential spice selection guarantees that you have the basic flavors covered, while considering the shelf-life of spices is vital for long-term survival preparedness.

Cooking versatility options expand your culinary horizons, allowing you to experiment with different flavor profiles even in emergency situations.

Advertisement

Essential Spice Selection

Securing the flavors of your emergency meals, essential spices like salt, pepper, and garlic powder play an important role in your preppers food list. These basic spices are versatile and can elevate the taste of various dishes.

For added variety, consider stocking up on cumin, paprika, and chili powder. These spices can bring depth and different flavor profiles to your meals.

Additionally, herbs like oregano, basil, and thyme can enhance the taste of your survival dishes, providing a fresh and aromatic touch.

Spice blends such as curry powder, taco seasoning, and Italian seasoning are convenient options that can simplify meal prep while adding complex flavors.

When storing your spices, make sure they're kept in a cool, dark place to maintain their potency and flavor for an extended shelf life.

Advertisement

Shelf-Life Considerations

To guarantee your emergency meals remain flavorful and varied, prioritizing spices with extended shelf lives is essential for your preppers food list.

When considering shelf-life, spices like salt, pepper, and garlic powder stand out as excellent choices due to their indefinite longevity when stored properly. Ground spices typically retain their flavor for 2-3 years, while whole spices can offer ideal taste for 3-4 years.

Properly stored in a cool, dark place away from heat and moisture, spices can remain potent and flavorful for an extended period. It's important to periodically check your spices for aroma and color to make sure they're still fresh and effective in enhancing the taste of your survival food.

By selecting shelf-stable spices with long-lasting properties, you can add depth and variety to your emergency meals, making them more enjoyable during challenging times.

Cooking Versatility Options

Consider incorporating essential spices like salt, pepper, garlic powder, and onion powder into your emergency pantry for a flavorful boost to your survival meals. In addition to these basics, spices like Cumin and paprika can add depth and complexity to your dishes, enhancing the taste of your emergency meals. Stocking up on dried herbs such as oregano, basil, and thyme will provide a flavorful touch to your survival food preparations. For those who enjoy a bit of heat, Cayenne pepper and chili powder can spice up bland emergency meals, adding excitement to your pantry. By having a variety of spices on hand, you make sure that you can create diverse and satisfying meals even during emergencies.

Advertisement
SpiceUse
CuminAdds depth to dishes
PaprikaProvides complexity
Cayenne pepperAdds a spicy kick

Baking Staples for Sustenance

essential ingredients for baking

Stock up on essential baking staples like flour, sugar, and baking powder for sustenance during emergencies.

Remember to include items like yeast, salt, and baking soda to guarantee you can make a variety of baked goods.

Powdered milk and cocoa are also beneficial additions to your pantry for long-term baking needs.

Additionally, syrups such as maple syrup and honey can provide sweetness and flavor to enhance your survival baked goods.

Having a well-rounded selection of baking staples on hand can offer comfort and sustenance during challenging times.

  • Yeast
  • Salt
  • Baking soda
  • Powdered milk

Preserving Fruits and Vegetables

storing fresh produce longer

When preserving fruits and vegetables, consider canning for longevity and freezing for freshness. Canning involves sealing produce in jars to prevent spoilage and preserve flavors, making it ideal for long-term storage.

On the other hand, freezing preserves the freshness and texture of fruits and vegetables, ensuring they retain their nutritional value.

Advertisement

Canning for Longevity

Preserving fruits and vegetables through canning is a reliable method for extending their shelf life and ensuring long-term food availability. When you can your produce at home, you not only preserve their nutritional value and flavor but also create a stockpile of food that can prove invaluable during emergency situations.

To fully enjoy the benefits of canning, remember to adhere to safety guidelines and follow proper techniques to guarantee the safety and longevity of your home-canned foods.

  • Canned fruits like peaches and applesauce and vegetables like green beans and tomatoes are popular choices for home canning due to their versatility and ease of preservation.
  • Canning involves sealing food in jars and heating them to kill bacteria, preventing spoilage and ensuring the food remains safe to consume.
  • Properly canned foods maintain their nutritional value, making them a healthy and convenient option for long-term storage.
  • By preserving fruits and vegetables through canning, you can create a diverse pantry that provides sustenance and variety in times of need.

Freezing for Freshness

To maintain the freshness of fruits and vegetables for extended periods, consider freezing them as a reliable preservation method. Freezing helps retain their freshness by slowing down bacterial growth and enzyme activity. Properly blanching vegetables before freezing can preserve their color, flavor, and nutrients. Fruits like berries, bananas, and citrus fruits freeze well and can be used in smoothies or baking. Vegetables such as broccoli, carrots, and bell peppers can be frozen for use in soups, stir-fries, or casseroles. Frozen fruits and vegetables can be stored for several months, providing a convenient and nutritious option for emergencies.

Frozen FruitsFrozen Vegetables
BerriesBroccoli
BananasCarrots
Citrus FruitsBell Peppers

Hydration Essentials: Drinks to Store

storing hydration drinks safely

Consider storing a variety of drinks for hydration, including bottled water, electrolyte mixes, fruit juices, and hot beverages, to guarantee you're prepared for emergencies.

Make sure you have a sufficient supply of these essential drinks to keep you hydrated and healthy during challenging times:

  • Bottled Water: A vital staple for staying hydrated, cooking, and cleaning.
  • Electrolyte Drinks: Provide a quick way to replenish fluids and essential nutrients.
  • Shelf-Stable Drinks: Options like fruit juices, sports drinks, and long-life milk alternatives offer variety and extended storage.
  • Hot Beverages: Include instant coffee, tea bags, and hot chocolate packets for comforting hot drinks on cold days.

Having a diverse selection of drinks on hand ensures you can meet your hydration needs and maintain morale in emergency situations.

Additionally, vacuum-sealed pouches of emergency water rations are convenient for on-the-go hydration requirements.

Be prepared with a well-rounded assortment of beverages to keep you and your loved ones in good spirits during unexpected events.

Advertisement

Foods to Limit or Avoid Storing

avoid storing perishable foods

Limit the storage of foods that have short shelf lives or require refrigeration to prevent spoilage during emergencies. Foods with higher fat content or moisture content are also best avoided as they can attract pests and lead to a shorter shelf life. Additionally, storing items in cardboard boxes or paper packaging is not recommended due to their susceptibility to damage from moisture and pests. Strong odors from certain foods should be limited as they can attract pests and impact the taste of other stored items. Furthermore, avoid storing foods in areas exposed to direct sunlight or fluctuating temperatures, as these conditions can degrade food quality and shorten shelf life.

Foods to Limit or Avoid StoringReasons
Short shelf lifeProne to spoilage during emergencies
Require refrigerationLack of refrigeration may lead to spoilage
Higher fat contentAttracts pests and shortens shelf life
Moisture contentAttracts pests and reduces shelf life
Cardboard boxes, paper packagingSusceptible to damage from moisture and pests

Organizing and Preserving Your Supplies

maintaining supply organization efficiently

When it comes to organizing and preserving your supplies, implementing a FIFO system will help you prevent food wastage and guarantee freshness during emergencies. By rotating your supplies using the FIFO method, you secure that the oldest items are used first, reducing the risk of items expiring before you can consume them.

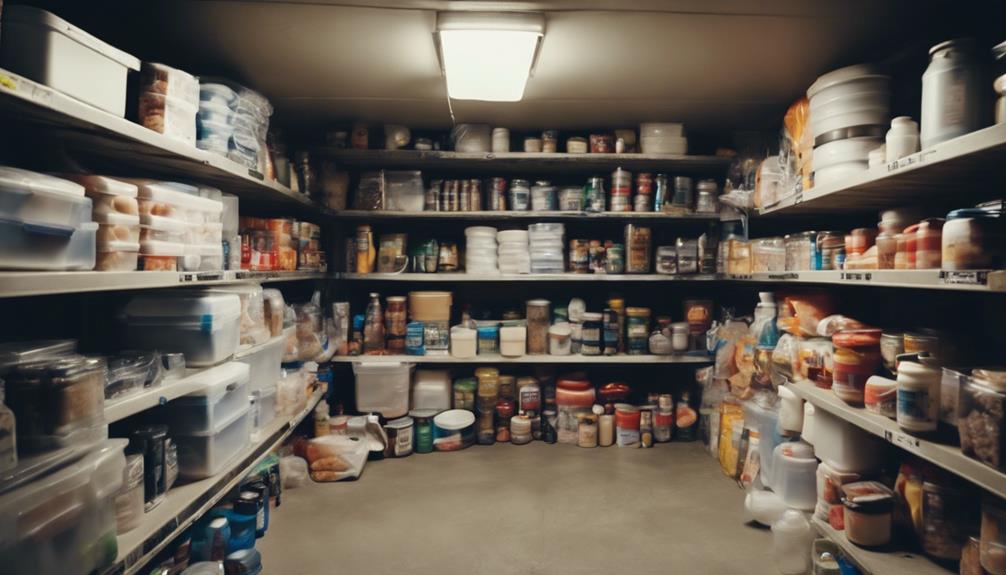
To further extend the shelf life of your stored food items, consider investing in mylar bags and oxygen absorbers. Store canned goods in a cool, dark pantry to maintain their quality and prolong their shelf life.

Labeling and organizing your supplies won't only make it easier to access them during emergencies but also assist in managing your inventory efficiently. Remember to regularly check the expiration dates of your stored food items and replace them as needed to secure freshness and maximize your storage space.

Frequently Asked Questions

What Is the Best Food to Stock for Emergencies?

For emergencies, prioritize shelf-stable foods like rice, pasta, beans, and canned goods. Include essential proteins such as canned meats and tuna. Don't forget cooking oils and nut butters. Water is vital for hydration and cooking.

What Should I Stockpile for Emergencies?

When prepping for emergencies, make sure your stockpile includes grains, beans, canned goods, and water for sustenance. Prioritize nutrient-dense options like canned tuna and peanut butter. A well-rounded supply covers essential needs.

What Food Is Good for Preppers Long Term Storage?

For preppers' long-term storage, focus on grains like rice and oats, beans such as pinto or garbanzo, cooking oils like olive oil, and durable protein sources like canned tuna. Water is also essential for various needs during emergencies.

Advertisement

What Is the Best Food Supply for Emergency?

When prepping for emergencies, focus on shelf-stable foods with essential nutrients like protein, carbs, and fats for sustained energy. Opt for versatile options that need minimal prep. Remember, water storage is key for hydration and cooking.

What Foods Should I Include in My Preppers Food List for Long-Term Survival?

When creating a preppers food list for long-term survival, it’s important to include non-perishable items like canned goods, dried fruits, and dehydrated meals. Also, consider stocking up on rice, beans, and other staples for sustenance. For food storage tips for preppers, make sure to rotate your supplies and keep track of expiration dates.

Conclusion

In times of crisis, having a well-stocked pantry can be your saving grace. Remember, your emergency preparedness food list is like a shield against uncertainty, providing you with the sustenance you need to weather any storm.

So, stock up, organize, and be ready for whatever may come your way. Your pantry is your fortress, your provisions your armor.

Stay prepared, stay safe, and stay nourished.

Advertisement
Advertisement

Survivalism

Beat Ticks With Simple DIY Solutions

Simple DIY solutions can help you effectively beat ticks, but are you ready to explore the best strategies for your outdoor spaces?

Published

on

diy solutions to beat ticks

You can effectively beat ticks with simple DIY solutions that are both easy and affordable. Start by maintaining your yard—mow the grass and clear away leaf litter regularly. Consider making DIY tick tubes using toilet paper rolls, treated cotton, and permethrin. Place these tubes every 10-15 yards in areas where mice often gather. Check them every couple of weeks for signs of use and replace materials as needed. Combining these tactics with natural repellents can enhance your defenses against ticks. Keep exploring to discover even more effective strategies for tick control in your outdoor spaces.

Key Takeaways

  • Create DIY tick tubes using permethrin-treated cotton to attract rodents and reduce tick populations effectively.
  • Regularly maintain your yard by mowing grass and removing leaf litter to deter ticks.
  • Conduct thorough tick checks on yourself and pets after outdoor activities to catch bites early.
  • Utilize natural repellents, such as citronella, for additional protection against tick bites.
  • Combine strategies like DIY tick tubes with community initiatives for comprehensive tick control efforts.

Understanding Ticks and Their Risks

ticks risks and understanding

Ticks, nature's tiny bloodsuckers, pose significant risks to both humans and pets. These ectoparasites thrive in wooded and grassy areas, where they can latch onto you or your furry friends.

With over 900 species identified, some can transmit serious diseases like Lyme disease and Rocky Mountain spotted fever. Understanding their life cycle, which includes egg, larva, nymph, and adult stages, is essential for effective prevention.

Regularly checking for ticks after outdoor activities can help reduce the risk of bites. Additionally, maintaining your yard by keeping grass trimmed and removing leaf litter can deter ticks.

What Are DIY Tick Tubes?

diy tick tube definition

When it comes to effective tick control, DIY tick tubes offer a practical solution for homeowners. These passive devices attract rodents, which carry insecticide-treated cotton back to their nests.

By using permethrin-infused cotton, you can greatly reduce tick populations, as studies show about 72% of mice become tick-free. Creating these tubes is cost-effective and allows you to repurpose household materials.

You'll want to place them strategically in areas where mice thrive, ideally every 10-30 feet. Timing is vital, so deploy them in early spring and late summer for the best results.

Advertisement

With a bit of effort, you can enhance your yard's safety from ticks while promoting a sustainable approach to pest control.

Materials Needed for Tick Tubes

tick tube construction supplies

To create effective DIY tick tubes, you'll need a few simple materials that are easy to gather from around your home.

Start with cardboard tubes, like those from toilet paper or paper towels. Next, grab some cotton balls or dryer lint to use as nesting material.

You'll also require permethrin insect repellent to treat the cotton, ensuring it effectively eliminates ticks. Don't forget a pair of gloves for safe handling of the permethrin.

If you'd like, you can include small rocks for weighing down the tubes and optional paint or markers for decoration.

With these materials, you'll be well-equipped to make your own tick tubes to help control tick populations in your yard.

Advertisement

How to Assemble Tick Tubes

diy tick tube assembly

Starting with a clean workspace makes assembling tick tubes easier and more efficient. First, gather your materials: cardboard tubes, treated cotton, and gloves. Spray the cotton balls with permethrin and let them dry. Next, fill the cardboard tubes with the treated cotton, making certain you leave some space for air. Seal one end with an end cap and make sure the holes for mouse access are clear.

Here's a quick reference table for the assembly process:

Step Action Notes
1 Gather materials Cardboard, cotton, etc.
2 Treat cotton with permethrin Wear gloves
3 Fill tubes with cotton Leave space for air
4 Seal one end Make certain holes are clear
5 Position tubes in yard Target mouse areas

Strategic Placement of Tick Tubes

effective tick control strategy

Strategically placing your DIY tick tubes is crucial for maximizing their effectiveness in controlling tick populations.

Start by identifying areas where mice frequently nest, such as along wooded edges or near tall grasses. Position your tick tubes every 10-15 yards in these hotspots to attract rodents.

Make certain the tubes are placed in sheltered spots to protect them from wind and rain. Avoid placing them directly in the open, as this may deter mice.

After a week, check the tubes to see if they've been used; if not, consider relocating them to more active areas.

Regularly assess your placements based on mouse activity and adjust as necessary to guarantee ideal results in tick control.

Advertisement

Monitoring and Maintenance Tips

regular oversight and care

Regular monitoring and maintenance of your DIY tick tubes is essential for keeping them effective in reducing tick populations. Here are some tips to guarantee peak performance:

  1. Check tubes bi-weekly: Replace cotton and document any mouse activity to assess effectiveness.
  2. Reapply permethrin: Treat the cotton every 4-6 weeks to maintain its insect-repelling properties.
  3. Adjust placements: After heavy rain or during peak tick seasons, relocate tubes to more active mouse areas.
  4. Evaluate materials: Confirm the tubes remain intact and secure against weather to prevent loss of effectiveness.

Combining Strategies for Tick Control

integrated tick control methods

Monitoring and maintaining your DIY tick tubes is just one part of an effective tick control strategy. To maximize your efforts, combine several methods. Here's a quick overview of complementary strategies:

Strategy Description Frequency
Tick Tubes Use permethrin-treated cotton Every 4-6 weeks
Yard Maintenance Mow grass and clear leaf litter Weekly
Natural Repellents Apply essential oils like citronella As needed
Pet Protection Use vet-approved tick treatments Monthly
Community Initiatives Collaborate with neighbors Ongoing

Frequently Asked Questions

How Long Do DIY Tick Tubes Remain Effective?

DIY tick tubes remain effective for about 4-6 weeks after you apply permethrin. You'll need to monitor them regularly, replace the cotton, and reapply the treatment to maintain their effectiveness against ticks.

Can Tick Tubes Harm Non-Target Animals?

Imagine a garden bustling with life—tick tubes target rodents, but non-target animals might wander too close. While generally safe, you should monitor nearby wildlife to guarantee they don't unintentionally interact with the treated materials.

Are There Alternatives to Permethrin for Treatment?

You can use alternatives like essential oils, diatomaceous earth, or vinegar solutions for tick treatment. These options might not be as effective as permethrin, but they offer safer methods for your environment and pets.

What Should I Do if I Find Ticks on Pets?

If you find ticks on your pets, act quickly. Remove them using tweezers, pulling straight out. Clean the area with antiseptic, monitor for symptoms, and consult your vet for further treatment or prevention strategies.

How Do Weather Conditions Affect Tick Populations?

Imagine stepping outside to enjoy nature, only to be overwhelmed by ticks. Weather conditions, like humidity and temperature, directly influence tick activity and populations, so staying informed helps you protect yourself and your loved ones effectively.

Advertisement

Conclusion

By taking proactive steps, like using DIY tick tubes, you can greatly reduce tick populations in your yard. Did you know that a single female tick can lay up to 2,000 eggs? Imagine those tiny threats multiplying in your outdoor space! With a little creativity and effort, you can protect your loved ones from tick-borne diseases. So, get started on these simple solutions and reclaim your outdoor enjoyment—it's easier than you think!

Continue Reading

Survivalism

Mastering Color Coding for Emergency Readiness

Navigating emergency situations is easier with color coding, but what are the best practices to ensure your family is fully prepared? Discover more inside.

Published

on

emergency color coding mastery

Mastering color coding can dramatically enhance your emergency readiness. By assigning specific colors to categories—like red for medical supplies and blue for water—you'll make it easier to find what you need quickly. This system enhances visibility and reduces panic during crises, ensuring your family knows where everything is. It also encourages teamwork and efficiency when it matters most. Regularly updating your inventory and practicing drills with your family solidifies this knowledge. With the right tools and training, you'll feel more confident in your preparedness. There's much more to explore that can further boost your emergency planning.

Key Takeaways

  • Assign distinct colors to different supply categories for quick identification: red for medical, orange for fire, yellow for communication, green for food, and blue for water.
  • Use clear labels and maintain consistency in color schemes to enhance visibility and organization in emergencies.
  • Conduct regular inventory checks to ensure supplies are accessible, updated, and to identify any gaps in resources.
  • Train family members on the color-coding system and conduct practice drills to reinforce memory and build confidence in emergency situations.
  • Foster teamwork and proactive planning through discussions about emergency scenarios and assigned roles during preparedness activities.

Benefits of Color Coding

organized efficient visual communication

Color coding can transform how you manage emergency supplies, making it easier to find what you need in a pinch. By assigning specific colors to different categories, you enhance visibility and quick recognition, which is essential in urgent situations.

This system reduces the time you spend searching for necessary items, allowing you to focus on what matters most. It also improves organization, minimizing stress when every second counts. Better inventory management leads to resource efficiency, ensuring you're prepared for unexpected situations.

With a well-implemented color-coding system, you'll train your family members to respond quickly and effectively, fostering a sense of readiness. Embracing color coding means you're taking a proactive step towards better emergency preparedness.

Effective Color Code Categories

color code organization system

To maximize the benefits of your color-coding system, it's important to establish effective categories for your emergency supplies.

Start by assigning specific colors to various functions; for instance, use red for medical supplies, orange for fire safety items, yellow for communication tools, green for food, and blue for water. This not only enhances visibility but also helps you quickly locate what you need during a crisis.

Make sure to label each category clearly, ensuring easy identification even in low light. Consistency is key—maintain the same color scheme across all supplies to reduce search time.

Advertisement

Training your family members on this system will further streamline your emergency preparedness efforts, making everyone more efficient when it counts.

Insights From Preparedness Surveys

preparedness survey insights analysis

Preparedness surveys reveal valuable insights that can greatly enhance your emergency readiness strategies. They highlight the importance of situational awareness, helping you identify potential threats before they become crises.

By focusing on small sections of your supplies, you can gradually improve your organization and effectiveness. Regularly updating your inventory not only keeps your resources accessible but also guarantees you're aware of any gaps in your preparedness.

Additionally, training family members on your color-coding system fosters teamwork and quick responses during emergencies. Ultimately, these insights encourage proactive planning and efficient resource management, giving you the confidence to face unexpected situations.

Embracing these strategies will empower you to navigate emergencies with greater ease and assurance.

Essential Color-Coding Tools

color coding organizational essentials

When it comes to organizing your emergency supplies, having the right tools at your disposal makes all the difference.

Start with a reliable color-coding kit, like the Vanquest color-coding kit, which includes PVC reference patches and AnchorWrap strips, perfect for sorting your gear. Use bright, distinct colors to categorize supplies—assign red for first aid, orange for fire, yellow for communication, green for food, and blue for water.

Advertisement

Clear labels are essential for quick identification, especially in low light. Regularly check and update your inventory to guarantee everything is organized and accessible.

Training for Family Readiness

family readiness training program

While developing a robust emergency plan is crucial, training your family on the color-coding system guarantees everyone knows how to quickly locate essential supplies.

Start by explaining the color categories: red for medical supplies, orange for fire-related items, yellow for communication tools, green for food, and blue for water.

Conduct practice drills where family members identify and gather these supplies using the color codes. This hands-on experience reinforces memory and boosts confidence during high-stress situations.

Regularly review the inventory together, updating any expired items. Encourage questions and discussions about emergency scenarios, so everyone understands their roles.

Frequently Asked Questions

How Can I Create My Own Color-Coding System?

To create your own color-coding system, choose distinct colors for categories that make sense to you. Label items clearly, and guarantee everyone understands the system. Regularly update your inventory for better organization and accessibility.

Advertisement

What Materials Work Best for Labeling Supplies?

Labeling supplies requires lightweight, long-lasting materials like laminated labels or vinyl tape. These choices guarantee durability and visibility, keeping your items organized. Remember, practical options make your prep process more efficient and effective during emergencies.

Can I Use Color Coding for Non-Emergency Items?

Absolutely, you can use color coding for non-emergency items! It helps you quickly identify and organize your belongings, making everything easier to find. Just assign specific colors for different categories to enhance your system.

How Often Should I Update My Color-Coded Inventory?

You should update your color-coded inventory regularly, ideally every few months or after significant changes. Regular checks keep your supplies organized, ensuring you can quickly find what you need when it matters most.

What if Family Members Are Colorblind?

If family members are colorblind, consider using symbols or patterns alongside colors for categorization. Make certain everyone understands the system by providing clear instructions and practicing together, making it accessible and effective for all.

Conclusion

By mastering color coding, you're not just organizing supplies; you're painting a clearer picture of safety for your family. Imagine traversing a dark room with just a flashlight. Each color is a guiding beam, leading you to what you need most in moments of chaos. With this simple system in place, you'll transform uncertainty into confidence. So, grab those labels and get started—your family's safety is worth every vibrant hue!

Advertisement

Continue Reading

Survivalism

Survival at Home: Hacks to Prepare for Any Emergency

Knowing how to prepare your home for emergencies can save lives, but are you ready to uncover essential hacks that could make all the difference?

Published

on

emergency preparedness home hacks

To guarantee your family's safety during emergencies, start by evaluating potential hazards around your home, like fire risks and fall hazards. Assemble an emergency kit stocked with non-perishable food, water, and a first aid kit. Install smoke detectors on every level and keep fire extinguishers accessible. Create a clear evacuation plan detailing escape routes and a meeting spot outside. Don't forget to address any special needs in your household, from medications to pet supplies. By following these hacks, you'll boost your preparedness and confidence. With a bit more insight, you can strengthen your emergency strategies even further.

Key Takeaways

  • Create a well-stocked emergency kit with non-perishable food, water, first aid supplies, and essential medications tailored to your household's needs.
  • Install smoke detectors and fire extinguishers in key areas, regularly test them, and maintain a written fire escape plan with marked exit routes.
  • Ensure home safety by securing tall furniture, using non-slip mats, and keeping flammable items away from heat sources to prevent accidents.
  • Establish clear communication and evacuation plans, designating safe meeting spots and practicing regularly to ensure all family members are prepared.
  • Regularly review and update emergency supplies and plans to adapt to changing family needs and ensure effective response during emergencies.

Assessing Potential Hazards

evaluating risk factors thoroughly

When it comes to keeping your home safe, evaluating potential hazards is crucial. Start by addressing fire hazards, which claim over 3,000 lives each year. Install smoke detectors in the kitchen, bedrooms, and basement, testing them monthly and replacing batteries twice a year. Keep flammable items at least three feet away from heat sources, and never leave cooking unattended. If a pan catches fire, use a damp tea towel, not water, to smother the flames.

Next, focus on fall and tripping hazards. Confirm staircases are well-lit and clutter-free. Install safety gates to keep young children safe. Use non-slip mats in bathrooms and secure furniture to walls to prevent tip-overs. Elderly individuals are particularly vulnerable to serious complications from falls, making it essential to assess and mitigate these risks. Regular screenings for early detection of potential health issues can also help prevent accidents related to chronic conditions.

Don't overlook poisoning and suffocation hazards. Install carbon monoxide detectors near sleeping areas and store chemicals out of children's reach in clearly labeled containers. Remove choking hazards, such as small toys and cords, from accessible areas.

Assembling Your Emergency Kit

prepare essential survival supplies

As you gather your emergency kit, start with a checklist of essential supplies to guarantee you're prepared for any situation. Think about any special considerations, like medical needs and personal preferences, that may affect what you include. Having a well-rounded kit can make all the difference when an emergency strikes. Regularly updating your kit ensures that you're equipped with relevant supplies that can effectively address any crisis.

Essential Supplies Checklist

Preparing for emergencies requires careful planning and the right supplies. An essential supplies checklist will help you stay organized and ready for anything life throws your way. Here's a quick rundown of must-have items for your emergency kit:

  1. Food and Water
    • Stock at least a several-day supply of non-perishable food and one gallon of water per person per day. Don't forget a manual can opener! Additionally, having an air purifier can help maintain indoor air quality during emergencies by filtering out pollutants.
  2. First Aid and Medication
    • Keep a basic first aid kit handy, along with prescription medications for at least a week. Include non-prescription meds like pain relievers, hand sanitizer, and disinfecting wipes.
  3. Communication and Lighting
    • A battery-powered or hand-crank radio is vital for updates, so grab one if you can. Flashlights, extra batteries, and matches in a waterproof container are important for maintaining visibility and safety. Additionally, consider including a basic first aid kit that can address common injuries and health issues in emergencies.

Special Considerations Needed

Considering your unique household and environment is essential for assembling an effective emergency kit. Assess your living situation and the specific disasters that could occur in your area. Include items based on dietary preferences and verify you can replace perishables before they expire. Additionally, remember that having a survival kit enhances individual and community resilience during emergencies. Incorporating multi-functional gear can also help maximize space and ensure you have versatile tools at your disposal. It's important to include financial considerations in your emergency planning to ensure you can access essential resources when needed. Additionally, having a well-structured retirement savings plan can provide peace of mind during uncertain times.

Here's a quick table to help you visualize some crucial considerations:

Advertisement

Consideration Examples Notes
Family Needs Baby formula, pet food Don't forget diapers!
Health Supplies Prescription meds, first-aid kit Stock at least a week's worth.
Unique Challenges Disability aids, hygiene items Tailor to individual needs.
Food & Water Nutrient-dense bars, extra water Consider shelf-life!
Accessibility Portable kits, multiple locations Everyone should know where!

Be certain to store items in airtight bags and easy-to-carry containers. Regularly check and update your supplies as family needs change. By addressing these special considerations, you'll create a kit that truly meets your household's needs during emergencies.

Home Safety Precautions

protective measures for home

Home safety requires vigilance and proactive measures to protect your family from potential hazards. Start by guaranteeing your home is equipped with essential safety devices. Regular testing and maintenance will keep your family safe and informed.

Here are three key safety precautions to implement:

  1. Fire Safety: Install smoke alarms on every level and outside sleeping areas. Test them monthly and change the batteries twice a year. Keep fire extinguishers on every floor, especially in the kitchen, and practice a fire escape plan with your family. Additionally, ensure that your family is familiar with the escape planning process to improve preparedness. Regularly check the air quality indicators in your home to detect any potential hazards. Consider using air purifiers to reduce harmful pollutants and improve overall air quality.
  2. Electrical Safety: Avoid overloading outlets and use tamper-resistant receptacles. Install ground fault circuit interrupters (GFCIs) in wet areas to reduce the risk of electrical shock. Make sure to label circuit breakers for quick access during emergencies.
  3. General Safety: Install carbon monoxide detectors on every floor and keep stairways free of clutter. Secure tall furniture and use safety latches on cabinets to keep small children safe. Guarantee you set your water heater to no higher than 125º Fahrenheit to prevent scalding. Regular maintenance of your appliances can also prevent unexpected emergencies.

Effective Communication Plans

strategic messaging and outreach

Effective communication plans are crucial in emergencies, guaranteeing everyone knows their roles and how to respond. You need to identify your organization's structure and the involved stakeholders, tailoring your strategies for different groups like employees, management, and external parties. This helps guarantee everyone receives the right information in a crisis. Additionally, investing in emergency mass notification software can enhance the speed and reliability of your communication efforts. Implementing a plan for positive reinforcement can also foster a collaborative atmosphere during emergencies. One way to ensure clarity is by utilizing essential survival skills to inform your communication strategies. Furthermore, establishing a home security system can provide peace of mind and enhance overall safety during emergencies.

Here's a simple overview of your communication plan:

Role Responsibilities Contact Method
Group Admin Oversee communication flow Email, Phone
Emergency Responders Implement safety measures Text, Voice
Information Officer Disseminate critical updates Social Media, Email
Spokesperson Serve as the primary communication voice Press Releases, Interviews

Assigning roles within your emergency communications team is crucial. Guarantee clear lines of communication between members and train them on their specific responsibilities. Develop and script precise messages tailored for various emergency scenarios. Finally, test your communication plan regularly to guarantee everyone can effectively perform their roles when it matters most.

Creating an Evacuation Strategy

emergency evacuation planning guide

In emergencies, having a well-thought-out evacuation strategy can make all the difference in guaranteeing safety. Start by identifying escape routes throughout your home. You should find two ways out of every room, including windows and doors, ensuring they're clear of obstacles and easy to open. Install emergency release devices on any security bars and consider escape ladders for upper levels. Regular practice ensures your family's safety during a fire emergency.

Next, create a written home fire escape plan. Draw a map that marks exit routes and smoke detector locations, and practice this plan regularly. Discuss it with everyone in your household to guarantee everyone understands their role.

Advertisement

Finally, designate a safe meeting spot outside your home where everyone knows to gather after evacuating. This spot should be visible to emergency responders and a safe distance from the house. Teach your children the importance of not going back inside once they've left.

Here's a quick checklist to help you:

  1. Identify and clear escape routes in every room.
  2. Create and practice a written evacuation plan.
  3. Designate and teach the meeting spot to all household members.

Preparation is key to staying safe during emergencies!

Addressing Special Needs

supporting diverse learning abilities

When emergencies strike, addressing special needs within your family is essential for guaranteeing everyone's safety. Start by incorporating specific needs into your family preparedness plan. Document individual requirements, including medications, equipment, and communication methods. Keep a thorough list of emergency contacts and medical information handy.

As you assemble your disaster supply kit, include personal supplies tailored to each person's needs. Stock extra wheelchair batteries, oxygen, catheters, and any essentials. Use Braille labels or large print for emergency supplies to assist those with visual impairments. For family members who are deaf or hard of hearing, make certain you have a weather radio with a text display and flashing alert feature. It's important to remember that additional lead time may be required for effective preparation.

Establish a support network of family, friends, and neighbors who can help during a disaster. Make sure they're aware of individual needs and capabilities. Register with local emergency services and disability organizations for added support. Inform your network about where emergency supplies are stored and provide access keys if necessary.

Lastly, prepare for potential power outages by finding alternative charging methods for medical equipment and keeping backup power supplies on hand. Always have a manual wheelchair available as a backup to power wheelchairs.

Advertisement

Frequently Asked Questions

How Often Should I Update My Emergency Plan?

You should update your emergency plan at least once a year to keep it relevant. However, if you make any changes to your home, like renovations or new appliances, it's vital to review it sooner. Additionally, after any drills or real emergencies, gather feedback and refine your plan. Regularly check that contact details and evacuation procedures are accurate, ensuring everyone knows what to do when an emergency strikes.

What Is the Best Way to Store Water Long-Term?

To store water long-term, use food-grade plastic, glass, or stainless steel containers, avoiding those previously used for toxic substances. Keep your containers in a cool, dark place, away from sunlight and chemicals. Treat tap water with chlorine for safety, and rotate your supply every six months to guarantee freshness. Label each container clearly as drinking water, and maintain proper sealing to prevent contamination. Regular checks will help keep your water safe and ready.

How Can I Prepare for Power Outages?

When power outages strike, you want to be as ready as a superhero! Start by keeping torches and spare batteries handy, ditching those dangerous candles. Charge your mobile devices and have a battery-operated radio for updates. Stock up on non-perishable food and at least a gallon of water per person daily. Don't forget to check your carbon monoxide detectors and have a first aid kit ready; you never know when you'll need it!

What Should I Include for Pets in My Emergency Kit?

When preparing your emergency kit for pets, start by including at least one to two weeks' worth of food and water. Don't forget collapsible bowls and a full supply of medications, along with instructions. Add a first aid kit, vaccination records, and recent photos of your pet. Keep a leash, collar with ID, and comfort items like blankets or toys handy. Finally, gather emergency contacts and vet information to stay organized.

How Do I Teach Children About Emergency Preparedness?

Imagine a brave knight facing a fierce dragon; your kids can be those knights! Teach them about emergency preparedness by turning lessons into adventures. Use stories to explain different emergencies, and create fun drills to practice. Equip them with knowledge about calling 911 and identifying safe spaces. Regularly review the plan, making it a family quest. By fostering confidence, they'll feel empowered to navigate any storm that comes their way.

Advertisement

Conclusion

By taking these steps, you're not just preparing for emergencies; you're gearing up to face any disaster like a superhero! With a well-thought-out plan, a stocked emergency kit, and a clear communication strategy, you can tackle whatever comes your way. Remember, even the smallest actions can make a world of difference when chaos strikes. So, roll up your sleeves, stay proactive, and you'll be ready to keep your home safe and sound in any situation!

Continue Reading
Advertisement

Affiliate disclaimer

As an affiliate, we may earn a commission from qualifying purchases. We get commissions for purchases made through links on this website from Amazon and other third parties.

Vetted

must have survival gear checklist must have survival gear checklist
Vetted5 months ago

15 Essential Survival Gear Items You Need for Your Next Adventure

I uncover the 15 essential survival gear items you can't afford to miss for your next adventure—will you be prepared...

essential survival gear checklist essential survival gear checklist
Vetted5 months ago

15 Essential Survival Gear Items You Need to Stay Prepared in the Wild

Harness the power of 15 essential survival gear items to thrive in the wild—discover what you need to stay prepared...

durable survival gear essentials durable survival gear essentials
Vetted5 months ago

15 Most Durable Survival Gear Essentials for Ultimate Preparedness

Amass your survival skills with these 15 durable gear essentials that promise to elevate your preparedness—discover what you might be...

essential survival gear checklist essential survival gear checklist
Vetted5 months ago

15 Essential Survival Gear Items Everyone Should Have in Their Kit

Just when you think you're prepared, discover the 15 essential survival gear items that could make all the difference in...

essential gear for adventurers essential gear for adventurers
Vetted5 months ago

15 Coolest Survival Gear Must-Haves for Every Adventurer

Adventure awaits with these 15 coolest survival gear must-haves that every adventurer needs to thrive—discover what essentials could transform your...

affordable survival gear essentials affordable survival gear essentials
Vetted5 months ago

15 Best Affordable Survival Gear Essentials for Every Adventurer

Check out these 15 affordable survival gear essentials every adventurer needs to stay prepared—discover what could save your life in...

ultimate camping survival essentials ultimate camping survival essentials
Vetted5 months ago

15 Best Camping and Survival Gear for Your Ultimate Outdoor Adventure

Achieve outdoor excellence with the 15 best camping and survival gear essentials—discover what you can't afford to leave behind!

essential survival gear checklist essential survival gear checklist
Vetted5 months ago

15 Best Backpack Survival Gear Essentials for Every Adventurer

Incredible backpack survival gear essentials await every adventurer—discover what you need to be fully prepared for any outdoor challenge!

top preppers backpacks reviewed top preppers backpacks reviewed
Vetted5 months ago

15 Best Backpacks for Preppers: Gear Up for Any Situation

Overview of the 15 best backpacks for preppers reveals essential features that could make all the difference in your survival...

ideal locations for preppers ideal locations for preppers
Vetted5 months ago

15 Best Places for Preppers to Live: Secure Your Future in These Ideal Locations

Discover the top 15 locations perfect for preppers seeking safety and sustainability, but which one will secure your future best?

essential long term survival foods essential long term survival foods
Vetted5 months ago

15 Best Prepper Foods to Store for Long-Term Survival and Peace of Mind

With the right prepper foods, you can ensure long-term survival and peace of mind—discover the essential items you need to...

top prepper resources guide top prepper resources guide
Vetted5 months ago

15 Best Prepper Sites to Help You Get Prepared for Anything

Join the journey to discover the 15 best prepper sites that can transform your emergency preparedness strategy—are you ready to...

Advertisement

Trending