Survivalism
Top Rain Barrels for Emergency Preparedness
Which rain barrel will best meet your emergency water needs? Discover essential features and top options to prepare for any situation.
When preparing for emergencies, choosing the right rain barrel is key. Consider options like the FCMP RC4000, with its 50-gallon capacity and effective overflow management, or the portable Grow1 Collapsible, which ranges from 13 to 265 gallons. The Graf Mondo offers durability with a 137-gallon capacity. Look for UV-resistant, BPA-free materials and check for essential features like spigot placement and overflow management. Position your barrel near downspouts for efficient collection and maintain it regularly for ideal performance. By exploring your options further, you can guarantee you have the best solution for your emergency water needs.
Key Takeaways
- Choose rain barrels with a capacity of at least 50 gallons for effective emergency water storage during crises.
- Look for models with UV-resistant and BPA-free materials to ensure safe water collection and storage.
- Ensure reliable overflow management features to prevent spillage and maintain water quality during heavy rainfall.
- Regular maintenance, including cleaning every three months, is essential for optimal water usability and emergency readiness.
- Familiarize yourself with local regulations regarding rainwater collection to ensure compliance and safety in emergency preparedness efforts.
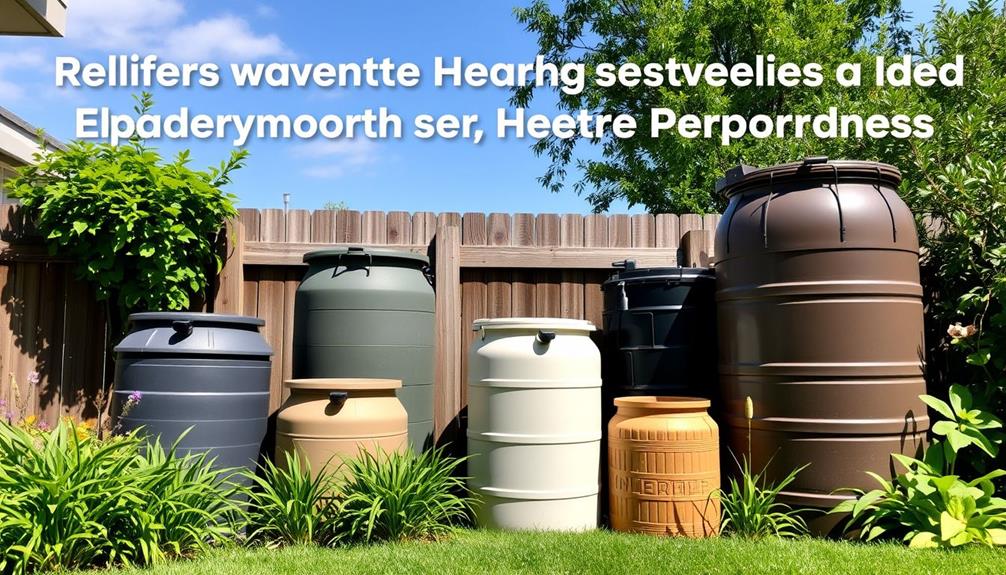
Best Rain Barrel Options
When it comes to choosing the best rain barrels for your emergency preparedness, you need options that fit your specific needs. An important factor to consider is the size and capacity of the rain barrel, as well as the material it is made from. Look for features such as overflow valves and mosquito-proof screens to ensure efficient and clean water collection. Additionally, smart downspout diverters can help to redirect water from the downspout into the rain barrel, maximizing its capacity during heavy rainfall. By carefully considering these factors, you can select the best rain barrels for your emergency preparedness needs.
The FCMP RC4000 offers a 50-gallon capacity, making it practical for urban prepping with its effective overflow management.
If you're looking for versatility, the Grow1 Collapsible comes in sizes ranging from 13 to 265 gallons, perfect for emergencies and easy to transport.
For those with serious water storage needs, the Graf Mondo, with its 137-gallon capacity and steel reinforcement, is a solid choice.
Each of these options caters to various prepping scenarios, ensuring you have reliable water access when it matters most.
Consider your space and requirements to pick the best fit for you.
Key Features to Consider
Choosing the right rain barrel involves careful consideration of several key features that guarantee effective water storage and usability. Focus on these essential aspects to make the best choice for your needs:
Feature | Importance | Considerations |
---|---|---|
Material | Durability and safety | Look for UV-resistant, BPA-free options |
Capacity | Meets water storage needs | Sizes typically range from 50 to 265 gallons |
Design | Ease of access | Open-top vs. closed systems with efficient spigot placement |
Overflow Management | Prevents spillage | Ascertain the barrel includes overflow features |
Usage Tips for Rain Barrels
Selecting the right rain barrel is just the beginning; proper usage guarantees you get the most out of your investment.
First, position your barrel on a flat, stable area close to downspouts for ideal rainwater collection. Installing downspout diverters can guide water directly into the barrel, improving efficiency.
To enhance water quality, consider adding a basic filtration system. Regularly agitate the stored water to prevent stagnation and maintain freshness.
Elevating the barrel will also help increase water distribution pressure, making it easier to access when needed.
Maintenance Best Practices
Maintaining your rain barrel is essential for ensuring it remains a reliable source of water during emergencies. Regular maintenance practices will help you avoid issues that could compromise your water supply. Clean your barrel every few months to prevent algae growth, and inspect the inlet and overflow screens for debris. Check seals and fittings for leaks or cracks, and store your barrel in a shaded area to maintain water quality.
Maintenance Task | Frequency | Emotional Impact |
---|---|---|
Clean the barrel | Every 3 months | Peace of mind |
Inspect seals | Monthly | Confidence in readiness |
Store in shade | Year-round | Assurance of water safety |
These simple steps will keep your rain barrel in top condition for emergencies.
Importance of Rain Barrels
Rain barrels play an essential role in emergency preparedness by providing a dependable source of water when you need it most.
In times of crisis, having a reserve of rainwater can considerably alleviate stress and guarantee you have the resources to stay hydrated and maintain hygiene.
Collecting rainwater also promotes sustainable practices, reducing your reliance on municipal water systems and lowering your water bill.
Additionally, rain barrels support conservation efforts by efficiently capturing and storing precious rainwater, which might otherwise go to waste.
Local Regulations Overview
Before diving into rainwater collection, it's vital to check the local regulations that govern this practice. Many regions have specific laws regarding the collection and use of rainwater, and it's important to understand these rules to avoid potential fines.
You may need permits or have restrictions on the size and type of barrels you can use. Additionally, some areas may require specific filtration systems to guarantee water quality.
Familiarize yourself with health standards that dictate how you can utilize the collected water, especially if you plan to use it for gardening or other non-potable purposes.
Stay informed about any changes in local legislation, as these can affect your rainwater harvesting efforts considerably.
Recommended Brands and Models
What's the best way to guarantee you have a reliable water source during emergencies? Choosing the right rain barrel can make all the difference. Here are some recommended brands and models to weigh:
Brand/Model | Capacity | Key Features |
---|---|---|
FCMP RC4000 | 50 gallons | Effective overflow management |
Grow1 Collapsible | 13-265 gallons | Lightweight, portable |
Graf Mondo | 137 gallons | Steel reinforcement for durability |
Rain Wizard 50 | 50 gallons | Easy access spigot, UV-resistant |
EarthMinded Rain Barrel | 50 gallons | Eco-friendly, durable materials |
These options cater to various prepping needs, ensuring you're well-equipped for any situation. Make sure to evaluate each based on your specific requirements!
Frequently Asked Questions
How Do I Calculate the Amount of Rainwater I Can Collect?
To calculate rainwater collection, measure your roof's square footage, multiply by rainfall inches, then convert to gallons. For example, one inch of rain on a 1,000-square-foot roof yields about 623 gallons.
Can I Use Rainwater for Drinking After Treatment?
Like a hidden gem, rainwater can quench your thirst after proper treatment. You can use it for drinking, but make certain you filter and purify it first, transforming nature's gift into a safe, revitalizing source.
What Are the Costs Associated With Installing a Rain Barrel System?
Installing a rain barrel system typically costs between $50 to $300, depending on size and materials. You'll also need to evaluate installation fees and potential maintenance costs to keep the system functioning effectively.
How Can I Prevent Mosquito Breeding in My Rain Barrel?
Preventing mosquito breeding in your rain barrel is as essential as stopping a flood! Keep the lid sealed, add a mosquito dunks, and regularly clean debris. By doing this, you'll keep your water pristine and pest-free.
What Is the Lifespan of a Typical Rain Barrel?
A typical rain barrel lasts about 10 to 20 years, depending on materials and maintenance. You should regularly inspect for damage and clean it to extend its lifespan and guarantee effective water storage.
Conclusion
Incorporating a rain barrel into your emergency preparedness plan can make a significant difference. Imagine during a drought, you have a 50-gallon rain barrel collecting water from your roof. This not only keeps your plants hydrated but also provides you with a valuable water source for cooking and cleaning. By choosing the right barrel and maintaining it well, you're not just ready for emergencies; you're also making a positive impact on the environment. Invest wisely and stay prepared!
Survivalism
Top Picks for Food Preservation Essentials
Incredible food preservation essentials await you, ensuring your ingredients stay fresh and flavorful—discover the must-have tools that can transform your kitchen!
When it comes to food preservation essentials, you'll want quality tools that enhance freshness and extend shelf life. Start with a reliable vacuum sealer to keep air out, and consider Mylar bags with oxygen absorbers for long-term storage. Canning jars work perfectly for fruits and sauces, while food dehydrators help create healthy snacks by removing moisture. Don't forget the importance of airtight containers to prevent spoilage. Regularly monitor your food storage conditions and replace oxygen absorbers as needed to maintain quality. Stick with these tips, and you'll enjoy fresher food for longer—stay tuned for more insights!
Key Takeaways
- Opt for quality vacuum sealers to keep air out and extend the life of perishables for 1-3 years.
- Invest in Mylar bags with oxygen absorbers for long-term storage, preserving food for 5-30 years.
- Use canning jars for effective preservation of fruits, vegetables, and sauces in airtight conditions.
- Employ food dehydrators to remove moisture, creating long-lasting and nutritious snacks.
- Choose airtight containers to prevent moisture and pests, maintaining food quality over time.
Importance of Food Preservation
While you mightn't think about it daily, food preservation is essential for ensuring the safety, quality, and longevity of the food you consume. By preventing spoilage and extending shelf life, you reduce waste and save money.
Proper preservation methods keep harmful bacteria and mold at bay, lowering the risk of foodborne illnesses. Additionally, maintaining flavor, texture, and nutritional value is vital for a satisfying eating experience.
As you store food, consider how preservation techniques can enhance your meals and protect your family's health. With effective food preservation, you're not just prolonging shelf life; you're also ensuring that the food you eat remains delicious and safe, making every bite a pleasure.
Key Preservation Techniques
Food preservation methods are varied and effective, each serving a specific purpose to keep your food safe and tasty.
You can utilize techniques like freezing, which halts bacterial growth and keeps your food fresh for months.
Canning is another great option, preserving food in airtight jars to guarantee longevity.
Dehydrating removes moisture, preventing spoilage while maintaining flavor and nutrients.
Fermentation not only preserves but also enhances taste and health benefits.
Finally, pickling involves soaking food in brine or vinegar, offering a zesty twist while extending shelf life.
Each method has its advantages, so choose the ones that best suit your needs and preferences to enjoy your food for longer.
Essential Food Preservation Tools
A variety of essential food preservation tools can make a significant difference in how you store and maintain your food.
First, investing in quality vacuum sealers helps keep air out, extending the life of your perishables. Mylar bags are another great option, especially when paired with oxygen absorbers, as they prevent oxidation and spoilage.
Don't forget about canning jars; they're perfect for preserving fruits, vegetables, and sauces. A dependable food dehydrator can also help you make snacks while reducing moisture content.
Best Practices for Food Storage
Effective food storage practices are essential for maintaining the quality and safety of your food. To maximize freshness, follow these guidelines:
Storage Method | Ideal Temperature | Shelf Life Extension |
---|---|---|
Refrigeration | 32°F – 40°F | 1-4 weeks |
Freezing | 0°F or lower | 6 months – 1 year |
Vacuum Sealing | Room Temperature | 1-3 years |
Mylar Bags with O2 Absorbers | Room Temperature | 5-30 years |
Keep your food in airtight containers to prevent moisture and pests. Label items with dates and contents for easy identification. Regularly check for spoilage and rotate stock to use older items first. Following these practices will help you enjoy fresher, safer food.
Evaluating Food Preservation Products
When it comes to preserving your food, selecting the right products can make a significant difference in maintaining quality and extending shelf life.
Start by evaluating the specific needs of your food items; consider factors like moisture content, storage duration, and packaging type. For instance, if you're using oxygen absorbers, verify they're appropriate for the size of your containers and the type of food.
Look for reputable brands that offer clear absorption capacities and include indicators for replacement. Don't forget to assess compatibility with your chosen storage materials, such as Mylar bags or vacuum-sealed containers.
Common Preservation Mistakes
Many home preservers overlook critical steps that can jeopardize their efforts. One common mistake isn't sealing containers properly. If there's any air left, oxidation can occur, leading to spoilage.
Another error is using insufficient oxygen absorber sizes for large quantities of food. This can result in inadequate preservation, diminishing your food's shelf life.
Ignoring storage conditions, like temperature and humidity, is also a significant oversight. High humidity can lead to spoilage, especially with certain foods.
Finally, don't forget to check expiration dates on your oxygen absorbers. Using expired products won't provide the protection you need.
Maintaining Food Quality Over Time
Maintaining food quality over time is essential for enjoying your stored items at their best. To achieve this, consider using oxygen absorbers in your packaging. They effectively absorb oxygen, preventing spoilage and extending shelf life.
Pair these absorbers with Mylar bags or vacuum-sealed containers for ideal results. Always store your oxygen absorbers in airtight containers and seal them immediately after use.
Be cautious not to use them with high-humidity foods, as this could lead to spoilage. Regularly monitor storage conditions and replace absorbers when you open containers for extended periods.
Frequently Asked Questions
How Do Oxygen Absorbers Work in Food Preservation?
Oxygen absorbers work by absorbing oxygen within sealed packaging, which prolongs food freshness and shelf life. They inhibit bacteria and mold growth, keeping your food safe and flavorful while preventing spoilage and reducing waste.
Can Oxygen Absorbers Be Reused After Opening?
When it comes to reusing oxygen absorbers, you can't have your cake and eat it too. Once opened, they lose effectiveness, so it's best to use fresh ones for ideal food preservation.
What Foods Should Not Be Stored With Oxygen Absorbers?
You shouldn't store high-humidity foods like fruits, vegetables, and certain cheeses with oxygen absorbers. They can absorb moisture, leading to spoilage and health risks. Always check food compatibility before using absorbers for preservation.
How Long Do Oxygen Absorbers Last Once Opened?
Once opened, oxygen absorbers last about 4-6 hours before losing effectiveness. To maximize their lifespan, store them in airtight containers immediately after use, ensuring you seal them tightly to prevent moisture from spoiling their function.
Are There Any Safety Concerns With Using Oxygen Absorbers?
Yes, there are safety concerns with using oxygen absorbers. You should guarantee they're used appropriately, avoiding high-humidity foods and sealing containers properly. Always monitor storage conditions to prevent spoilage and potential foodborne illnesses.
Conclusion
In summary, mastering food preservation can feel like wielding a magic wand that transforms your kitchen into a waste-free wonderland. By choosing the right tools and techniques, you can guarantee your favorite ingredients stay fresh and flavorful for what seems like an eternity. Remember to follow best practices and avoid common pitfalls to truly elevate your food storage game. Embrace these essentials, and enjoy the satisfaction of knowing your food is well-protected and your waste is minimized!
Survivalism
Master Canning Ravioli for Emergency Preparedness
Master the art of canning ravioli for emergency preparedness and learn essential tips that will ensure your meals are ready when you need them most.
Mastering canning ravioli is a smart move for emergency preparedness. Start with fresh or frozen uncooked ravioli and a pressure canner, which is essential for safely processing low-acid foods. Use a flavorful broth or sauce as your canning liquid. Verify your jars are sterile and filled with ravioli, leaving a 1-inch headspace. Seal jars properly and process them at 240°F for safety. Once cooled, store sealed jars in a cool, dark place. With your ravioli ready, you'll have meals on hand when you need them most. Stick around to discover more handy tips and techniques!
Key Takeaways
- Use fresh or frozen uncooked ravioli and a flavorful broth or sauce for optimal taste and preservation during canning.
- Ensure a pressure canner reaches 240°F (116°C) to safely process low-acid foods like ravioli.
- Sterilize jars and lids thoroughly to prevent spoilage; inspect for cracks before use.
- Store sealed jars in a cool, dark place and label with date and contents for easy access.
- Regularly check sealed jars for spoilage after canning to ensure food safety during emergencies.
Understanding the Canning Process
Understanding the canning process is essential for safely preserving ravioli and other low-acid foods. Canning involves placing food in airtight jars and using heat to create a sterile environment, which prevents spoilage and foodborne illnesses.
For ravioli, you'll need to use a pressure canner, as it guarantees the internal temperature reaches 240°F (116°C), essential for low-acid foods. Start with fresh or frozen uncooked ravioli and prepare a flavorful canning liquid, like broth or sauce.
Fill the jars with ravioli, maintaining a 1-inch headspace, and release air bubbles. Properly process the jars for the recommended time to guarantee safety.
Necessary Equipment for Canning
When you're ready to can ravioli, having the right equipment is vital for success.
You'll need sturdy canning jars and fresh lids to guarantee a proper seal. A pressure canner is essential for safely processing low-acid foods like ravioli.
Here's a quick list of what you should gather:
- Canning Jars: Use pint or quart-sized jars, making sure they're free from cracks.
- Pressure Canner: This maintains the necessary temperature to avoid spoilage.
- Jar Lifter: Important for safely handling hot jars right out of the canner.
With these tools in hand, you're set to start the canning process efficiently and safely, making sure your ravioli is preserved for future meals.
Ensuring Safety During Canning
Safety is always a top priority during the canning process. To prevent foodborne illness, always use tested recipes from reliable sources.
When working with low-acid foods like ravioli, make sure you use a pressure canner to reach the necessary temperature for safe preservation. Inspect your jars and lids for any cracks or imperfections before starting; faulty equipment can lead to spoilage.
Utilize a jar lifter to handle hot jars, minimizing the risk of burns. Keep your workspace clean and organized to avoid contamination.
Regularly check the pressure during processing, and if it drops, restart the timing. Finally, inspect sealed jars after cooling for any signs of spoilage, such as bulging lids or off odors.
Sterilization of Jars and Lids
To guarantee your canning process is successful, proper sterilization of jars and lids is essential. Start by washing your jars in hot, soapy water, rinsing thoroughly.
Then, immerse the jars in a boiling-water canner for at least 10 minutes to eliminate any contaminants. For the lids, soak them in hot water (not boiling) to soften the sealing compound, assuring a tight seal.
Here's what you need to remember:
- Use clean, undamaged jars to prevent spoilage.
- Boil jars for 10 minutes to assure sterilization.
- Soak lids in hot water to enhance sealing effectiveness.
Proper Sealing Techniques
Proper sealing techniques are essential for guaranteeing the longevity and safety of your canned ravioli. Start by wiping the rims of your jars with a clean, damp cloth to remove any food particles. This step prevents contamination and guarantees a tight seal.
Next, use a magnetic wand to place sterilized lids onto each jar, followed by screwing on the bands until they're fingertip tight. Be careful not to overtighten, as this can interfere with the sealing process.
Once filled and sealed, process your jars immediately in a pressure canner according to your recipe instructions. Proper sealing keeps your ravioli safe and flavorful for years, so take the time to do it right!
Cooling and Storing Canned Ravioli
After processing your jars, let them cool down completely on a wire rack or a clean dishtowel for 12 to 24 hours.
Once cooled, check the seals by pressing down in the center of each lid; if it pops back, your seal is good.
To guarantee your canned ravioli stays fresh, follow these storage tips:
- Store sealed jars in a cool, dark place (50°F to 70°F).
- Keep jars away from direct sunlight to prevent spoilage.
- Label each jar with the date and contents for easy reference.
Creative Cooking Ideas
Canned ravioli opens up a world of culinary creativity that you can easily explore in your kitchen. You can transform this convenient staple into a variety of delicious dishes.
Try making a hearty casserole by layering ravioli with marinara sauce, cheese, and your favorite vegetables. For a unique twist, stuff bell peppers with ravioli and bake them with a sprinkle of cheese on top.
If you're craving soup, combine canned ravioli with broth, fresh herbs, and vegetables for a quick meal. Elevate your dish by adding gourmet toppings like freshly grated Parmesan or a drizzle of pesto.
With a bit of imagination, your canned ravioli can shine in countless delightful ways!
Frequently Asked Questions
How Long Can Canned Ravioli Be Stored Safely?
Canned ravioli can safely be stored for 1 to 2 years if kept in a cool, dark place. Check seals regularly and discard any jars with bulging lids or off odors to guarantee safety.
Can I Reuse Canning Lids for Sealing?
You can't reuse canning lids for sealing. They're designed for one-time use to guarantee a proper seal. Always use new lids to maintain food safety and quality in your canning process.
What Are the Signs of Spoiled Canned Ravioli?
You might think canned ravioli lasts forever, but look for bulging lids, off odors, or unusual colors. If you notice any of these signs, discard the jars to guarantee your safety. Always check before consuming!
Can I Can Homemade Ravioli Instead of Store-Bought?
Yes, you can homemade ravioli! Just make certain they're fresh and uncooked for the best texture. Follow proper canning techniques, using a pressure canner to guarantee safety and prevent spoilage. Enjoy your delicious creations!
Is It Safe to Can Ravioli With Meat Fillings?
Yes, it's safe to can ravioli with meat fillings if you use a pressure canner. Make certain you follow tested recipes and proper processing times to avoid foodborne illnesses and guarantee safe preservation.
Conclusion
By mastering the art of canning ravioli, you're not just storing food; you're crafting a safety net for your future. Like a treasure chest brimming with culinary delights, your pantry will become a source of comfort and nourishment in challenging times. With the right techniques and a bit of practice, you'll enjoy the satisfaction of having delicious, homemade meals at your fingertips. So roll up your sleeves, get started, and savor the rewards of your efforts!
Survivalism
Essential Flood Survival Kit: Be Prepared
Be ready for unexpected floods with an essential survival kit that ensures your safety and security—discover what to include for maximum preparedness.
A flood survival kit is essential for your safety, ensuring you're prepared when emergencies arise. Start by packing non-perishable food and at least one gallon of water per person per day for three days. Don't forget waterproof clothing and sturdy boots for protection; also include a NOAA weather radio for real-time alerts. Prepare evacuation supplies like a first aid kit and keep important documents handy. Regularly check and update your kit to maintain its effectiveness. By being proactive and prepared, you can better face flooding challenges. For more tips on assembling the perfect kit, you'll want to keep exploring.
Key Takeaways
- Pack non-perishable food and at least one gallon of water per person per day for three days in your survival kit.
- Include waterproof clothing, sturdy boots, and essential gear for protection against flooding conditions.
- Equip your kit with communication tools like NOAA weather radios and portable generators for power outages.
- Familiarize yourself with local evacuation routes and pack important documents and first aid supplies for emergencies.
- Regularly maintain and update your survival kit to ensure all items are fresh and functional.
Importance of Flood Survival Kits
Flood survival kits are essential for ensuring your safety and well-being during emergencies. When you live in flood-prone areas, being prepared can make all the difference.
By customizing your kit, you address specific challenges you might face during a flood, such as power outages or lack of clean water. Create a checklist to include items that meet your unique needs, like medications or personal documents.
Assess local flood risks and familiarize yourself with available emergency resources. Regularly evaluate and update your kit, keeping it ready for any situation.
Engaging with your community can enhance your understanding of local flood risks, while collaborating with neighbors strengthens your support network during emergencies.
Being prepared is your best defense against flooding.
Essential Food and Water Supplies
When preparing your flood survival kit, essential food and water supplies should be a top priority. Pack non-perishable food items like canned goods, energy bars, and waterproof ration bars to guarantee you have enough nutrition during emergencies.
Don't forget to include a minimum of one gallon of water per person per day, aiming for at least three days' worth. Water purification tablets or reliable survival water filters are vital for securing clean drinking water.
Consider portable cooking devices for meal preparation if conditions allow. Always check expiration dates on food supplies and replace them as needed.
Being proactive with food and water will help keep you and your loved ones nourished and hydrated during a flood situation.
Personal Clothing and Gear
Packing the right personal clothing and gear is essential for staying safe and comfortable during a flood emergency. Focus on waterproof clothing, including a rain poncho and quick-drying materials, to keep you dry and warm.
Don't forget sturdy, waterproof boots; they'll protect your feet from contaminated water and debris. Layering is key, so pack lightweight clothing that can be easily removed or added based on changing weather conditions.
Consider bringing gloves and a hat for added protection. A waterproof backpack can help keep your essentials dry.
Additionally, pack items like shovels or sandbags, which can assist in flood prevention efforts. Being equipped with the right clothing and gear will help you navigate through challenging flood situations more effectively.
Communication and Detection Tools
Equipping yourself with reliable communication and detection tools is essential for staying informed and safe during a flood emergency. Invest in a NOAA weather radio to receive real-time alerts about impending floods.
Keep an emergency contact list handy, making sure family members can reach each other. Water alarms can help you detect localized flooding early, giving you a heads-up to act quickly.
Don't forget smartphone apps that provide weather updates and alerts from emergency services for added convenience. If power goes out, a portable generator can keep essential devices running.
Evacuation Supplies and Planning
In the event of a flood, having the right evacuation supplies can make all the difference in guaranteeing your safety and quick relocation.
First, familiarize yourself with local evacuation routes and plan your escape ahead of time. Pack essential items like a first aid kit, flashlight, and portable phone charger in an easily accessible bag.
Don't forget important documents and an emergency contact list. Consider including a NOAA weather radio for real-time updates.
If you have pets, make sure you have leashes, carriers, and pet supplies ready. Signal flares can help alert rescuers if needed.
Regularly review your evacuation plan with your family, so everyone knows what to do when disaster strikes. Being prepared can save lives.
Maintaining Your Survival Kit
Regular maintenance of your survival kit is essential to ascertain it's always ready when you need it most. Keeping your supplies fresh and functional ascertains you're prepared for any emergency. Check your kit at least every season, updating as necessary.
Item | Frequency of Check | Notes |
---|---|---|
Water Purification | Every 6 months | Replace filters as needed |
Non-Perishable Food | Annually | Rotate stock for freshness |
First Aid Supplies | Every 3 months | Check expiration dates |
Emergency Tools | Every season | ascertain they're in working order |
Including Pets in Emergency Plans
When planning for emergencies like floods, don't forget about your pets; they rely on you for safety and well-being.
Make sure to include essential supplies for them in your flood survival kit. Pack at least three days' worth of food and water, along with portable bowls.
Don't forget leashes, carriers, and any medications they might need. Identification tags and microchips are vital for their safe return if you get separated.
Create a pet-friendly evacuation plan, including designated pet-friendly shelters or hotels.
Regularly check and update your pet supplies, ensuring everything's in good condition.
Frequently Asked Questions
How Can I Customize My Flood Survival Kit for Specific Needs?
You can customize your flood survival kit by evaluating your specific needs, including food preferences, medical requirements, and local risks. Regularly review and update your supplies to guarantee they meet your family's unique circumstances.
What Are the Best Portable Cooking Devices for Emergencies?
For emergencies, consider portable cooking devices like camping stoves, solar cookers, or compact propane grills. They're lightweight, easy to use, and guarantee you can prepare meals even when traditional cooking methods aren't available.
How Do I Create a Community Flood Preparedness Plan?
Think of your community as a puzzle; each piece represents a neighbor. To create a flood preparedness plan, gather everyone, share resources, assess risks, and build a supportive network that can withstand any flood challenge together.
What Should I Do With Important Documents During a Flood?
During a flood, secure important documents in waterproof bags or containers. Store them high up, away from potential water damage. Make digital copies too, ensuring you can access them easily if needed.
How Can I Ensure My Pets Remain Calm During Emergency Evacuations?
To keep your pets calm during evacuations, create a familiar environment by bringing their favorite toys and blankets. Practice short trips beforehand, and use soothing voices to reassure them while maintaining a steady pace.
Conclusion
As you gather your flood survival kit, remember that every item could make a difference when the waters rise. Imagine facing an unexpected flood without the essentials—what would you wish you'd prepared? Don't leave your safety to chance; take action now. Update your supplies, involve your loved ones, and make certain your pets are included in your plans. When the moment comes, you'll be ready to face the uncertainty with confidence and resilience. Don't wait—prepare today!
-
Survivalism4 months ago
Meal Preppers Near Me: Find Local Services and Tips!
-
Survivalism4 months ago
Preppers Pack Crossword: Test Your Knowledge of Survival Gear!
-
Survivalism4 months ago
Inside the Secret World of Doomsday Preppers: Are You Ready?
-
Survivalism4 months ago
AI Doomsday Scenario: Understanding the Potential Risks
-
Vetted4 months ago
15 Best Satellite Phones for Preppers: Stay Connected Anywhere, Anytime
-
Survivalism3 months ago
Preppers List of Items: Essential Gear for Every Survivalist!
-
Survivalism4 months ago
Mastering Hurricane Preparedness: Your Essential Guide
-
Vetted3 months ago
15 Essential Survival Gear Items You Need to Stay Prepared in the Wild