Survivalism
Mastering Ammo Reloading for Preparedness
Unlock the secrets of ammo reloading for preparedness and discover essential tips that could change your approach to self-sufficiency.

Mastering ammo reloading is vital for your preparedness plan. It helps you guarantee a steady supply of ammunition when you need it most. Start by setting up a safe, well-ventilated workspace with good lighting. You'll need essential tools like a reloading press, dies, and a powder scale, which won't break the bank. Understanding the four main components—primers, brass, bullets, and gunpowder—is key. Follow a clear step-by-step process for safety and consistency. The more you know, the better your reloading will be, so stick around to uncover additional tips and best practices for efficient ammo reloading. Additionally, it’s crucial to familiarize yourself with proper safety measures and guidelines for handling gunpowder and other hazardous materials. Once you have mastered the basics of ammo reloading, you can consider exploring more advanced techniques, such as customizing loads for specific firearms or experimenting with different bullet designs. Just like mastering any skill, practice and patience are essential for becoming proficient in ammo reloading. With dedication and continuous learning, you may even find yourself delving into niche practices such as meat canning techniques.
Key Takeaways
- Prioritize safety by working in a well-ventilated area and using a sturdy, level work table to prevent accidents.
- Start with basic equipment, keeping initial costs under $500 for essential tools like a reloading press and dies.
- Understand the four essential components of reloading: primers, brass casings, bullets, and gunpowder for effective ammunition preparation.
- Regularly inspect and clean brass casings to ensure safety and reliability in your reloading process.
Reloading Safety Essentials
When reloading ammo, you've got to prioritize safety by working in a well-ventilated area away from any flammable materials.
Choose a sturdy, level work table that's around six feet long, ensuring it can handle the equipment and components you'll use. Good lighting is essential, as it helps you spot any potential hazards, and maintaining a dry workspace prevents accidents.
Always think about those around you; safety measures should protect not just you but anyone nearby. Avoid reloading in kitchens, basements, or attached garages where risks are higher.
Understanding Start-Up Costs
Getting into ammo reloading doesn't have to break the bank, with initial costs typically capped at around $500 for equipment and supplies. Here's a breakdown of potential start-up costs to help you budget:
| Item | Estimated Cost | Notes |
|---|---|---|
| Reloading Press | $150 | Essential for assembling rounds. |
| Die Sets (2-3) | $100 | Necessary for different calibers. |
| Priming Tool | $50 | Varies in style and efficiency. |
| Powder Scale | $40 | Guarantees accurate measurements. |
| Brass & Components | $160 | Includes bullets and gunpowder. |
While you may spend around $500 initially, remember to budget for ongoing supplies to maintain your reloading practice.
Basics of Ammo Reloading

Four essential components make up the basics of ammo reloading: primers, brass casings, bullets, and gunpowder.
Primers ignite the gunpowder, so they must match your brass casings and load specifications.
Brass casings are reusable, and saving them from shooting ranges can enhance your reloading sustainability.
When selecting gunpowder, be meticulous; the right type is critical to guarantee safe and effective rounds.
Always refer to reloading manuals for guidance on bullet and powder choices, as they provide significant information to prevent mishaps.
With these components in mind, you're laying the groundwork for a successful reloading experience.
Understanding these basics will help you navigate the reloading process confidently and safely, preparing you for whatever lies ahead.
Necessary Supplies and Tools
To successfully reload ammunition, you'll need a selection of essential supplies and tools that assure efficiency and precision in the process.
Start with a reloading press, the cornerstone of your setup, and make certain you have the correct dies for each caliber you're working with—carbide dies are a great choice for durability.
You'll also need vernier calipers to trim brass to the right length, along with priming tools that suit your preferences.
Don't forget a reliable powder scale for accurate measurements of gunpowder; this is vital for consistency and safety.
With these tools in hand, you're well on your way to mastering the art of reloading.
Always prioritize quality, as it directly affects your results.
Step-by-Step Reloading Process

Begin by inspecting your brass casings for any defects, discarding any that show signs of flaws to guarantee a safe reloading process.
Next, clean the brass thoroughly, ensuring it's completely dry before moving on. Apply lubricant to the interior of the cases per your reloading manual's instructions.
Now, insert new primers into each casing, ensuring they're seated correctly. Fill the cases with gunpowder, carefully following the specifications in your reloading manual to avoid overloading.
Then, place your bullets on top of each filled casing, ensuring a secure fit. Finally, check each round for consistency and quality.
After reloading, clean all your equipment to maintain functionality and safety for future sessions.
Frequently Asked Questions
What Types of Primers Are Best for Specific Calibers?
When selecting primers, you'll want to match them specifically to your caliber. For example, small rifle primers work well for .223, while large pistol primers suit .45 ACP. Always check manufacturer recommendations for ideal performance.
How Can I Store Reloading Supplies Safely?
"Better safe than sorry." Store your reloading supplies in a cool, dry place away from heat sources. Use locked cabinets for sensitive materials, and label containers clearly to keep everything organized and secure.
What Common Mistakes Should Beginners Avoid?
When starting out, avoid rushing through processes, neglecting safety gear, or skipping equipment inspections. Don't assume all supplies are interchangeable; always double-check compatibility. Finally, don't overlook the importance of following reloading manuals closely.
How Do I Know When to Replace My Reloading Tools?
You should replace your reloading tools when you notice excessive wear, rust, or malfunction. Regularly inspect them for damage and guarantee they perform accurately; a decline in performance indicates it's time for an upgrade.
Can I Reload Ammunition for Different Firearms?
Yes, you can reload ammunition for different firearms, but you must use the correct dies and components for each caliber. Always consult reloading manuals to guarantee proper specifications and safety for each firearm type.
Conclusion
By embracing the art of ammo reloading, you're not just honing a skill; you're crafting your own peace of mind.
With a little practice and the right tools, you'll find yourself in a world where you call the shots—literally!
So, roll up your sleeves and plunge into this rewarding endeavor.
You'll soon discover that creating your own ammunition is a fulfilling journey, one that keeps you prepared and confident in any situation that may arise.
Survivalism
Making Tools From Nature: Survival Made Ingenious
Prepare to discover how to transform natural resources into essential survival tools that will leave you questioning what else you can create.

You can tap into nature's resources to craft essential survival tools, showcasing your ingenuity. Start by selecting sturdy branches or logs to build a shelter, insulating it with leaves or moss. For cutting tools, use flint or sharp stones, shaping them with careful strikes. Craft bows and arrows from durable woods, ensuring a solid bowstring. Remember to utilize efficient fire-starting techniques and select safe spots for sustainable resource management. By observing local wildlife and understanding seasonal patterns, you'll enhance your hunting effectiveness. Explore further to uncover more tips and techniques for mastering the art of survival in the wild.
Key Takeaways
- Craft sharp cutting tools using flint or obsidian through flint knapping techniques for effective survival applications.
- Select durable hardwoods to create strong handles for your tools, ensuring longevity and reliability in survival situations.
- Utilize renewable materials from your environment to create bows and arrows, optimizing them for hunting larger game.
- Regularly maintain and sharpen your tools to enhance their performance and ensure they remain effective over time.
- Combine traditional knowledge with sustainable practices to minimize environmental impact while crafting tools from nature.
Building Shelter From Natural Materials

When you're caught in the wild, building a shelter from natural materials is essential for your survival. Start by constructing a sturdy frame using large branches or logs. An A-frame structure or a tripod, like a wicki-up, works well for this. Secure your frame with cordage—rope, twine, or plant fibers will do the trick. If you have tools like a fixed-blade knife, folding saw, or axe, use them to cut and shape your materials more efficiently.
Next, insulate and waterproof your shelter. Layer it with leaves, grass, moss, or bark to retain warmth and keep water out. Weave in smaller branches for added support and insulation. Aim for a thick layer of vegetation, about 2 to 3 feet, covering all sides to fend off rain and wind. Additionally, consider the importance of ventilation needs in your shelter design to prevent suffocation and regulate temperature.
Consider various shelter designs based on the materials available. You could build a wicki-up, a leaf hut, or a simple lean-to. Make sure to choose a safe area away from falling trees, and clear away debris for comfort. Finally, secure your structure with knots and weights to guarantee stability against the elements. Your shelter is your first line of defense in the wild.
Crafting Bows and Arrows
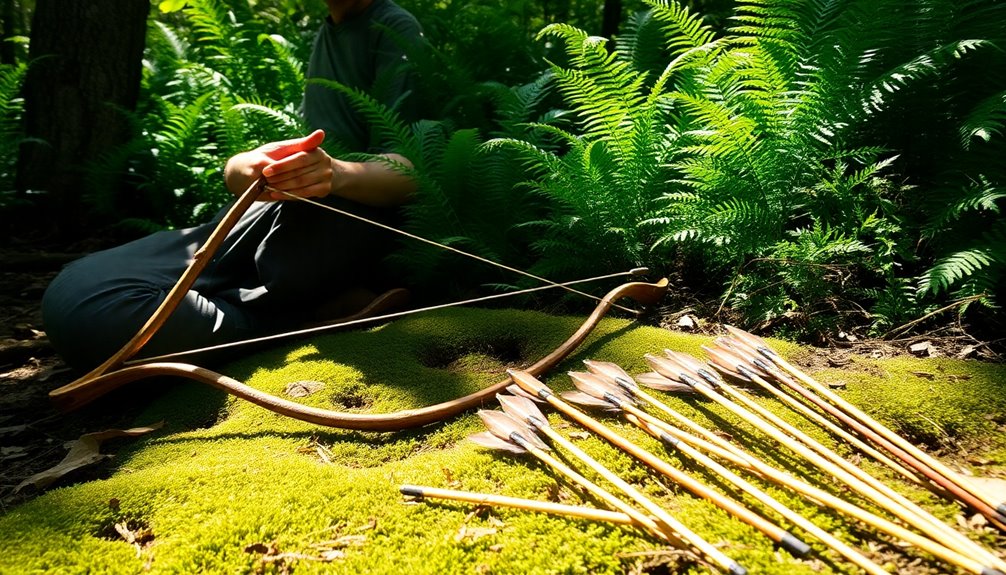
Crafting bows and arrows is a rewarding skill that can greatly enhance your survival chances in the wild. To create effective tools, you'll need to follow a structured process.
- Select a sturdy tree branch or a small tree, ideally from durable woods like white oak.
- Cut the stave to about 50 inches using a celt hatchet or sharp stone, removing any twigs or bumps.
- Shape the stave, making it wider at the handle and narrower at the tips, using primitive tools like stone blades.
- Create the bowstring from materials like animal rawhide or tree bark, twisting strips together for strength. Fast-growing tree bark is ideal for crafting a strong bow string that can withstand tension.
- Craft your arrows from straight branches or saplings, ensuring they're balanced and fly straight.
As you shape and season the bow, remember to heat it over a fire for better flexibility. Test for any imperfections before use. For the arrows, sharpen one end to a point and notch the other for the bowstring. Finally, fletch them with feathers for added stability. With patience and practice, you'll master this essential survival skill, ready to hunt and gather in the wild.
Creating Effective Cutting Tools

Creating effective cutting tools is crucial for survival in the wild, and you'll often find that the right materials make all the difference. For sharp cutting tools, consider using stones like flint, obsidian, chert, or even glass, as they can be crafted into razor-sharp edges. When selecting wood for tool handles, choose durable hardwoods like oak, hickory, or ash for their strength and versatility. If these materials aren't available, rocks and bones can serve as alternatives.
To craft a stone cutting tool, employ flint knapping by striking a flint rock with a hammer stone to create sharp flakes. Remember to wear safety glasses for protection. These flakes can be shaped into knives resembling arrowheads, offering superior sharpness for skinning and butchering. Mastery of these materials is essential for enhancing your survival capabilities and ensuring effective tool-making.
When working with wood, select a straight branch, and use careful whittling techniques to form a pointed tip. You can harden this tip over a fire for added durability. Regular maintenance, including sharpening, will keep your wooden tools effective. Effective cutting tools are not just essential for hunting; they also aid in food preparation and shelter construction, making them invaluable in any survival situation.
Making Cordage and Ropes
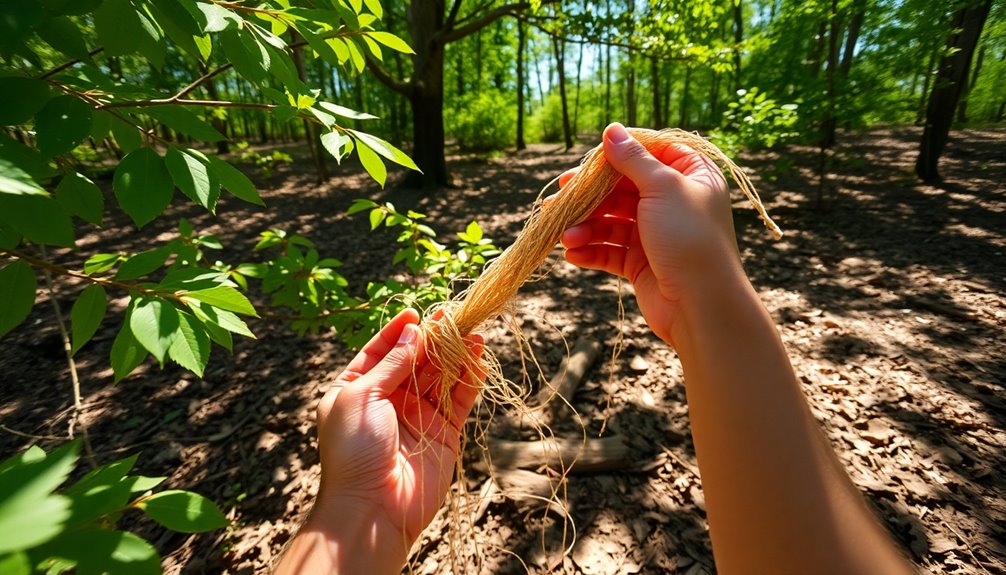
In the wild, making cordage and ropes can be a game changer for survival. You'll find plenty of plant sources around you, from tropical varieties like sea hibiscus and jute to subtropical options like stinging nettle and yucca. Here's how to create your own cordage:
- Extract fibers: Retting, scraping, and crushing are effective methods for fiber extraction. Additionally, suitable plants for cordage can include options like banana and milkweed, which are commonly found in various environments.
- Process fibers: Soak and rinse the plant material to remove unnecessary parts before drying them for 1 to 4 hours.
- Twist fibers: Increase tensile strength by twisting the dried fibers together.
- Create the rope: Separate fibers into sets and braid or twist them. Twisting two strands and then plying them together will strengthen your cord.
- Finish it off: Tie knots at the ends to prevent unraveling and trim any loose fibers for a neat finish.
Starting and Maintaining Fire
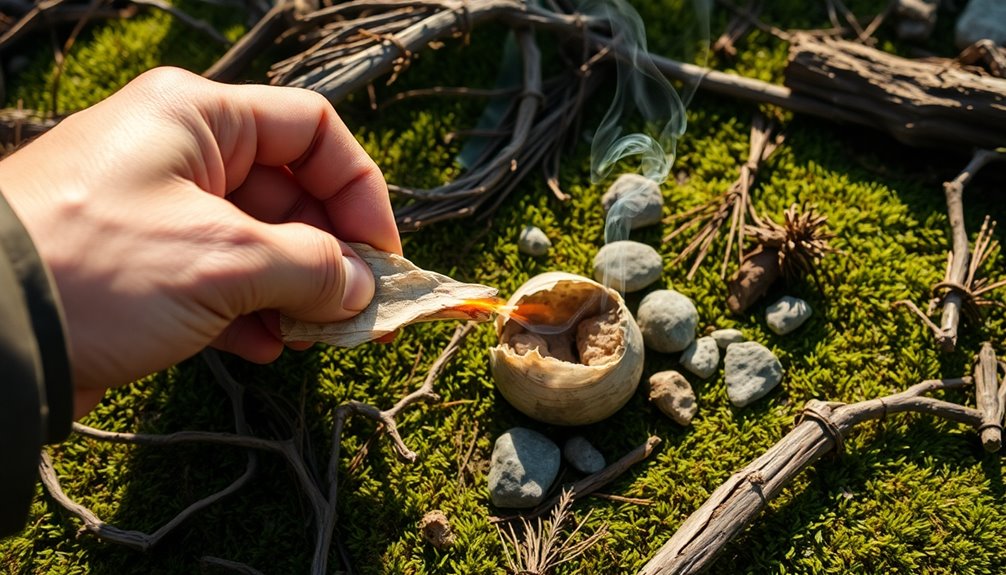
A reliable fire can be your best friend in the wild, providing warmth, light, and a means to cook food. To get started, find a safe spot, clear of flammable materials and branches. Gather your components: tinder, kindling, and fuel. You might use rocks to create a fire ring or prepare a fire pit. Understanding fire building techniques is essential for survival in various conditions.
Here's a quick reference table to help you with fire preparation, starting, maintenance, and extinguishing:
| Step | Action | Tip |
|---|---|---|
| Fire Preparation | Clear debris and gather materials | Confirm a safe location |
| Fire Starting | Use matches or ferro rods | Select effective natural tinder |
| Fire Maintenance | Stoke and add fuel as needed | Adjust logs for desired flame |
| Fire Extinguishing | Smother with water, dirt, or sand | Stir ashes to confirm it's out |
| Safety Precautions | Always have a plan for extinguishing | Check for embers |
Use the fire triangle—heat, air, and fuel—to ignite your fire. Regularly monitor your fire, confirming it remains contained and manageable. With practice, you'll master the art of starting and maintaining fire in the wild.
Procuring Food and Water

When you're out in the wild, knowing how to set traps and hunt can make all the difference in your survival. You'll also need effective water purification methods to guarantee what you drink is safe. DIY survival tool crafting enhances your ability to procure food and water by allowing you to create essential tools from available resources. Let's explore these essential techniques for procuring food and water.
Traps and Hunting Techniques
Effective traps and hunting techniques can greatly enhance your chances of procuring food and water in the wild. By understanding and utilizing various methods, you can improve your survival skills and make the most of your environment. Here are some key strategies to reflect on:
- Types of Traps: Use snares, pitfalls, and log traps to capture small to medium-sized game effectively.
- Materials Needed: Gather snare wire, sturdy branches, and cordage to construct reliable traps.
- Waiting Techniques: Position yourself near fruit trees, where animals often gather, to increase your chances of a successful hunt. This technique aligns with the finding that urban and rural hunters commonly utilize "Waiting at a Fruit Tree" as their primary method for hunting.
- Crafting Tools: Create bows and arrows from natural materials for hunting larger game, ensuring you're well-equipped.
- Environmental Awareness: Knowledge of animal behavior and local ecosystems will greatly enhance your hunting success.
Water Purification Methods
Access to clean water is essential for survival in the wild, and knowing various purification methods can make all the difference. Here are some effective techniques you can use:
| Method | Description | Notes |
|---|---|---|
| Boiling | Heat water to 212 °F (100 °C) to kill pathogens. | Use a metal container or heated stones. |
| Solar Still | Dig a pit, place a container, and cover it with clear plastic. | Requires patience, but effective in scarce conditions. |
| Natural Filtration | Create filters using charcoal, cotton, or Moringa seeds. | Slower process, combine with boiling for safety. |
| Biological Methods | Utilize aquatic organisms like mussels for purification. | Eco-friendly, reduces sludge and improves water quality. |
| Conifer Tea | Boil water with conifer needles for a Vitamin C-rich tea. | Masks tastes and adds nutrients. |
In survival situations, surface water typically requires purification before consumption to ensure safety from contaminants.
Utilizing Natural Resources Wisely

When you're out in the wild, choosing the right materials can make all the difference in your survival. It's crucial to manage resources efficiently and be aware of your impact on the environment. By understanding these principles, you can guarantee that your use of nature's gifts is both sustainable and responsible. Additionally, knowing how to construct shelters using available resources can significantly enhance your chances of enduring harsh conditions.
Sustainable Material Selection
Choosing sustainable materials is essential for utilizing natural resources wisely and ensuring a healthier planet for future generations. By opting for renewable resources, you not only help preserve what nature has to offer but also contribute to environmental restoration. Materials like bamboo, hemp, and agricultural residues can be harvested sustainably, ensuring they're available for future use. Sustainable harvesting of renewable materials supports the transition to a low-carbon economy.
Here are some key benefits of selecting sustainable materials:
- Renewable: Harvested resources can be replenished naturally, reducing the strain on finite materials.
- Carbon Sequestration: Biobased materials absorb carbon during growth, helping combat climate change.
- Biodiversity: Sustainable sourcing protects ecosystems, maintaining essential habitats and food chains.
- Water Conservation: Efficient irrigation practices associated with sustainable materials help preserve this crucial resource.
- Waste Reduction: Using recycled materials decreases the demand for new resources, minimizing overall environmental impact.
Efficient Resource Management
Efficient resource management is essential for ensuring that we make the most of what nature offers. You can optimize resource consumption by using materials in a way that maximizes output while minimizing waste. Adopting energy-efficient technologies helps reduce resource consumption and lowers your overall impact. Implementing eco-friendly practices helps in utilizing renewable resources wisely and enhancing energy efficiency. Additionally, using natural remedies such as turmeric for inflammation can promote better health while utilizing resources effectively.
It's vital to reduce waste generation through meticulous resource use, ensuring you get the most value without overexploiting what you have. Implementing efficient irrigation systems can conserve water, making your efforts in resource management even more effective. Environmental innovations like waste management solutions can also play a crucial role in minimizing waste.
Consider the conservation of resources by protecting natural habitats and using renewable resources like solar and wind energy. This not only helps in reducing reliance on non-renewable resources but also promotes sustainability. Support local communities by ensuring fair access to resources, fostering social equity. Effective resource management practices also emphasize equitable distribution, ensuring that all populations benefit from available resources.
Lastly, create adaptive strategies to handle uncertainties, such as climate change. By coordinating the use of various resources in a holistic manner, you can enhance resilience. Embrace technological innovations and multi-stakeholder partnerships to drive collective action in your resource management efforts. Together, these practices will help you utilize nature's gifts wisely.
Environmental Impact Awareness
Understanding the environmental impact of how we utilize natural resources is essential for our planet's health. When you extract and process raw materials, you contribute considerably to greenhouse gas emissions and biodiversity loss. This awareness isn't just about you; it involves everyone making conscious choices.
Here are some key considerations to keep in mind:
- Raw material extraction accounts for about 50% of global greenhouse gas emissions.
- Overconsumption worsens climate breakdown and air pollution.
- The richest countries consume ten times more materials than the poorest, highlighting gross inequality.
- Unsustainable practices often harm both people and the environment.
- Sustainable resource use balances economic needs with social equity. Additionally, processing and extraction of raw materials is responsible for 50% of global greenhouse gas emissions.
Frequently Asked Questions
What Are the Best Plants for Making Cordage?
When you're looking to make cordage, several plants stand out. Cattails offer fibrous leaves perfect for twine, while yucca provides sturdy fibers for stronger rope. Daylilies can be processed in spring for simple twine, and sisal agave yields robust cordage. Don't overlook palm and willow; both supply excellent materials. Ultimately, milkweed and dogbane have fibers that can be extracted for your cordage needs. Each plant presents unique advantages for crafting durable cordage.
How Do I Identify Edible Wild Plants?
Identifying edible wild plants is a delicate balance between knowledge and caution. You can't just rely on looks; you need 100% certainty before consuming anything. Use field guides and observe plants through various growth stages to learn their characteristics. Start journaling your findings and establish a study area. Familiarity with local flora will help you avoid toxic look-alikes. Remember, knowing which parts are edible is just as essential as proper identification.
What Tools Are Essential for Crafting Survival Gear?
To craft survival gear, you'll need a few essential tools. A machete is crucial for cutting and gathering materials. Keep a pocket-sized file handy to maintain its sharpness. You might also want a sturdy branch for a survival spear and natural cordage for constructing items. Consider including a fire-starting kit with friction methods and waterproof matches. Finally, a plastic tarp can serve multiple purposes, like shelter and rainwater collection.
How Can I Purify Water in the Wild?
Imagine you're hiking and run out of water. You can easily purify water in the wild by boiling it. Just find a metal container—like an old soda can—and heat it over a fire until the water reaches a rolling boil. Keep it boiling for at least five minutes to kill harmful pathogens. Alternatively, you could create a simple filter using sand and charcoal, but always boil the water afterward for safety.
What Safety Precautions Should I Take While Making Fire?
When making a fire, you should prioritize safety by choosing a clear area away from flammable materials. Use dry tinder and create a fire ring to contain the flames. Keep water or a fire extinguisher close by in case things get out of hand. Wear protective clothing and maintain a safe distance to avoid burns. Always monitor wind conditions and guarantee the fire is completely extinguished before leaving the site unattended.
Conclusion
In the heart of the wild, your hands transform the bounty of nature into life-sustaining tools. With each crafted bow, every spark ignited, you weave yourself into the tapestry of survival. The rustling leaves whisper secrets of shelter, while sturdy cords bind your creations. As you sip from a crystal-clear stream, you realize that you've not just survived; you've thrived. Embrace the ingenuity that nature inspires, and let your spirit dance among the trees, forever intertwined with the earth.
Survivalism
Basic Knot Tying: The Essential Skill Everyone Should Learn
Skillful knot tying is crucial for safety and practicality; discover how mastering this essential skill can transform your everyday tasks and adventures.

Knot tying is an essential skill you should master for safety and everyday practicality. Whether you're securing a tent or tying your shoes, knowing how to tie knots can prevent accidents and enhance your problem-solving abilities. Start with fundamental knots like the Bowline and Square Knot. These are handy for various tasks, from outdoor activities to first aid. You'll also find that mastering this skill improves your focus and coordination. Once you get the hang of it, you'll discover the myriad of creative applications for knot tying that can make your life easier and safer.
Key Takeaways
- Knot tying is a vital skill for safety in outdoor activities, preventing accidents and injuries.
- Mastering essential knots like the Square Knot and Bowline enhances practical problem-solving and cognitive skills.
- Knots have everyday applications, such as securing bandages and tying shoes, making them valuable life skills.
- Effective knot tying techniques are crucial in first aid for immobilizing injuries and securing dressings.
- Learning knots fosters teamwork and communication skills, especially in group settings or outdoor activities.
Importance of Knot Tying

Mastering knot tying is fundamental for anyone who spends time outdoors or engages in various hands-on activities. Whether you're securing a boat to a dock or tying up livestock, knowing how to tie the right knot can make all the difference. You might find yourself in situations where a sturdy Bowline Knot guarantees your safety while rock climbing or a Slip Knot helps you set up your campsite efficiently.
Knot tying isn't just about practical uses; it's a critical safety skill. It can be the difference between a safe adventure and a trip to the emergency room. Imagine needing to tie a bandage or create an arm sling in an emergency—having knot skills is imperative. Plus, engaging in these activities can enhance your cognitive and motor development. As you practice, you'll notice improvements in your hand-eye coordination and problem-solving abilities. Additionally, understanding the historical significance of knots can deepen your appreciation for this skill as a tool for advancements.
Knot tying also carries cultural significance and artistic value. From wedding ceremonies to macramé crafts, knots symbolize unity and creativity. In mastering knot tying, you not only gain practical skills but also enrich your life in multiple dimensions.
Essential Knots to Master

Knot tying is an essential skill that you'll often rely on in various activities, from camping to fishing. Mastering a few key knots can make a big difference in your outdoor adventures. Here are the essential knots you should focus on:
| Knot Name | Purpose |
|---|---|
| Square Knot | Connects two ropes for added length. |
| Bowline | Creates a strong loop for heavy loads. |
| Two Half-Hitches | Ideal for binding rope to objects or posts. |
| Fisherman's Knot | Securely joins two ropes, perfect for fishing. |
| Taut-Line Hitch | Adjusts rope length under load, great for tents. |
These knots serve various functions, from joining ropes to creating loops and securing items. Each knot has its unique application, so practice them regularly to build your confidence. For example, the Bowline knot is particularly useful in rescue situations due to its ability to form a strong loop that is easy to untie after being under load. Whether you're tying down gear, setting up a tent, or securing a fishing line, these essential knots will help you tackle any challenge you encounter outdoors. Get started on mastering these knots, and you'll be well-prepared for your next adventure!
Everyday Uses of Knots
Everyday Uses of Knots
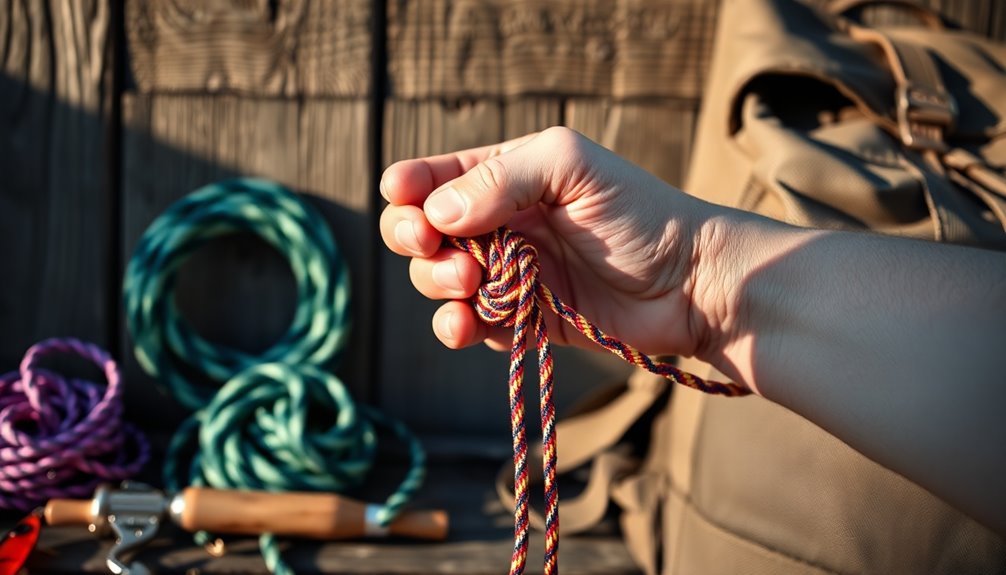
Whether you're looking to secure your belongings or release your creativity, knots play an important role in everyday life. From tying your shoes with a Bow Knot or the speedy Ian Knot to sealing bags or balloons with an Overhand Knot, these simple techniques come in handy daily. If you're boating, the Bowline Knot is crucial for securing your vessel, a method that's been around since ancient times.
In crafting, knots like the Lark's Head and Square Knot are significant for macramé projects. This art form, which peaked in the 1970s, blends functionality with aesthetics, allowing you to create beautiful designs using cotton rope and decorative beads. The versatility of knots extends to practical applications, too. You can bind objects with a Clove Hitch or connect ropes using a Square Knot, ensuring your projects stay together. A Square Knot is also effective for securing bandages in first aid situations, highlighting its importance in both creative and practical uses.
Even in emergencies, knots are lifesavers. Use a Blood Knot to join broken lines or a Trucker's Hitch to secure loads effectively. With so many everyday applications, mastering a few essential knots can enhance both your creativity and problem-solving skills.
Knot Tying in Outdoor Activities
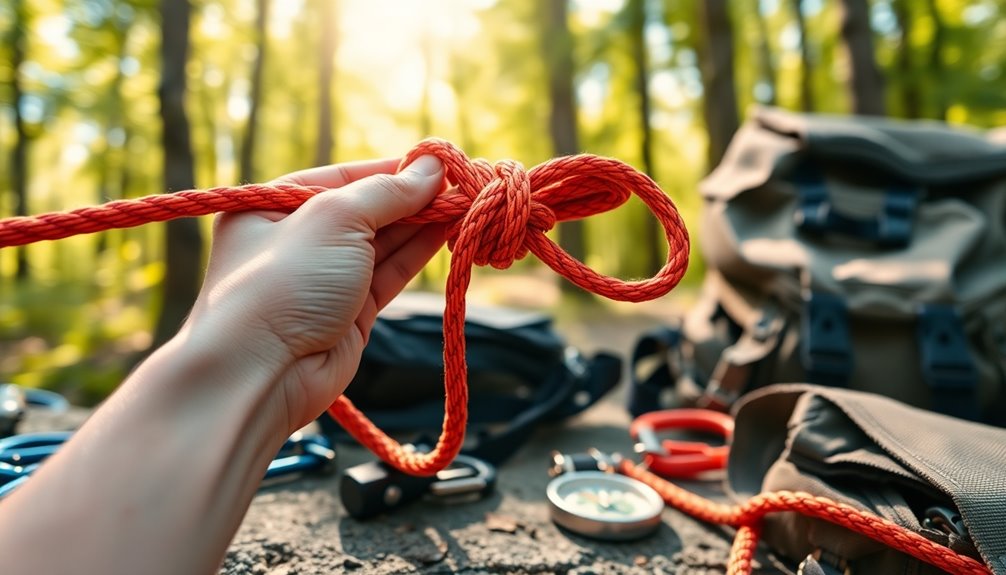
When you're camping or out on the water, knowing the right knots can make all the difference. Essential knots like the taut-line hitch and bowline can help you secure your gear and guarantee safety in various situations. Mastering these techniques not only enhances your outdoor experience but also keeps you prepared for emergencies. Mastery of knots enhances overall outdoor skills, increasing safety and efficiency in various activities.
Essential Knots for Camping
Mastering essential knots for camping can greatly enhance your outdoor experience. One of the most useful knots is the taut-line hitch, which helps you adjust guyline tension to keep your tent stable. You can tie it by passing the rope around an anchor point and coiling the free end around the standing line, allowing for easy tension adjustments without jamming. Regular practice is essential for maintaining knot skills, ensuring you can tie and untie them efficiently when needed.
The bowline knot creates a fixed loop that's perfect for lifting bear bags or anchoring tarps for weather protection. Just remember, it can't be tied or untied under load. When you need to join two ropes, the sheet bend is your go-to; it's great for binding firewood or combining scrap pieces.
For securing items, the overhand knot serves as a stopper to prevent slipping, while the figure 8 knot is a reliable stopper that's easier to untie. If you need to bundle gear, the square knot efficiently ties two rope ends together. Finally, the clove hitch is versatile for setting up clotheslines, allowing for quick adjustments. With these essential knots, you'll feel more prepared and confident during your camping adventures.
Safety in Boating Activities
Knot tying isn't just fundamental for camping; it plays a significant role in guaranteeing safety during boating activities too. Proper knots secure your boat to docks and piers, preventing unwanted movement that could lead to accidents. When you tie your vessel correctly, you keep it stable, reducing the risk of injuries caused by shifting cargo or capsizing. Additionally, mastering the use of knots is essential for preventing vessels from moving, which can strike people or other ships. Having a solid understanding of knot types ensures you can effectively respond to various situations on the water.
Familiarizing yourself with key knots like the Bowline, Cleat Hitch, and Figure Eight is essential. The Bowline creates a secure loop for docking or rescue, while the Cleat Hitch stabilizes your boat in changing tides. The Figure Eight knot guarantees your line won't slip through, which is critical for safety. You'll also want to master the Clove Hitch for fenders and the Square Knot for towing or securing gear.
To enhance your knot-tying skills, take advantage of online tutorials or join courses like those offered by America's Boating Club. Practicing with ropes or shoestrings can help you gain confidence. Remember, effective knot tying not only enhances your boating experience but also protects you and your companions from potential hazards on the water.
First Aid Applications of Knots
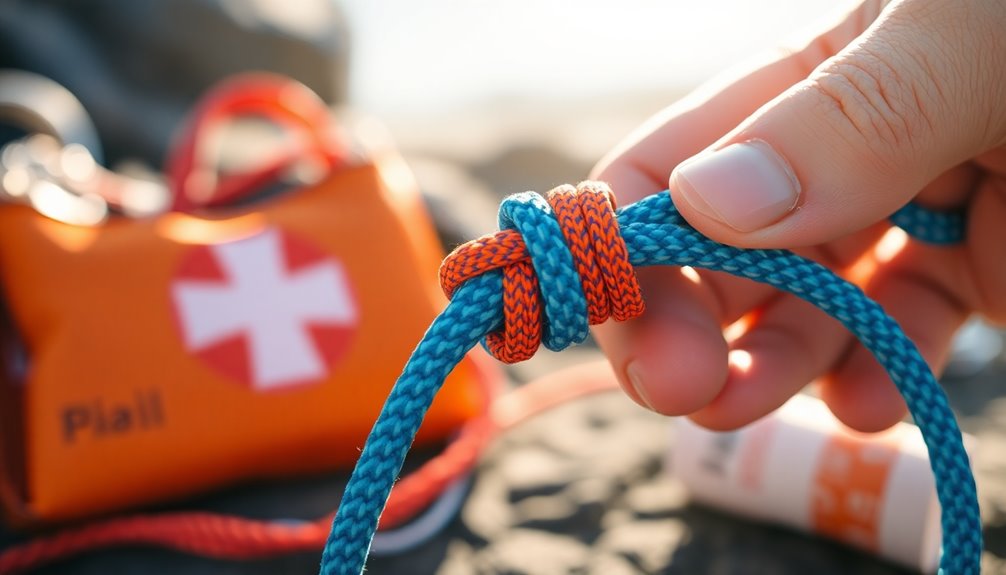
When it comes to first aid, knowing how to tie knots can make a lifesaving difference. You'll want to master cravat tying techniques for securing dressings, learn effective tourniquet application methods to control bleeding, and practice immobilizing injured limbs to prevent further damage. These skills are essential for providing immediate care in emergencies. Additionally, understanding the specific knot applications can enhance your ability to respond effectively in various situations.
Cravat Tying Techniques
Utilizing cravat tying techniques is essential in first aid, as they allow you to effectively secure bandages and provide support for injuries. Start by folding the base of the bandage and placing it on the affected area, ensuring the apex is on top and centered over the injury. Leave one tail longer for later use, and cross the ends at the back of the limb.
To secure the cravat, tie a square knot. Cross the ends and form an overhand knot, then tie another with the opposite ends. Make sure the knot is snug but not too tight, adjusting the bandage for even pressure and coverage.
For arm injuries, cover the area with the tails, rolling towards the opposite elbow and securing the knot at the back. For leg injuries, place the cravat over the dressing and make ascending turns, tying off with a square knot. When addressing ankle sprains, lay the cravat over the foot and cross the ends underneath, securing the ankle in a stable, dorsi-flexed position. These techniques provide vital support and protection, facilitating healing while preventing further injury.
Tourniquet Application Methods
Effective tourniquet application is crucial in stopping severe bleeding from traumatic injuries. When you need to apply a tourniquet, follow these steps to guarantee maximum effectiveness:
- Identify the Site: Position the tourniquet 5 to 10 cm (2-4 inches) above the wound, avoiding any joints. The tourniquet should be between the wound and the heart for ideal compression.
- Secure the Tourniquet: Tear away any clothing to expose the wound. Apply firm, direct pressure before placing the tourniquet. Secure it using the buckle and pull firmly on the end strap. Tighten further with the windlass rod, securing it to prevent unwinding.
- Check for Effectiveness: After application, check if the bleeding has stopped. Monitor the area for any signs of continued bleeding or complications. Adjust the tourniquet as necessary, making sure it's tight enough without causing excessive pain. Commercial tourniquets are generally more reliable than improvised alternatives, so it's important to use them whenever possible.
- Document the Application: Record the time the tourniquet was applied to avoid tissue damage from prolonged use. This information is crucial for future medical care and prioritization.
Immobilizing Injured Limbs
Immobilizing injured limbs is essential in first aid to prevent further harm and alleviate pain. You can use various techniques, like applying a sling, which can stabilize a fractured arm effectively. To create a sling, use a triangular bandage and tie a knot in the right-angled corner to form a pocket for the forearm. Position the sling so it supports the arm and ties around the neck with even tension. Additionally, casts are commonly used for fractures, which provide a secure method of immobilization.
Additionally, swathing can offer extra support. Use a wider swathe to secure the injured arm, tying a knot at the patient's back. Remember not to restrict breathing while pulling up on the swathe to relieve weight from the extremity.
Here's a quick reference table to help you remember key immobilization techniques:
| Technique | Key Points |
|---|---|
| Sling Application | Pocket for forearm; ties around neck |
| Swathing | Wider material; knot at back for support |
| Casts | Used for fractures; requires doctor's care |
| SAM Splints | Versatile; good for low-resource settings |
Mastering these techniques can make a real difference in emergency situations. Your skills in knot tying can help save someone from further injury.
Creative Uses for Knot Tying
Knot tying isn't just for survival or practical applications; its creative potential is vast and exciting. You can explore various artistic avenues that breathe new life into the simple act of knotting. Here are four creative uses for knot tying that might inspire you:
- Macrame Art: Transform cords into stunning wall hangings, plant hangers, or intricate decorative pieces using various knot techniques. Knot tying as an essential skill can enhance your macrame projects, ensuring durability and style.
- Interior Design: Incorporate knots into your home decor, adding a unique touch to cushions, curtains, or even furniture.
- Daily Items: Create functional yet stylish accessories like keychains or jewelry by employing knotting techniques that showcase your personality.
- Art Installations: Take inspiration from artists like Windy Chien, who elevate knots into enthralling art pieces, making an impactful statement in galleries and public spaces.
These creative endeavors not only allow you to express yourself but also give you a chance to refine your knot-tying skills in an enjoyable way. So grab some rope or cord, and start experimenting with knots to discover the artistic side of your knot-tying journey!
Educational Benefits of Knot Skills
Many people might not realize the educational benefits of knot skills, which extend far beyond basic functionality. Knot-tying engages various aspects of learning, enhancing physical, social, and cognitive skills. Below is a breakdown of these benefits:
| Category | Benefits | Examples |
|---|---|---|
| Physical Education | Improves hand-eye coordination and builds hand strength | Practicing knots strengthens fingers |
| Social Skills Development | Strengthens communication and teamwork | Explaining techniques to peers |
| Cognitive Development | Enhances focus and problem-solving skills | Figuring out complex knots |
| Cultural and Social Studies | Provides insight into traditions and practices | Exploring knots in historical contexts |
As you practice knot-tying, you not only improve your dexterity but also increase your ability to concentrate and collaborate with others. You'll learn to communicate effectively while guiding peers, fostering patience and empathy. Plus, you'll gain insight into the cultural significance of knots, deepening your understanding of their role in various societies. Friction's role in knot security is another crucial aspect that highlights the importance of understanding the physical properties involved. Embrace knot skills, and you'll find yourself equipped with educational tools that benefit you in multifaceted ways.
Frequently Asked Questions
What Materials Are Best for Practicing Knot Tying?
For practicing knot tying, you'll want non-slippery, flexible ropes like polypropylene or paracord. They're affordable and durable enough for repeated use. Gather materials like a pine board for a practice station, dowel rods to secure your setup, and screws for assembly. You might also consider a rope cutting gun for synthetic ropes. With these materials, you'll create an effective training environment to improve your knot-tying skills efficiently.
How Do I Know Which Knot to Use?
When you're faced with a knotty dilemma, think of your task as a puzzle waiting to be solved. To choose the right knot, consider its purpose, strength, and the environment. Ask yourself what you're securing and how much load it'll bear. If time's tight, opt for a simple knot. But for critical tasks, a more complex knot's your best bet. Practice makes perfect, so keep experimenting until you find your ideal match!
Can Knots Be Un-Tied Easily After Use?
Knots can be tough to untie after use, especially if they've been under heavy loads or in harsh conditions. You'll find that improvisational knots are often the hardest to loosen. Before you try, make sure the knot is dry, and consider using tools like a spoon or needle-nose pliers for assistance. Remember, yanking on loose ends can make it worse, so take your time and work patiently to unravel it.
Are There Any Common Mistakes to Avoid When Tying Knots?
Did you know that around 30% of people struggle with knot-tying due to common mistakes? To avoid errors, make sure you don't pull on one side too much, as that can create slip knots. Always place your instrument correctly and maintain consistent tension. Remember, securing your knot properly is essential, so double-check your steps and avoid wrapping incorrectly. Practice regularly to build muscle memory and improve your knot-tying skills!
How Can I Teach Knot Tying to Children Effectively?
To teach knot tying to children effectively, start with simple knots and demonstrate them multiple times. Use visual aids like posters to guide them through each step. Sit together and practice, providing immediate feedback. Involve older kids to assist younger ones, fostering collaboration. Choose appropriate materials, ensuring they're comfortable to handle. Frame knot tying as a fun puzzle to enhance problem-solving skills, creativity, and patience while boosting their fine motor skills.
Conclusion
So, you thought knot tying was just for sailors and Boy Scouts, huh? Surprise! It's an essential skill that can save the day in countless situations—whether you're securing a package or whipping up a makeshift first aid bandage. Mastering these knots doesn't just keep your belongings safe; it also boosts your creativity and problem-solving skills. Who knew that something as simple as tying a knot could reveal a world of possibilities? Now, go tie one on—figuratively, of course!
Survivalism
Recognizing Signs of Weather Changes: Nature’s Warnings You Can’t Miss
Keep an eye on nature’s subtle cues for weather changes; discover how these signs can prepare you for unexpected storms ahead.
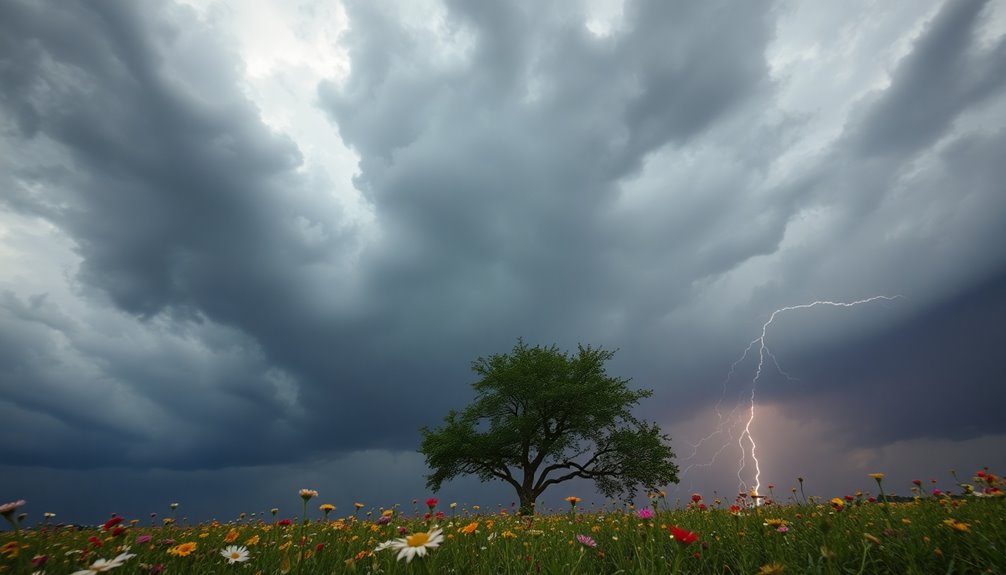
Nature offers unmistakable signs of weather changes, and you can easily spot them around you. Look for your dog eating grass or your cat being unusually active—these behaviors often precede storms. Cows lying down or birds flying low can signal rain, while certain cloud formations, like nimbostratus, point to impending precipitation. Keep an eye on wind patterns; a sudden shift often indicates change. Traditional sayings also provide insights into weather predictions, rooted in centuries of observation. By paying attention to these signs, you'll be better prepared for what lies ahead. There's much more to uncover about these natural indicators!
Key Takeaways
- Animals, like dogs and cows, often exhibit behaviors such as eating grass or lying down before impending rain.
- Specific cloud formations, such as nimbostratus and cumulonimbus, are indicators of approaching precipitation and severe weather.
- Changes in wind patterns and air pressure, such as increasing wind speed and falling barometric readings, signal upcoming weather shifts.
- Traditional weather sayings, like "red sky at night," reflect historical observations that can still offer insights into weather changes today.
- Observing insect activity, such as increased ant movement or crickets chirping, can indicate temperature changes and impending weather conditions.
Understanding Animal Behavior

When storms approach, you might notice your dog munching on grass or your cat zooming around the house. These behaviors signal that your pets are sensing changes in the environment. Dogs often eat grass before rain, while cats may dash about, indicating shifting weather patterns. Interestingly, cows lying down in pastures is another sign that rain is on the way.
Other animals exhibit similar behaviors. Oxen sniff the air, and pigs become restless, both predicting incoming rain. Bats, usually quiet during the day, can start clicking loudly, a sign of a storm brewing. Horses, too, display restlessness, hinting at severe weather.
Seasonal adjustments also play a role in animal behavior. For instance, horses grow thicker coats in fall to prepare for winter's chill, while cicadas begin buzzing, signaling the monsoon season. These adaptations show their ability to perceive and respond to changing climates.
Observing Cloud Formations

Cloud formations provide essential insights into upcoming weather conditions. By paying attention to the clouds above you, you can better anticipate the weather. High-level clouds like cirrus are thin and wispy, often signaling fair weather, while cirrostratus can appear 12 to 24 hours before rain or snow. Mid-level clouds, such as altostratus, cover much of the sky, hinting at impending precipitation. If you see nimbostratus, expect long-lasting rain.
Low-level clouds like cumulus usually indicate pleasant weather, but keep an eye out; they can develop into cumulonimbus clouds, which are a sign of severe thunderstorms. Stratus clouds, dull and grey, may bring light drizzle or snow. Notably, high-level clouds form at approximately 6200 m above sea level and are primarily composed of ice crystals.
Special formations like mammatus clouds often accompany cumulonimbus clouds, indicating unstable air and potential severe weather. Lenticular clouds, with their lens-like shape, form near mountains and signal unique atmospheric conditions. By observing these various cloud types, you can enhance your understanding of the weather, allowing you to prepare for whatever nature throws your way.
Reading Ground and Water Signs
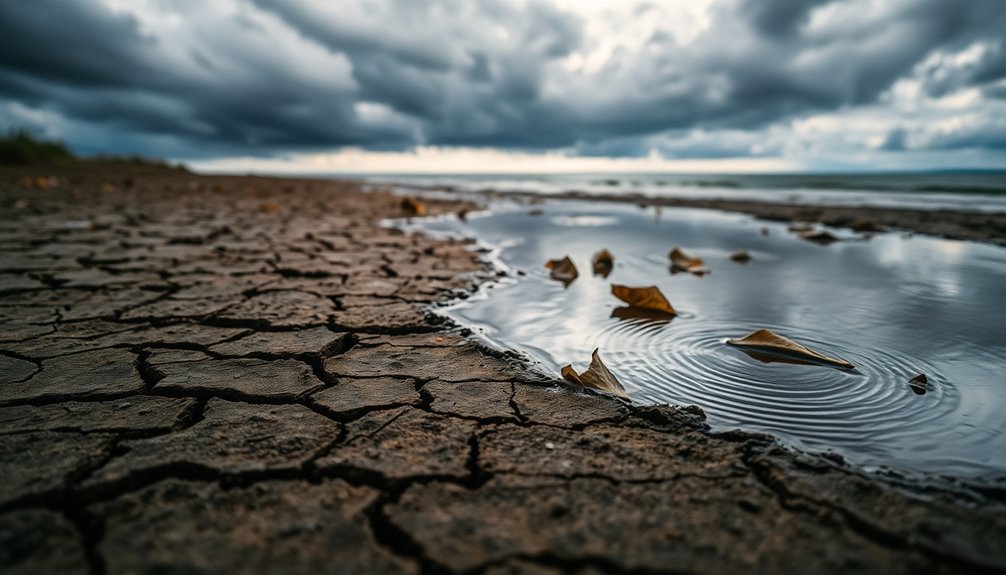
Observing the sky offers valuable weather clues, but the ground and water around you can reveal just as much. Pay attention to moisture and humidity; if you notice dampness underfoot, it's often a sign of rising humidity or imminent precipitation. Warm ground temperatures can indicate warm, moist air masses that might lead to thunderstorms.
Watch animal behavior closely. Birds flying low and ants scurrying about signal a drop in air pressure, typically preceding a storm. If you see squirrels retreating to their dens or bears coming closer to human habitats, expect inclement weather soon. Additionally, agitated animal behavior can serve as a warning sign that weather conditions are about to change.
Ground temperature and activity also provide hints. For instance, increased ant nest activity suggests rain is on the horizon, while animals seeking shelter in lower areas can indicate changing atmospheric conditions.
When it comes to water signs, observe surface activity. Increased ripples on the water can suggest stronger winds linked to approaching weather fronts. If you see whirligig beetles moving closer to shore, cooler weather may be on its way. By closely monitoring these ground and water signs, you can better predict what nature has in store.
Using Traditional Weather Sayings

You might be surprised at how much wisdom traditional weather sayings hold. These phrases, passed down through generations, often reflect historical accuracy and cultural insights into weather patterns. By exploring commonly used sayings, you can gain a deeper understanding of how different cultures interpret the signs of changing weather. For instance, the saying "Red sky at night, sailor's delight; red sky in morning, sailor take warning" illustrates the significance of sky color as an indicator of upcoming weather changes.
Historical Accuracy of Sayings
Weather sayings, rooted in centuries of observation and cultural wisdom, have long intrigued those seeking to predict the elements. Historically, these sayings emerged from the experiences of people like farmers and sailors, who relied on nature to guide their actions. While some weather lore has stood the test of time, its accuracy can be questionable.
Here are three key points to reflect on regarding the historical accuracy of weather sayings:
- Empirical Studies: Research, such as the analysis of Groundhog Day lore, shows little correlation between animal behavior and weather predictions, often landing around 33% accuracy—barely better than random chance.
- Cultural Transmission: Many sayings were passed down orally, evolving over generations. This cultural significance often outweighs their empirical reliability, as they served practical purposes for shepherds and farmers. Furthermore, these sayings frequently connect folklore with scientific meteorological principles, helping to bridge traditional knowledge and modern understanding.
- Observational Basis: Weather lore often stems from keen observations of nature, like cloud patterns or animal behavior. While these observations can provide insights, they're not always scientifically proven.
Commonly Used Sayings
Throughout history, people have relied on various sayings to help them interpret weather patterns and make predictions. These traditional sayings offer you a quick guide to understanding the skies, climate, and nature's signals. For instance, if you see a "red sky at night, shepherd's delight," it suggests pleasant weather ahead, while a "red sky in the morning" warns of storms to come.
Observing clouds can also be telling: a "mackerel sky" means alternating wet and dry spells, while clouds that look like "rocks and towers" signal frequent showers. If the sun appears pale at sunset, it's said that "twill rain tomorrow." Additionally, when you find yourself feeling under the weather, it may be a sign that a storm is brewing nearby.
When it comes to plants, remember "ash before oak and we shall have soak," indicating a wet summer. And if you catch ants marching in a straight line, expect rain soon.
Even celestial signs play a role. A ring around the moon? Brace for rain. By keeping these sayings in mind, you can better prepare for weather changes, making your daily plans a bit easier and more predictable.
Cultural Variations and Insights
Traditional weather sayings reflect the rich tapestry of cultural insights and observations that different societies have developed over centuries. These sayings not only provide guidance on weather changes but also connect you to the histories and traditions of various cultures.
Here are three fascinating examples:
- Indigenous Australian Wisdom: The flowering of specific trees and shrubs signifies seasonal changes, while the arrival of plovers in the Simpson Desert signals impending rains. In Yawuru Country, you'll find a six-season calendar that reflects intricate weather patterns, emphasizing the importance of observing nature's signs for understanding local weather.
- Ancient Mayan Rituals: The Mayans performed rain dances, mimicking frog calls as a way to invoke rain. These rituals often included symbolic gestures and communal feasts, demonstrating their deep connection to weather and agriculture.
- Nature's Observations: You may notice swallows flying lower as a storm approaches, or spiders abandoning their webs before bad weather. Such behaviors act as natural indicators, helping you anticipate changes in the environment.
Understanding these diverse cultural insights enhances your ability to read the signs of nature, enriching your experience of the world around you.
Monitoring Wind and Air Pressure

When you monitor wind patterns, you can make better predictions about upcoming weather changes. Pay attention to air pressure fluctuations, as they often signal shifts in conditions. You might even notice how insect behavior can indicate what's coming, giving you more clues to work with. For instance, the presence of crickets chirping can be a sign of rising temperatures, as their chirping frequency correlates with the air temperature.
Wind Patterns and Predictions
Understanding wind patterns is essential for accurate weather predictions. Wind direction plays an important role in determining the type of weather you can expect. For instance, when you notice a shift in wind direction, it often signals a change in weather conditions. Here are three key factors to keep in mind:
- Prevailing Wind Direction: This indicates the typical weather for your location. If the wind shifts from the north, expect cooler, drier air, while a southeast wind brings warm, humid air. Additionally, stronger pressure differences can lead to more intense winds, further indicating significant weather changes.
- Wind Speed Changes: Light winds can lead to variable directions, but a sudden increase in wind speed often hints at an approaching low-pressure system or severe weather.
- Seasonal and Local Patterns: Different seasons bring predictable wind patterns, like monsoons, which greatly affect precipitation and temperatures in your area.
Air Pressure Fluctuations
Monitoring air pressure fluctuations can provide essential insights into upcoming weather changes. By keeping an eye on barometric readings, you can better predict whether the weather will improve or worsen. For instance, a rising barometer usually signals that clearer skies are on the way, while a falling barometer often indicates impending storms. Additionally, understanding the relationship between air pressure and temperature can enhance your weather predictions.
Here's a quick reference table for understanding air pressure readings:
| Pressure Category | Pressure (inHg / mb) | Weather Implications |
|---|---|---|
| High Pressure | Over 30.20 inHg / 1022.689 mb | Clear skies, calm weather |
| Normal Pressure | 29.80 – 30.20 inHg / 1009.144 – 1022.689 mb | Steady weather |
| Low Pressure | Below 29.80 inHg / 1009.144 mb | Warm air, potential rainstorm |
| Seasonal Variability | Higher in winter, lower in summer | Influence on forecasts |
| Rapid Changes | Sudden drop in pressure | Possible storm approaching
Insect Behavior Indicators
Changes in air pressure and wind conditions can greatly impact insect behavior, offering valuable indicators of approaching weather patterns. Understanding these changes can help you predict shifts in the environment based on how insects react.
Here are three key ways insects respond to wind and air pressure:
- Migration Patterns: Many insects, like monarch butterflies and green darner dragonflies, rely on wind direction and speed to migrate efficiently. Wind can considerably improve their travel time, allowing them to cover long distances between breeding and wintering grounds.
- Activity Levels: Insects tend to be more active during specific times of the day, influenced by temperature and wind conditions. When temperatures rise and winds are gentle, you'll notice increased feeding and mating behaviors. This heightened activity is often a result of increased metabolic rates in response to warmer temperatures.
- Behavioral Adjustments: In response to rapid weather changes, insects often seek shelter. For example, a sudden drop in temperature or heavy winds can lead them to hibernate or find warmer spots to avoid mortality.
Recognizing Changes in Smells and Temperatures
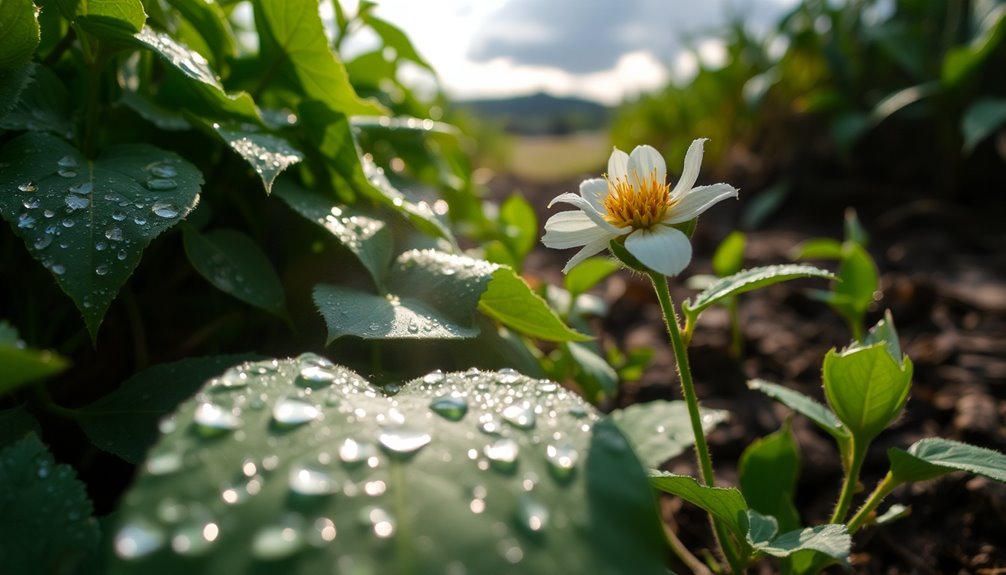
Before a storm, you might notice distinct changes in smells and temperatures that signal an impending shift in weather. One of the first things you'll experience is the unique scent of petrichor, which arises when moisture releases oils from plants and rocks. You may also catch a whiff of geosmin, an earthy smell produced by bacteria in the soil, intensifying as rain approaches. As humidity builds, you'll likely notice a soapy scent from plant oils being forced into the air. This scent is particularly pronounced after prolonged dry spells due to higher concentrations of geosmin and plant oils.
Temperature changes are equally telling. You might feel cooler ground temperatures and increased dampness underfoot, indicating rising humidity. A sudden drop in air pressure often accompanies these signs, and you may notice animals behaving unusually, like birds flying low or ants frantically fortifying their nests.
These sensory cues not only warn you of rain but also create a calming effect, evoking memories of past storms. By tuning into these changes in smells and temperatures, you can better prepare for the weather ahead and appreciate the natural signals that nature provides.
Frequently Asked Questions
How Do I Prepare for Sudden Weather Changes in My Area?
To prepare for sudden weather changes in your area, start by creating an emergency plan that includes meeting places and emergency contacts. Keep an emergency kit stocked with non-perishable food, water, and essential supplies. Regularly check the weather forecast and set up alerts on your phone. Stay informed about local advisories and be ready to adapt your plans based on the conditions. Having a go-bag can also help you respond quickly if needed.
Are There Specific Animals to Watch for Local Weather Predictions?
Absolutely, you can watch for specific animals to predict local weather. For instance, if you see dogs eating grass, it might signal rain. Restless pigs and bats making loud clicks are also good indicators of storms. Keep an eye on birds; if they're gathering in large groups, a storm could be near. Just remember, animal behavior can vary, so it's wise to contemplate multiple signs before making any conclusions.
Can Urban Environments Affect Natural Weather Signs?
Imagine a city as a giant, restless beast, breathing out heat and pollution. In urban environments, you'll notice how structures and smog can distort natural weather signs. The urban heat island effect raises temperatures, altering cloud formation and rainfall patterns, often suppressing the signals nature sends. As you observe the skies, remember that your city's influence can mask or change these signs, making it essential to look beyond the concrete for accurate weather predictions.
What Tools Can Help Me Monitor Weather Changes Effectively?
To monitor weather changes effectively, you can use various tools. A thermometer tracks temperature shifts, while a barometer helps you understand atmospheric pressure changes. An anemometer measures wind speed, and a rain gauge lets you assess precipitation. For a broader view, satellites provide real-time data about weather patterns. Additionally, weather apps on your smartphone can give you instant updates, ensuring you're always informed about the changing conditions around you.
How Can I Teach Children About Recognizing Weather Signs?
When it comes to teaching kids about recognizing weather signs, you're really hitting the nail on the head! Start with nature walks where they can spot different cloud types and observe animal behaviors. Use simple tools like thermometers and anemometers to make learning hands-on. Encourage them to create their own weather forecasts based on what they see. Incorporate fun activities, like drawing weather symbols, to keep their interest high and learning engaging!
Conclusion
As you tune into nature's whispers, you'll discover a symphony of signs that hint at the weather's dance. Animals scurry, clouds swirl like painted brushstrokes, and the air shifts, carrying scents of rain. Each subtle change becomes a note in the melody of the environment, guiding you through the ever-changing skies. Embrace these moments, and you'll find yourself in harmony with the world, ready to face whatever weather comes your way, like a sailor reading the sea.
-

 Survivalism7 months ago
Meal Preppers Near Me: Find Local Services and Tips!
-

 Survivalism7 months ago
Preppers Pack Crossword: Test Your Knowledge of Survival Gear!
-

 Survivalism7 months ago
Inside the Secret World of Doomsday Preppers: Are You Ready?
-

 Vetted7 months ago
15 Best Geiger Counters for Preppers: Top Picks for Radiation Detection
-

 Survivalism7 months ago
AI Doomsday Scenario: Understanding the Potential Risks
-

 Vetted7 months ago
15 Best Satellite Phones for Preppers: Stay Connected Anywhere, Anytime
-

 Survivalism6 months ago
Preppers List of Items: Essential Gear for Every Survivalist!
-

 Vetted6 months ago
15 Essential Survival Gear Items You Need to Stay Prepared in the Wild


