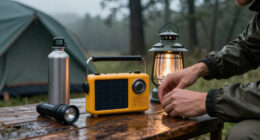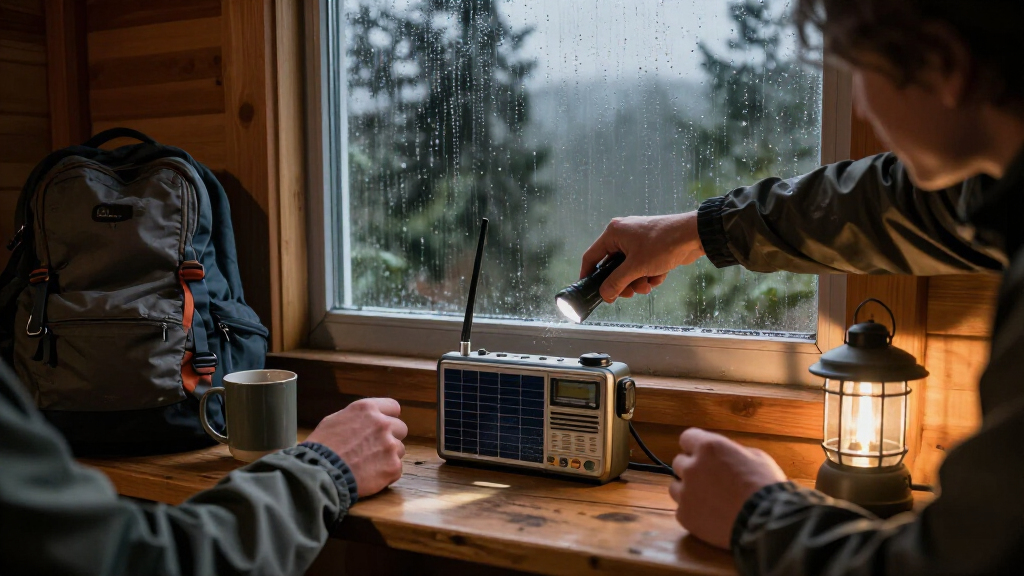
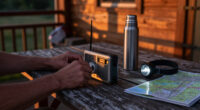
This guide helps you choose and prepare a solar-powered emergency radio that can receive useful local alerts and provide backup lighting or device charging during an outage. It is for beginners assembling a home, vehicle, or travel emergency kit. Allow 45-90 minutes to inspect and test the radio, plus several hours if you want to observe solar charging. You will finish with a radio that is configured for your area, charged, tested, and stored with a clear maintenance plan.

Get emergency and outdoor gear delivered free — and shop member deals
- Fast, free delivery on millions of items
- Access to Prime Big Deal Days deals on October 6–7
- Prime Video, Amazon Music and more included
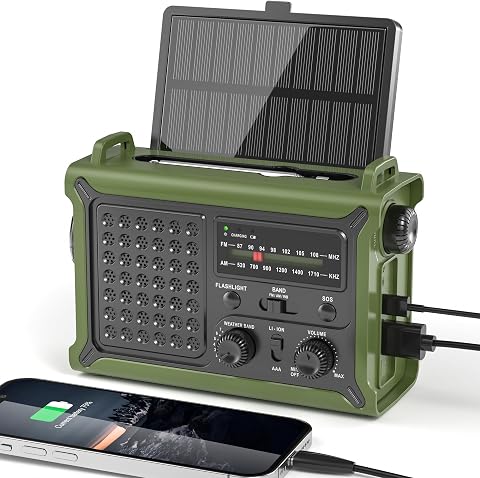
Solar Emergency Radio with Hand Crank, 12,000mAh Battery, and NOAA/AM/FM Reception
- ✔ Battery capacity: 12,000mAh
- ✔ Power sources: Solar, hand crank, internal battery, USB-C input, or 3 AAA batteries
- ✔ Radio bands: NOAA, FM, AM

FosPower A1 NOAA Emergency Weather Radio with Solar and Hand Crank
- ✔ Model: FOSPWB-2376
- ✔ Power bank: 7,400mWh (2,000mAh)
- ✔ Power sources: Hand crank, solar panel, AAA batteries

Leaton Hand-Crank Emergency Radio with NOAA, AM/FM, and 10,000mAh Battery
- ✔ Battery capacity: 10,000mAh
- ✔ Radio bands: AM 520–1710kHz, FM 87–108MHz, NOAA 162.400–162.550MHz
- ✔ Charging methods: Solar, hand crank, USB-C
Difficulty: Beginner | Time: 45-90 minutes for setup and testing; several hours for a full solar-charge test
What You’ll Need
Tools & Materials:
- Solar-powered emergency radio with its supplied charging cable and instructions
- USB wall charger or other manufacturer-approved charging source
- A smartphone or computer for checking local broadcast and alert information
- Paper and pen or a note-taking app
- Optional: fresh batteries, if the radio supports replaceable batteries
Knowledge:
- Basic ability to use radio tuning and volume controls
- Your general location, including county or regional alert area
Check the radio’s manual for supported bands, battery type, charging limits, water resistance, and alert setup before use. Models vary: some receive NOAA Weather Radio broadcasts in the United States, while others use AM/FM or different public-service bands. A solar panel, hand crank, or USB port does not guarantee that every model can charge a phone or receive official alerts.
Do not rely on the radio as your only emergency information source. Keep another way to receive alerts, such as a battery-powered phone or local warning system, and follow instructions from emergency services.
Solar Emergency Radio with Hand Crank, 12,000mAh Battery, and NOAA/AM/FM Reception
This is the strongest all-round choice in this comparison because it combines the largest listed battery, at 12,000mAh, with several ways to keep the radio powered: USB-C, solar, a hand crank, and three AAA batteries. That mix is useful when an outage lasts longer than expected or when charging access changes. Like the Leaton and FosPower, it covers NOAA, AM, and FM; unlike the FosPower, its stated battery capacity gives us more reason to consider it for occasional phone backup as well as radio listening.The practical advantage is breadth. A flashlight, reading lamp, and SOS alarm make it more than a receiver, while the 5-watt speaker provides a specified output for shared listening. It is water resistant, but the supplied description does not give a formal ingress rating, so we should not treat that wording as permission to leave it exposed to heavy rain. The listed flashlight range of up to 260 feet is a specification, not a guarantee of usable visibility in every setting.There are compromises. At 1.6 pounds, it is heavier than the 1.1-pound Leaton, and its dimensions appear in inconsistent width-and-height order in the product information. Instructions also recommend a full charge before first use. The 12,000mAh figure does not establish how much usable power reaches a phone, so we should still reserve the USB output for essential top-ups. Choose this when capacity and backup options matter more than minimizing pack weight.
Pros:
- Largest stated battery in this lineup at 12,000mAh
- Solar, hand-crank, USB-C, and three-AAA power options
- NOAA, AM, and FM reception plus flashlight, reading lamp, and SOS alarm
- USB phone-charging output and a specified 5-watt speaker
Cons:
- Heavier than the Leaton at 1.6 pounds
- Water resistance is not described with a formal rating
- Instructions recommend charging fully before first use
Best for: Households or campers who want the broadest set of power options and the largest stated battery capacity in this lineup.
Not ideal for: Buyers prioritizing the lightest carry, or anyone who needs a clearly specified water-ingress rating or guaranteed automatic weather alerts.
Bottom line: We rank it first for pairing the broadest backup-power options with the largest stated battery, provided we accept its extra weight and unspecified water-resistance rating.
“We rank it first for pairing the broadest backup-power options with the largest stated battery, provided we accept its extra weight and unspecified water-resistance rating.”
FosPower A1 NOAA Emergency Weather Radio with Solar and Hand Crank
The FosPower A1 makes sense for buyers who want the core emergency-radio toolkit without treating phone charging as a major feature. It receives NOAA, AM, and FM, and its solar panel, hand crank, and AAA-battery operation provide alternatives when USB power is unavailable. Four reading-light LEDs, a 1-watt flashlight, and an SOS alarm cover useful basics. Compared with the 12,000mAh pick, however, its listed 2,000mAh power bank is a much smaller reserve for a connected device.That smaller capacity is the defining tradeoff, not a minor footnote. FosPower lists the power bank as 7,400mWh (2,000mAh), which can help provide emergency charging for a phone or small tablet but should not be mistaken for a dependable full recharge. The product information does not specify USB-C input or a large internal battery like the first pick. For buyers who mainly need broadcasts and a light, those omissions may matter less; for anyone expecting repeated phone top-ups, the capacity gap is hard to ignore.It is also less fully specified in the supplied details than the Leaton: there are no dimensions, weight, or formal water-resistance rating to compare. Its limited lifetime warranty is a useful ownership detail, but it does not compensate for the smaller power bank if backup charging is central to our plan. Choose it for a simple radio-and-light role, and skip it if we want the most stored energy or need a clearly stated ruggedness rating.
Pros:
- Receives NOAA, AM, and FM broadcasts
- Can run by hand crank, solar panel, or AAA batteries
- Includes reading LEDs, a flashlight, and an SOS alarm
- Limited lifetime warranty is specified
Cons:
- 2,000mAh power bank is the smallest stated charging reserve here
- Solar and crank charging depend on sunlight or sustained manual effort
- Dimensions, weight, and formal water-resistance rating are not provided
Best for: Buyers building a basic emergency kit who value weather and broadcast reception, simple lighting, and multiple ways to power the radio.
Not ideal for: People who expect to charge a phone repeatedly, want a high-capacity internal battery, or need published size and water-resistance details.
Bottom line: We recommend the FosPower for core radio and lighting needs, but its modest power bank makes it a weaker choice than the other two for phone backup.
“We recommend the FosPower for core radio and lighting needs, but its modest power bank makes it a weaker choice than the other two for phone backup.”
Leaton Hand-Crank Emergency Radio with NOAA, AM/FM, and 10,000mAh Battery
The Leaton is the portability pick: at 1.1 pounds and 6.3 × 3.5 × 3.1 inches, it is the lightest of the radios with published dimensions in this group. Its 10,000mAh battery is below the first pick’s 12,000mAh, but far above the FosPower’s stated 2,000mAh power bank. Solar, hand-crank, and USB-C charging provide a useful range of options, and a 5V/1A USB output can offer emergency phone power. That output is specified more modestly than a higher-powered charging setup, so we should plan for a backup top-up rather than fast charging.Its standout distinction is IPX6 water resistance, which is more specific than the first radio’s general water-resistant description and the FosPower’s unlisted rating. IPX6 is not a submersion rating, and the supplied information cautions against treating it as protection from heavy rain; that makes sensible storage important. The radio also adds a compass, flashlight, and 1.3-watt reading lamp, making the package appealing for a small outdoor kit.The crucial limitation is weather-warning behavior. NOAA frequencies are supported, but the Leaton requires manual tuning and has no automatic or location-based alerts. Buyers who need warnings to sound without active listening should look for a radio that explicitly supports that function rather than assume NOAA reception includes it. Compared with the higher-capacity first pick, the Leaton gives up some battery reserve; compared with the FosPower, it offers a larger stated battery and a clearer water rating. It is best when carry weight and a defined splash-and-spray rating outweigh automatic alert capability.
Pros:
- Lightest listed radio in this comparison at 1.1 pounds
- 10,000mAh battery with solar, hand-crank, and USB-C charging
- IPX6 rating is more specific than the other models’ water-protection details
- Includes flashlight, reading lamp, compass, and USB phone output
Cons:
- NOAA requires manual tuning; automatic and location-based alerts are not supported
- 5V/1A USB output is intended for emergency charging rather than fast charging
- No headphone jack, and IPX6 does not mean submersible
Best for: Campers and emergency-kit buyers who want a lighter radio with a stated IPX6 rating and a substantial battery for its size.
Not ideal for: Anyone who needs automatic or location-based NOAA alerts, a headphone jack, or protection suitable for immersion and all heavy-rain conditions.
Bottom line: We choose the Leaton when a lighter carry and clearly stated water rating matter most, but its manual NOAA tuning rules it out for hands-off alerts.
“We choose the Leaton when a lighter carry and clearly stated water rating matter most, but its manual NOAA tuning rules it out for hands-off alerts.”
As an Amazon Associate we earn from qualifying purchases.
Before You Start
Choose a safe place to test the radio, away from water and extreme heat. Do not leave a charging radio on a hot windowsill, in a parked vehicle, or in direct sun beyond the maker’s instructions. Solar charging is generally slower than USB charging and may depend on panel angle, cloud cover, and battery condition. Treat the radio’s battery indicator as an estimate, and check the manual before using a hand crank for long periods. If the radio has a replaceable battery compartment, confirm the correct battery type and polarity before inserting cells.
Step-by-Step Instructions
Step 1: Match the radio to your needs
List the jobs the radio must do: receive local broadcasts or alerts, provide a flashlight, charge a phone, or operate without replaceable cells. Check the product specifications and manual for each feature instead of relying on the product name. For U.S. weather alerts, confirm that the model receives NOAA Weather Radio and supports the alert function you want; check which channels serve your area through an official local or national source. If you live elsewhere, verify compatibility with your local emergency broadcast system.
Compare the radio’s power options, battery capacity information, solar-panel size, crank operation, charging ports, and weather protection. Read the operating instructions for any feature you plan to depend on. Favor simple controls you can operate in low light, and make sure the radio can be used while plugged in if that matters to you.
Tip:Do not assume that a USB output can recharge a phone at a useful rate. Look for the stated output rating and check the manual for supported devices.
Check: You can identify the radio’s supported broadcast bands, available power methods, and any features it does not provide.
Step 2: Inspect the radio and identify its controls
Unpack the radio and compare the contents with the manual. Look for cracks, loose controls, damaged cables, corrosion in the battery compartment, and an antenna that does not extend or rotate smoothly. Find the power switch, tuning controls, volume control, flashlight, alert setting, charging input, and any phone output. Read the label beside each port before connecting a cable; input and output ports are not interchangeable.
Write down the model number and the manufacturer’s support contact or web address. Keep the manual, charging cable, and any supplied adapters together in a labeled pouch.
Tip:Do not use a radio with a swollen battery, melted plastic, exposed wiring, or a strong chemical smell. Stop and contact the seller or manufacturer for safe handling advice.
Check: The radio and accessories appear undamaged, and you can locate the controls and ports you need.
Step 3: Charge the internal battery safely
Read the manual’s initial-charge instructions and use the supplied cable or a compatible, approved charger. Connect the cable to the radio’s charging input, then to the power source. Place the radio on a stable, dry surface with ventilation around it. Charge for the time specified by the maker, and watch for an indicator light or display that shows charging or a full battery. Disconnect it when the manual says charging is complete.
If the radio uses replaceable batteries instead, install the exact type listed in the manual, matching the plus and minus marks. Do not mix old and new cells, or different battery types. If it has both an internal battery and replaceable cells, follow the maker’s instructions for which source powers which functions.
Tip:Do not leave the unit charging unattended if the manual advises against it. Stop charging if it becomes unusually hot, smells odd, or makes a sound the manufacturer does not describe as normal.
Check: The charging indicator reaches the state the manual identifies as full, or the correct fresh cells are installed without loose connections.
Step 4: Set up local broadcasts and alerts
Extend the antenna and place the radio near a window or in another open location. Turn it on at a low volume, select the appropriate band, and tune through the available stations. Find a reliable local news or public-service station, then locate your area’s official emergency broadcast frequency or channel if your radio supports it. Use a station list from an official weather, emergency-management, or broadcaster source rather than guessing.
If the radio has an alert mode, set the county, region, or channel as described in the manual. Check whether alert monitoring requires the radio to remain powered on, plugged in, or set to a particular band. Test the alert function only using the manufacturer’s test procedure or an officially scheduled test; do not trigger an unapproved alarm.
Tip:Reception can vary by building and location. Test the radio in the room where you expect to use it, and note a second location with better reception.
Check: You can hear at least one clear local station, and you have recorded the correct official alert channel or verified how the alert feature works.
Step 5: Test backup features one at a time
Test the flashlight, alarm, and hand crank individually, following the manual. Crank at the maker’s recommended pace and duration; stop if the handle binds or the radio becomes hot. If the radio has a USB output, connect a device only if the manual lists it as compatible. Check whether the device shows that it is charging, then disconnect it after a brief test. A small emergency radio may provide limited phone power, so do not drain the radio’s reserve during routine checks.
Test the solar panel outdoors in bright daylight, following the specified placement and temperature limits. Keep the panel uncovered and orient it toward direct sunlight as instructed. Record the starting and ending battery indicators over a reasonable observation period. Do not use a brief test as proof that solar charging alone can refill a depleted battery quickly.
Tip:Keep the phone’s cable and any adapter required by the radio in the emergency kit. A charging symbol confirms a connection, not that the radio can fully recharge the phone.
Check: Each feature you plan to rely on operates, and you know which features are limited or unavailable on your model.
Step 6: Pack the radio for quick use
Write down the local station or alert channel, the charging instructions, and the manufacturer’s support information. Store that note with the radio, cable, manual, and any spare cells in a dry, reachable location. Keep the radio away from leaking liquids, loose metal objects that could damage its ports, and places exposed to extreme temperatures.
Choose a storage location that household members can find without searching. If the radio is part of a vehicle kit, account for heat and cold inside the vehicle and follow the battery maker’s storage limits; a home location may be safer for temperature-sensitive batteries.
Tip:Tell household members where the radio is and how to turn it on, tune it, and switch on alert monitoring.
Check: The radio, cable, instructions, and local channel information are stored together and can be reached quickly.
Step 7: Set a maintenance and retest schedule
Check the manual for battery-storage and charging recommendations, then add the radio to your household kit inspection schedule. At the interval recommended by the maker, inspect it for damage or battery leakage, check the charge indicator, and briefly test reception and the flashlight. Recharge it as directed rather than waiting for an emergency. Replace disposable batteries before their expiration date, and remove them for storage if the manual recommends it.
Retest after moving the radio, changing alert settings, replacing batteries, or changing your emergency kit’s storage location. Update the recorded station or channel if local authorities change their broadcast information.
Tip:Use a calendar reminder so the radio is not forgotten between emergencies. Follow the manufacturer’s schedule if it differs from a general household inspection routine.
Check: You have a dated reminder for the next inspection and know how to restore charge and verify reception.
Common Mistakes to Avoid
- Expecting the solar panel or USB port to rapidly recharge a phone. — Check the radio’s stated output and charging limits, and treat phone charging as a reserve option unless the manufacturer specifies otherwise.
Troubleshooting
Problem: The radio turns on but stations sound weak or noisy.
Solution: Extend and reposition the antenna, move the radio near a window or outdoors in a safe location, and tune slowly across the band. Check the local station listing and try the alternate reception location you noted. Buildings, terrain, interference, and distance can all affect reception.
Problem: The battery indicator does not rise during solar charging.
Solution: Confirm that the radio supports solar charging of its internal battery and that the panel is exposed in the position specified by the manual. Remove shade, improve sunlight, and allow more time. Some models charge slowly or use the panel only as a limited power source. Use the approved cable and charger if the battery remains low; stop if the unit overheats.
Problem: The alert does not sound during a test.
Solution: Check the manual for the correct alert mode, channel, power state, and test procedure. Confirm that you selected the right region or frequency and that reception is available where the radio is placed. Use an official scheduled test or maker-approved test method; not every alert system sends a test on demand.
Problem: A phone does not charge from the radio.
Solution: Check that the radio has a USB output rather than an input, that the battery has enough charge, and that the cable and phone are compatible. Confirm the output rating and any required button or mode in the manual. If charging still fails, reserve the radio for reception and use a separate power bank for the phone.
What Success Looks Like
The radio is charged or fitted with the correct batteries, tunes to a clear local station, and has the correct official alert settings for your area if the model supports them. Its flashlight and any other intended backup features have been tested, its limits are understood, and the radio is stored with its cable, instructions, and local channel information. You also have a reminder to inspect and recharge it on the manufacturer’s schedule.
Next Steps
Add the radio and its maintenance date to your household emergency plan. Keep a separate battery bank or other backup communications option if you need reliable phone power, and check local emergency-management guidance for alerts and evacuation information. After a real outage or drill, recharge the radio, replace any depleted disposable batteries, and note any reception problems so you can update the storage location or equipment before the next use.
Frequently Asked Questions
Can a solar-powered emergency radio charge in cloudy weather?
It may collect some solar power in bright overcast conditions, but charging can be much slower than in direct sunlight and depends on the model. Check the manual for panel performance guidance, and keep an approved USB charging method or compatible spare batteries available if the radio supports them.
How long should I leave the radio in the sun?
Use the charging time and temperature limits in the manufacturer’s instructions; models vary, so there is no safe universal duration. Place the panel in the recommended position, monitor for unusual heat, and move the unit out of direct sun if it becomes hot.
Do all emergency radios receive official weather alerts?
No. Some receive only AM/FM broadcasts, and alert capabilities differ by model and region. Check the supported bands and alert functions before buying, then confirm the correct local station or channel through an official source.
Can I leave the radio switched to alert mode?
Follow the manual. Some radios monitor alerts only in a particular mode or while powered on, and battery use can vary. Test the required setup at home and keep the unit charged so it is ready when needed.
How often should I test the radio?
Follow the manufacturer’s maintenance guidance and inspect the radio as part of your regular emergency-kit checks. Test reception and key features after a move, battery change, or setting change, and confirm local alert information has not changed.
Fall Picks
fall essentials
As an affiliate, we earn on qualifying purchases.