Survivalism
Preppers Guide: How to Prepare for Any Disaster!
An essential guide for preppers to anticipate and handle any disaster with practical tips and crucial insights.
To prepare for any disaster, focus on critical aspects like emergency planning, essential supplies, and shelter provisions. Guarantee a sufficient water supply and stockpile non-perishable food items. Create an emergency kit with necessary supplies like blankets, masks, and first aid materials. Develop a communication plan and review it regularly for thoroughness. Strengthen your home's security, learn basic survival skills, and stay informed through various channels like weather forecasts and local news. Remember, thorough planning and readiness form the foundation of effective disaster preparedness.
Key Takeaways
- Stock essential supplies like water and non-perishable food.
- Create a detailed emergency plan tailored to likely scenarios.
- Develop communication strategies and practice regularly.
- Learn basic survival skills such as first aid and navigation.
- Stay informed through weather forecasts and community alerts.
Importance of Being Prepared
Being prepared for any disaster is essential for your safety and well-being. Emergency preparedness is critical in ensuring that you're ready to face natural disasters effectively.
One key aspect of preparedness is securing an ample water supply. In times of crisis, access to clean water can be limited, making it important to store an adequate amount for drinking, cooking, and sanitation.
Natural disasters such as hurricanes, earthquakes, or floods can disrupt water sources, leading to shortages and contamination. By having a sufficient water supply stored in advance, you can guarantee that your basic needs are met even when utilities are unavailable.
Additionally, staying informed about potential risks in your area and creating a detailed emergency plan can greatly increase your chances of survival and reduce the impact of unforeseen events.
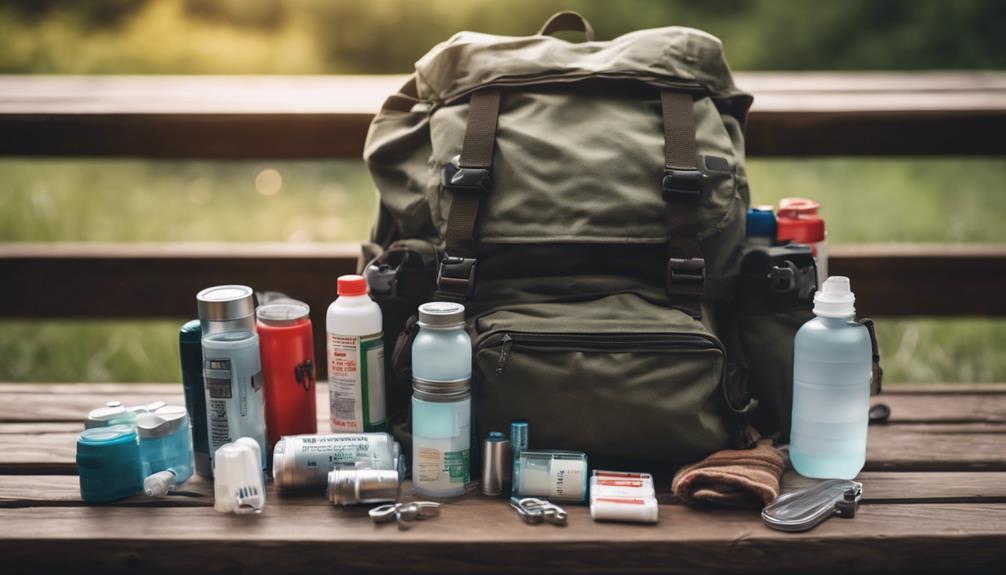
Essential Survival Supplies
Guarantee you have the essential survival supplies to stay safe and prepared in any disaster situation. In emergencies, access to clean water is vital. Make sure you have at least one gallon of water per person per day stored.
Non-perishable food items are also essential for your survival. Stock up on canned goods, dried fruits, nuts, and energy bars for sustenance during emergencies.
Additionally, having a well-equipped emergency kit can make a significant difference. Include items like a first aid kit, flashlight, batteries, multi-tool, and a whistle for signaling for help.
Proper food storage is imperative to avoid contamination and spoilage. Store your emergency food supplies in a cool, dry place away from direct sunlight. Regularly check expiration dates and rotate food items to maintain freshness.
Being prepared with these essential supplies can make a significant impact on your ability to withstand and recover from any disaster.
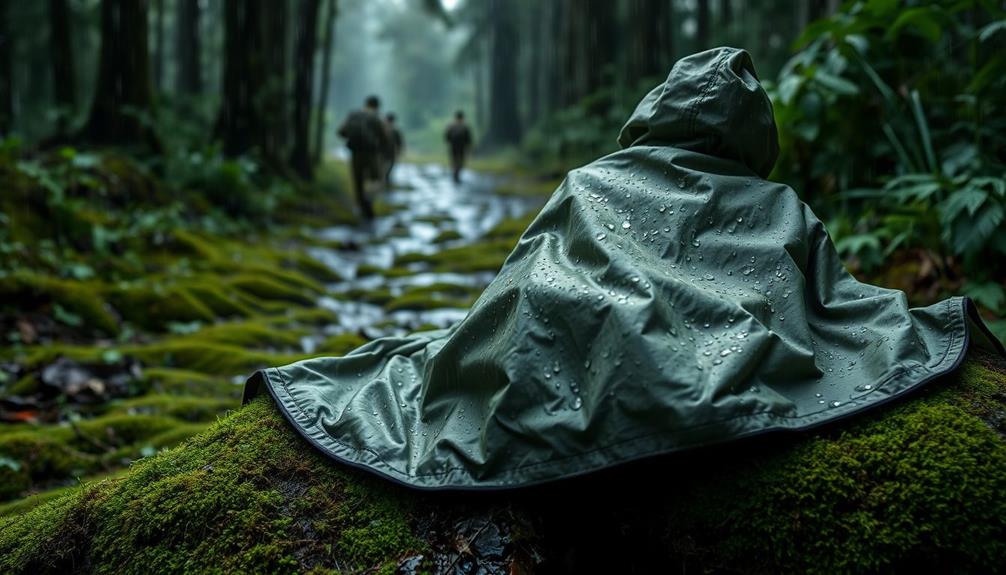
Emergency Shelter and Clothing
Make sure you have the necessary emergency shelter supplies and clothing to protect yourself and stay comfortable in any disaster scenario.
Emergency shelter supplies like a tent, tarp, sleeping bag, and portable stove are essential for guaranteeing warmth and protection in long-term emergency situations. Additionally, having a change of clothes, sturdy shoes, and personal hygiene items can greatly contribute to your comfort and well-being during a crisis.
Dust masks are vital for filtering contaminated air, while an emergency blanket provides insulation and protection in emergency scenarios. Whistles and flashlights with extra batteries can aid in signaling for help and providing illumination in dark or hazardous conditions.
Remember to pack prescription medications, cash in small denominations, and copies of personal documents in a waterproof bag to ensure preparedness for any disaster. These items, along with water storage and an emergency kit, are fundamental for your safety and security in challenging circumstances.
Readiness and Resilience
Preparing for any disaster requires a strategic approach to readiness and resilience.
You must verify that your essential supplies checklist is up to date, including food, water, medical supplies, and tools.
Developing an emergency communication plan is vital for staying connected with loved ones and authorities in times of crisis.
Essential Supplies Checklist
Including a variety of essential supplies in your preparedness kit is important for ensuring readiness and resilience in the face of any disaster. A well-rounded preparedness kit, as outlined in the Complete Guide, serves as your first line of defense when emergencies strike.
Items such as food, water, first aid supplies, shelter materials, and communication tools are highly valuable. Essential supplies like flashlights, multi-tools, tents, and emergency blankets are critical for disaster readiness, providing comfort and security.
Communication supplies, including radios, cell phones with chargers, and emergency contact lists, play a crucial role in staying connected during emergencies. Additionally, clothing, personal hygiene items, and prescription medications shouldn't be overlooked as they contribute to health maintenance and overall well-being.
Safety and protection supplies like matches, duct tape, work gloves, and emergency blankets help ensure safety and security in challenging situations. Be prepared by gathering these essential supplies to enhance your readiness and resilience in any disaster scenario.
Emergency Communication Plan
To guarantee readiness and resilience in any disaster scenario, establishing an emergency communication plan is paramount. One key aspect of this plan is designating an out-of-area contact person whom family members can check in with to coordinate and share information. Including crucial phone numbers, addresses, and meeting places in this plan ensures that everyone knows how to connect during a crisis. Rehearsing the communication plan through drills and ensuring that each family member has a copy of it significantly enhances readiness and resilience. Additionally, utilizing multiple communication methods such as text, social media, and walkie-talkies can increase the likelihood of successful communication during emergencies. Regularly updating and reviewing the emergency communication plan is crucial to keeping it relevant and effective for any disaster scenario.
Emergency Communication Plan | Benefits |
---|---|
Designate out-of-area contact | Coordinate and share info |
Include important contact info | Ensure connectivity in crisis |
Rehearse plan through drills | Enhance readiness |
Use multiple communication methods | Increase successful communication |
Planning for Self-Reliance
Creating a personalized emergency plan is essential for achieving self-reliance in preparing for disasters. When planning for self-reliance, consider the needs of all family members to guarantee everyone is taken care of during emergencies.
Identify the likely scenarios in your area and tailor your preparedness plan accordingly. Stock up on essential supplies such as food, water, first aid kits, and shelter materials to sustain yourself and your loved ones.
Develop communication strategies and maintain a list of emergency contacts to coordinate effectively in times of crisis. Regularly review and update your emergency plan to adapt to changing circumstances and remain prepared for any disaster that may strike.
Additionally, practicing survival skills like fire-starting, shelter-building, and navigation can enhance your self-reliance and readiness for unforeseen events. By taking these steps, you can increase your self-sufficiency and be better equipped to handle emergencies with confidence.
Building a Prepping Community
Connect with like-minded individuals in your area to begin building a prepping community. Forming a network of individuals who share your mindset towards preparedness is a well-thought step in enhancing your readiness for any disaster.
By collaborating with neighbors, friends, and family members, you can pool together resources, skills, and knowledge, ensuring that everyone is better prepared when emergencies strike. A prepping community not only offers practical assistance but also emotional support during crises, creating a sense of security within the group.
Organizing community events, drills, and meetings provides the opportunity to learn from one another and improve collective disaster preparedness. Taking the time to learn from each other's experiences and expertise can notably increase the effectiveness of your prepping efforts.
Together, you can strengthen your support network and work towards a more resilient community that's ready to face any challenge that may come your way.
Frequently Asked Questions
What Are the 5 Steps to Emergency Preparedness for Any Disaster?
To prepare for any disaster, you must follow five critical steps.
First, assess potential risks by identifying common threats in your area.
Second, create a family emergency plan with communication strategies and evacuation routes.
Third, build an emergency kit containing essential supplies like food and first aid items.
Fourth, stay informed by monitoring local news and weather alerts.
What Are the 10 Essential Survival Kit Items?
To be prepared for any disaster, your survival kit must include 10 essential items:
- Food
- Water
- First aid kit
- Flashlight with extra batteries
- Multi-tool
- Emergency shelter supplies like a tent or tarp
- Sleeping bag
- Portable stove
- Whistle
- Dust masks
Communication supplies such as a battery-powered radio, cell phone with charger, emergency contact list, paper, maps, clothing like a change of clothes, sturdy shoes, personal hygiene items, prescription medications, cash, safety and protection supplies like matches, duct tape, work gloves, emergency blanket, personal documents.
What Is the First Rule of Prepping?
The first rule of prepping is to prioritize health and financial readiness as the foundation for emergency preparedness.
Getting your home ready for two weeks of self-reliance is essential in following this rule.
Preppers emphasize focusing on personal well-being and home preparedness as initial disaster readiness steps.
Health, finances, and essential supplies for two weeks are core components of adhering to this rule.
Following it guarantees you're better equipped to handle any disaster effectively.
What Are 10 Items in an Emergency Kit for an Earthquake?
To prepare for an earthquake, your emergency kit should include:
- Non-perishable food and water
- First aid supplies
- Flashlights with extra batteries
- Tents and sleeping bags
- Portable stoves
- Battery-powered radios
- Cell phones with chargers
- Emergency contact lists
- Sturdy shoes and hygiene products
- Prescription medications
- Matches, duct tape, and work gloves
- Emergency blankets
These items guarantee you have sustenance, shelter, communication, clothing, and safety during and after an earthquake.
What Are the Essential Steps for Preparing for Any Disaster, According to Preppers?
Preppers believe in being prepared for any disaster. Essential steps include creating a family emergency plan, stocking up on food and water, securing a safe shelter, and learning how to protect home from potential threats. It’s important to stay informed and practice emergency drills regularly to ensure readiness.
Conclusion
In summary, being prepared for any disaster is vital for ensuring the safety and well-being of yourself and your loved ones.
By stocking up on essential survival supplies, creating a plan for self-reliance, and building a prepping community, you can increase your readiness and resilience in the face of unforeseen events.
Remember, taking the time to prepare now can make all the difference when disaster strikes.
Stay informed, stay safe, and stay ready.
Survivalism
Essential Flood Survival Kit: Be Prepared
Be ready for unexpected floods with an essential survival kit that ensures your safety and security—discover what to include for maximum preparedness.
A flood survival kit is essential for your safety, ensuring you're prepared when emergencies arise. Start by packing non-perishable food and at least one gallon of water per person per day for three days. Don't forget waterproof clothing and sturdy boots for protection; also include a NOAA weather radio for real-time alerts. Prepare evacuation supplies like a first aid kit and keep important documents handy. Regularly check and update your kit to maintain its effectiveness. By being proactive and prepared, you can better face flooding challenges. For more tips on assembling the perfect kit, you'll want to keep exploring.
Key Takeaways
- Pack non-perishable food and at least one gallon of water per person per day for three days in your survival kit.
- Include waterproof clothing, sturdy boots, and essential gear for protection against flooding conditions.
- Equip your kit with communication tools like NOAA weather radios and portable generators for power outages.
- Familiarize yourself with local evacuation routes and pack important documents and first aid supplies for emergencies.
- Regularly maintain and update your survival kit to ensure all items are fresh and functional.
Importance of Flood Survival Kits
Flood survival kits are essential for ensuring your safety and well-being during emergencies. When you live in flood-prone areas, being prepared can make all the difference.
By customizing your kit, you address specific challenges you might face during a flood, such as power outages or lack of clean water. Create a checklist to include items that meet your unique needs, like medications or personal documents.
Assess local flood risks and familiarize yourself with available emergency resources. Regularly evaluate and update your kit, keeping it ready for any situation.
Engaging with your community can enhance your understanding of local flood risks, while collaborating with neighbors strengthens your support network during emergencies.
Being prepared is your best defense against flooding.
Essential Food and Water Supplies
When preparing your flood survival kit, essential food and water supplies should be a top priority. Pack non-perishable food items like canned goods, energy bars, and waterproof ration bars to guarantee you have enough nutrition during emergencies.
Don't forget to include a minimum of one gallon of water per person per day, aiming for at least three days' worth. Water purification tablets or reliable survival water filters are vital for securing clean drinking water.
Consider portable cooking devices for meal preparation if conditions allow. Always check expiration dates on food supplies and replace them as needed.
Being proactive with food and water will help keep you and your loved ones nourished and hydrated during a flood situation.
Personal Clothing and Gear
Packing the right personal clothing and gear is essential for staying safe and comfortable during a flood emergency. Focus on waterproof clothing, including a rain poncho and quick-drying materials, to keep you dry and warm.
Don't forget sturdy, waterproof boots; they'll protect your feet from contaminated water and debris. Layering is key, so pack lightweight clothing that can be easily removed or added based on changing weather conditions.
Consider bringing gloves and a hat for added protection. A waterproof backpack can help keep your essentials dry.
Additionally, pack items like shovels or sandbags, which can assist in flood prevention efforts. Being equipped with the right clothing and gear will help you navigate through challenging flood situations more effectively.
Communication and Detection Tools
Equipping yourself with reliable communication and detection tools is essential for staying informed and safe during a flood emergency. Invest in a NOAA weather radio to receive real-time alerts about impending floods.
Keep an emergency contact list handy, making sure family members can reach each other. Water alarms can help you detect localized flooding early, giving you a heads-up to act quickly.
Don't forget smartphone apps that provide weather updates and alerts from emergency services for added convenience. If power goes out, a portable generator can keep essential devices running.
Evacuation Supplies and Planning
In the event of a flood, having the right evacuation supplies can make all the difference in guaranteeing your safety and quick relocation.
First, familiarize yourself with local evacuation routes and plan your escape ahead of time. Pack essential items like a first aid kit, flashlight, and portable phone charger in an easily accessible bag.
Don't forget important documents and an emergency contact list. Consider including a NOAA weather radio for real-time updates.
If you have pets, make sure you have leashes, carriers, and pet supplies ready. Signal flares can help alert rescuers if needed.
Regularly review your evacuation plan with your family, so everyone knows what to do when disaster strikes. Being prepared can save lives.
Maintaining Your Survival Kit
Regular maintenance of your survival kit is essential to ascertain it's always ready when you need it most. Keeping your supplies fresh and functional ascertains you're prepared for any emergency. Check your kit at least every season, updating as necessary.
Item | Frequency of Check | Notes |
---|---|---|
Water Purification | Every 6 months | Replace filters as needed |
Non-Perishable Food | Annually | Rotate stock for freshness |
First Aid Supplies | Every 3 months | Check expiration dates |
Emergency Tools | Every season | ascertain they're in working order |
Including Pets in Emergency Plans
When planning for emergencies like floods, don't forget about your pets; they rely on you for safety and well-being.
Make sure to include essential supplies for them in your flood survival kit. Pack at least three days' worth of food and water, along with portable bowls.
Don't forget leashes, carriers, and any medications they might need. Identification tags and microchips are vital for their safe return if you get separated.
Create a pet-friendly evacuation plan, including designated pet-friendly shelters or hotels.
Regularly check and update your pet supplies, ensuring everything's in good condition.
Frequently Asked Questions
How Can I Customize My Flood Survival Kit for Specific Needs?
You can customize your flood survival kit by evaluating your specific needs, including food preferences, medical requirements, and local risks. Regularly review and update your supplies to guarantee they meet your family's unique circumstances.
What Are the Best Portable Cooking Devices for Emergencies?
For emergencies, consider portable cooking devices like camping stoves, solar cookers, or compact propane grills. They're lightweight, easy to use, and guarantee you can prepare meals even when traditional cooking methods aren't available.
How Do I Create a Community Flood Preparedness Plan?
Think of your community as a puzzle; each piece represents a neighbor. To create a flood preparedness plan, gather everyone, share resources, assess risks, and build a supportive network that can withstand any flood challenge together.
What Should I Do With Important Documents During a Flood?
During a flood, secure important documents in waterproof bags or containers. Store them high up, away from potential water damage. Make digital copies too, ensuring you can access them easily if needed.
How Can I Ensure My Pets Remain Calm During Emergency Evacuations?
To keep your pets calm during evacuations, create a familiar environment by bringing their favorite toys and blankets. Practice short trips beforehand, and use soothing voices to reassure them while maintaining a steady pace.
Conclusion
As you gather your flood survival kit, remember that every item could make a difference when the waters rise. Imagine facing an unexpected flood without the essentials—what would you wish you'd prepared? Don't leave your safety to chance; take action now. Update your supplies, involve your loved ones, and make certain your pets are included in your plans. When the moment comes, you'll be ready to face the uncertainty with confidence and resilience. Don't wait—prepare today!
Survivalism
Top Picks for Food Preservation Essentials
Incredible food preservation essentials await you, ensuring your ingredients stay fresh and flavorful—discover the must-have tools that can transform your kitchen!
When it comes to food preservation essentials, you'll want quality tools that enhance freshness and extend shelf life. Start with a reliable vacuum sealer to keep air out, and consider Mylar bags with oxygen absorbers for long-term storage. Canning jars work perfectly for fruits and sauces, while food dehydrators help create healthy snacks by removing moisture. Don't forget the importance of airtight containers to prevent spoilage. Regularly monitor your food storage conditions and replace oxygen absorbers as needed to maintain quality. Stick with these tips, and you'll enjoy fresher food for longer—stay tuned for more insights!
Key Takeaways
- Opt for quality vacuum sealers to keep air out and extend the life of perishables for 1-3 years.
- Invest in Mylar bags with oxygen absorbers for long-term storage, preserving food for 5-30 years.
- Use canning jars for effective preservation of fruits, vegetables, and sauces in airtight conditions.
- Employ food dehydrators to remove moisture, creating long-lasting and nutritious snacks.
- Choose airtight containers to prevent moisture and pests, maintaining food quality over time.
Importance of Food Preservation
While you mightn't think about it daily, food preservation is essential for ensuring the safety, quality, and longevity of the food you consume. By preventing spoilage and extending shelf life, you reduce waste and save money.
Proper preservation methods keep harmful bacteria and mold at bay, lowering the risk of foodborne illnesses. Additionally, maintaining flavor, texture, and nutritional value is vital for a satisfying eating experience.
As you store food, consider how preservation techniques can enhance your meals and protect your family's health. With effective food preservation, you're not just prolonging shelf life; you're also ensuring that the food you eat remains delicious and safe, making every bite a pleasure.
Key Preservation Techniques
Food preservation methods are varied and effective, each serving a specific purpose to keep your food safe and tasty.
You can utilize techniques like freezing, which halts bacterial growth and keeps your food fresh for months.
Canning is another great option, preserving food in airtight jars to guarantee longevity.
Dehydrating removes moisture, preventing spoilage while maintaining flavor and nutrients.
Fermentation not only preserves but also enhances taste and health benefits.
Finally, pickling involves soaking food in brine or vinegar, offering a zesty twist while extending shelf life.
Each method has its advantages, so choose the ones that best suit your needs and preferences to enjoy your food for longer.
Essential Food Preservation Tools
A variety of essential food preservation tools can make a significant difference in how you store and maintain your food.
First, investing in quality vacuum sealers helps keep air out, extending the life of your perishables. Mylar bags are another great option, especially when paired with oxygen absorbers, as they prevent oxidation and spoilage.
Don't forget about canning jars; they're perfect for preserving fruits, vegetables, and sauces. A dependable food dehydrator can also help you make snacks while reducing moisture content.
Best Practices for Food Storage
Effective food storage practices are essential for maintaining the quality and safety of your food. To maximize freshness, follow these guidelines:
Storage Method | Ideal Temperature | Shelf Life Extension |
---|---|---|
Refrigeration | 32°F – 40°F | 1-4 weeks |
Freezing | 0°F or lower | 6 months – 1 year |
Vacuum Sealing | Room Temperature | 1-3 years |
Mylar Bags with O2 Absorbers | Room Temperature | 5-30 years |
Keep your food in airtight containers to prevent moisture and pests. Label items with dates and contents for easy identification. Regularly check for spoilage and rotate stock to use older items first. Following these practices will help you enjoy fresher, safer food.
Evaluating Food Preservation Products
When it comes to preserving your food, selecting the right products can make a significant difference in maintaining quality and extending shelf life.
Start by evaluating the specific needs of your food items; consider factors like moisture content, storage duration, and packaging type. For instance, if you're using oxygen absorbers, verify they're appropriate for the size of your containers and the type of food.
Look for reputable brands that offer clear absorption capacities and include indicators for replacement. Don't forget to assess compatibility with your chosen storage materials, such as Mylar bags or vacuum-sealed containers.
Common Preservation Mistakes
Many home preservers overlook critical steps that can jeopardize their efforts. One common mistake isn't sealing containers properly. If there's any air left, oxidation can occur, leading to spoilage.
Another error is using insufficient oxygen absorber sizes for large quantities of food. This can result in inadequate preservation, diminishing your food's shelf life.
Ignoring storage conditions, like temperature and humidity, is also a significant oversight. High humidity can lead to spoilage, especially with certain foods.
Finally, don't forget to check expiration dates on your oxygen absorbers. Using expired products won't provide the protection you need.
Maintaining Food Quality Over Time
Maintaining food quality over time is essential for enjoying your stored items at their best. To achieve this, consider using oxygen absorbers in your packaging. They effectively absorb oxygen, preventing spoilage and extending shelf life.
Pair these absorbers with Mylar bags or vacuum-sealed containers for ideal results. Always store your oxygen absorbers in airtight containers and seal them immediately after use.
Be cautious not to use them with high-humidity foods, as this could lead to spoilage. Regularly monitor storage conditions and replace absorbers when you open containers for extended periods.
Frequently Asked Questions
How Do Oxygen Absorbers Work in Food Preservation?
Oxygen absorbers work by absorbing oxygen within sealed packaging, which prolongs food freshness and shelf life. They inhibit bacteria and mold growth, keeping your food safe and flavorful while preventing spoilage and reducing waste.
Can Oxygen Absorbers Be Reused After Opening?
When it comes to reusing oxygen absorbers, you can't have your cake and eat it too. Once opened, they lose effectiveness, so it's best to use fresh ones for ideal food preservation.
What Foods Should Not Be Stored With Oxygen Absorbers?
You shouldn't store high-humidity foods like fruits, vegetables, and certain cheeses with oxygen absorbers. They can absorb moisture, leading to spoilage and health risks. Always check food compatibility before using absorbers for preservation.
How Long Do Oxygen Absorbers Last Once Opened?
Once opened, oxygen absorbers last about 4-6 hours before losing effectiveness. To maximize their lifespan, store them in airtight containers immediately after use, ensuring you seal them tightly to prevent moisture from spoiling their function.
Are There Any Safety Concerns With Using Oxygen Absorbers?
Yes, there are safety concerns with using oxygen absorbers. You should guarantee they're used appropriately, avoiding high-humidity foods and sealing containers properly. Always monitor storage conditions to prevent spoilage and potential foodborne illnesses.
Conclusion
In summary, mastering food preservation can feel like wielding a magic wand that transforms your kitchen into a waste-free wonderland. By choosing the right tools and techniques, you can guarantee your favorite ingredients stay fresh and flavorful for what seems like an eternity. Remember to follow best practices and avoid common pitfalls to truly elevate your food storage game. Embrace these essentials, and enjoy the satisfaction of knowing your food is well-protected and your waste is minimized!
Survivalism
Master Canning Ravioli for Emergency Preparedness
Master the art of canning ravioli for emergency preparedness and learn essential tips that will ensure your meals are ready when you need them most.
Mastering canning ravioli is a smart move for emergency preparedness. Start with fresh or frozen uncooked ravioli and a pressure canner, which is essential for safely processing low-acid foods. Use a flavorful broth or sauce as your canning liquid. Verify your jars are sterile and filled with ravioli, leaving a 1-inch headspace. Seal jars properly and process them at 240°F for safety. Once cooled, store sealed jars in a cool, dark place. With your ravioli ready, you'll have meals on hand when you need them most. Stick around to discover more handy tips and techniques!
Key Takeaways
- Use fresh or frozen uncooked ravioli and a flavorful broth or sauce for optimal taste and preservation during canning.
- Ensure a pressure canner reaches 240°F (116°C) to safely process low-acid foods like ravioli.
- Sterilize jars and lids thoroughly to prevent spoilage; inspect for cracks before use.
- Store sealed jars in a cool, dark place and label with date and contents for easy access.
- Regularly check sealed jars for spoilage after canning to ensure food safety during emergencies.
Understanding the Canning Process
Understanding the canning process is essential for safely preserving ravioli and other low-acid foods. Canning involves placing food in airtight jars and using heat to create a sterile environment, which prevents spoilage and foodborne illnesses.
For ravioli, you'll need to use a pressure canner, as it guarantees the internal temperature reaches 240°F (116°C), essential for low-acid foods. Start with fresh or frozen uncooked ravioli and prepare a flavorful canning liquid, like broth or sauce.
Fill the jars with ravioli, maintaining a 1-inch headspace, and release air bubbles. Properly process the jars for the recommended time to guarantee safety.
Necessary Equipment for Canning
When you're ready to can ravioli, having the right equipment is vital for success.
You'll need sturdy canning jars and fresh lids to guarantee a proper seal. A pressure canner is essential for safely processing low-acid foods like ravioli.
Here's a quick list of what you should gather:
- Canning Jars: Use pint or quart-sized jars, making sure they're free from cracks.
- Pressure Canner: This maintains the necessary temperature to avoid spoilage.
- Jar Lifter: Important for safely handling hot jars right out of the canner.
With these tools in hand, you're set to start the canning process efficiently and safely, making sure your ravioli is preserved for future meals.
Ensuring Safety During Canning
Safety is always a top priority during the canning process. To prevent foodborne illness, always use tested recipes from reliable sources.
When working with low-acid foods like ravioli, make sure you use a pressure canner to reach the necessary temperature for safe preservation. Inspect your jars and lids for any cracks or imperfections before starting; faulty equipment can lead to spoilage.
Utilize a jar lifter to handle hot jars, minimizing the risk of burns. Keep your workspace clean and organized to avoid contamination.
Regularly check the pressure during processing, and if it drops, restart the timing. Finally, inspect sealed jars after cooling for any signs of spoilage, such as bulging lids or off odors.
Sterilization of Jars and Lids
To guarantee your canning process is successful, proper sterilization of jars and lids is essential. Start by washing your jars in hot, soapy water, rinsing thoroughly.
Then, immerse the jars in a boiling-water canner for at least 10 minutes to eliminate any contaminants. For the lids, soak them in hot water (not boiling) to soften the sealing compound, assuring a tight seal.
Here's what you need to remember:
- Use clean, undamaged jars to prevent spoilage.
- Boil jars for 10 minutes to assure sterilization.
- Soak lids in hot water to enhance sealing effectiveness.
Proper Sealing Techniques
Proper sealing techniques are essential for guaranteeing the longevity and safety of your canned ravioli. Start by wiping the rims of your jars with a clean, damp cloth to remove any food particles. This step prevents contamination and guarantees a tight seal.
Next, use a magnetic wand to place sterilized lids onto each jar, followed by screwing on the bands until they're fingertip tight. Be careful not to overtighten, as this can interfere with the sealing process.
Once filled and sealed, process your jars immediately in a pressure canner according to your recipe instructions. Proper sealing keeps your ravioli safe and flavorful for years, so take the time to do it right!
Cooling and Storing Canned Ravioli
After processing your jars, let them cool down completely on a wire rack or a clean dishtowel for 12 to 24 hours.
Once cooled, check the seals by pressing down in the center of each lid; if it pops back, your seal is good.
To guarantee your canned ravioli stays fresh, follow these storage tips:
- Store sealed jars in a cool, dark place (50°F to 70°F).
- Keep jars away from direct sunlight to prevent spoilage.
- Label each jar with the date and contents for easy reference.
Creative Cooking Ideas
Canned ravioli opens up a world of culinary creativity that you can easily explore in your kitchen. You can transform this convenient staple into a variety of delicious dishes.
Try making a hearty casserole by layering ravioli with marinara sauce, cheese, and your favorite vegetables. For a unique twist, stuff bell peppers with ravioli and bake them with a sprinkle of cheese on top.
If you're craving soup, combine canned ravioli with broth, fresh herbs, and vegetables for a quick meal. Elevate your dish by adding gourmet toppings like freshly grated Parmesan or a drizzle of pesto.
With a bit of imagination, your canned ravioli can shine in countless delightful ways!
Frequently Asked Questions
How Long Can Canned Ravioli Be Stored Safely?
Canned ravioli can safely be stored for 1 to 2 years if kept in a cool, dark place. Check seals regularly and discard any jars with bulging lids or off odors to guarantee safety.
Can I Reuse Canning Lids for Sealing?
You can't reuse canning lids for sealing. They're designed for one-time use to guarantee a proper seal. Always use new lids to maintain food safety and quality in your canning process.
What Are the Signs of Spoiled Canned Ravioli?
You might think canned ravioli lasts forever, but look for bulging lids, off odors, or unusual colors. If you notice any of these signs, discard the jars to guarantee your safety. Always check before consuming!
Can I Can Homemade Ravioli Instead of Store-Bought?
Yes, you can homemade ravioli! Just make certain they're fresh and uncooked for the best texture. Follow proper canning techniques, using a pressure canner to guarantee safety and prevent spoilage. Enjoy your delicious creations!
Is It Safe to Can Ravioli With Meat Fillings?
Yes, it's safe to can ravioli with meat fillings if you use a pressure canner. Make certain you follow tested recipes and proper processing times to avoid foodborne illnesses and guarantee safe preservation.
Conclusion
By mastering the art of canning ravioli, you're not just storing food; you're crafting a safety net for your future. Like a treasure chest brimming with culinary delights, your pantry will become a source of comfort and nourishment in challenging times. With the right techniques and a bit of practice, you'll enjoy the satisfaction of having delicious, homemade meals at your fingertips. So roll up your sleeves, get started, and savor the rewards of your efforts!
-
Survivalism4 months ago
Meal Preppers Near Me: Find Local Services and Tips!
-
Survivalism4 months ago
Preppers Pack Crossword: Test Your Knowledge of Survival Gear!
-
Survivalism4 months ago
Inside the Secret World of Doomsday Preppers: Are You Ready?
-
Survivalism4 months ago
AI Doomsday Scenario: Understanding the Potential Risks
-
Vetted4 months ago
15 Best Satellite Phones for Preppers: Stay Connected Anywhere, Anytime
-
Survivalism3 months ago
Preppers List of Items: Essential Gear for Every Survivalist!
-
Survivalism4 months ago
Mastering Hurricane Preparedness: Your Essential Guide
-
Vetted3 months ago
15 Essential Survival Gear Items You Need to Stay Prepared in the Wild