Survivalism
Purifying Water: The Life-Saving Hacks Everyone Should Learn
Knowing how to purify water can save your life, but which methods are truly effective when it matters most? Discover the answers inside.
Purifying water is an essential skill that can keep you safe from harmful pathogens and toxins. You can start by boiling water, which effectively kills most germs, making it ideal during emergencies. Chemical treatments like chlorination provide quick purification, while advanced methods like UV purification and reverse osmosis offer high-level filtration. Using mechanical and adsorptive filters can enhance taste and remove larger impurities. Each method has its strengths and weaknesses, so knowing when to use them is key. Discovering the best techniques can empower you with the knowledge to guarantee safe drinking water anytime.
Key Takeaways
- Boil water for at least one minute to kill most pathogens; extend boiling time at higher altitudes for safety.
- Use chlorine treatment to quickly eliminate bacteria and viruses; monitor residual chlorine levels to prevent regrowth.
- Implement UV purification to effectively kill up to 99.99% of germs without harmful chemical residues; pre-treat for turbidity.
- Consider reverse osmosis for high purity levels, removing salts and microorganisms, but be aware of potential wastewater production.
- Combine multiple methods, like filtration and chemical treatments, for comprehensive water purification and enhanced safety.
Importance of Water Purification
In today's world, the importance of water purification can't be overstated. Safe drinking water is essential for your overall health and well-being. By removing harmful bacteria, viruses, parasites, and fungi, water purification helps prevent diseases like diarrhea, cholera, and typhoid. It also eliminates carcinogenic chemicals, reducing your risk of serious health issues. You'll feel more at ease knowing that you're not exposed to contaminants like chlorine, which can cause irritation and breathing difficulties.
Moreover, water purification protects against lead poisoning, a serious concern that can lead to learning disorders in children. This is especially vital for vulnerable populations. In fact, 52% of filtration owners trust tap water at home, highlighting the need for effective purification solutions.
On a broader scale, water purification plays a significant role in environmental conservation. It reduces reliance on single-use plastic bottles, which take centuries to decompose and pollute our planet. By making tap water safe, you can help minimize waste and promote sustainable practices.
With a growing global need for clean water—2.1 billion people lack safe drinking water—your choice to purify can make a significant impact. Embracing water purification isn't just about personal health; it's a step towards a healthier planet.
Boiling: A Simple Solution
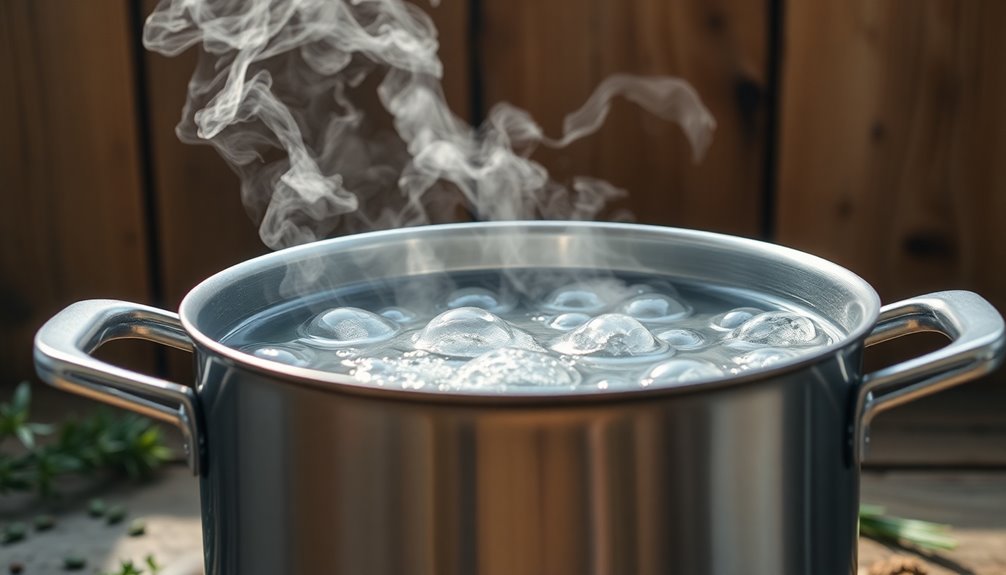
Boiling water is one of the simplest and most effective methods for purifying your drinking supply. By bringing water to a rolling boil, you can kill most bacteria, viruses, and parasites, making it essential in emergencies or remote areas where clean water is scarce. Just remember, at higher altitudes, you'll need to extend the boiling time to guarantee all pathogens are eliminated. Boil your water until you see the first big bubbles for maximum safety.
However, boiling has its limitations. It won't remove chemical pollutants, heavy metals, or toxins like lead, mercury, and pesticides. In fact, boiling can concentrate these contaminants, potentially making the water more hazardous. Physical impurities such as dirt or sediment also remain, and the taste may even suffer as dissolved oxygen decreases. Additionally, boiling requires time and energy, which can make it less sustainable in the long run. It might reduce your water supply due to evaporation, and handling hot water poses burn risks. While boiling is effective for immediate safety, be aware of its drawbacks and consider alternative purification methods for thorough water treatment. Moreover, to ensure the highest level of safety, it is crucial to integrate multiple purification methods, as comprehensive systems can address the limitations of boiling.
Effective Filtration Techniques
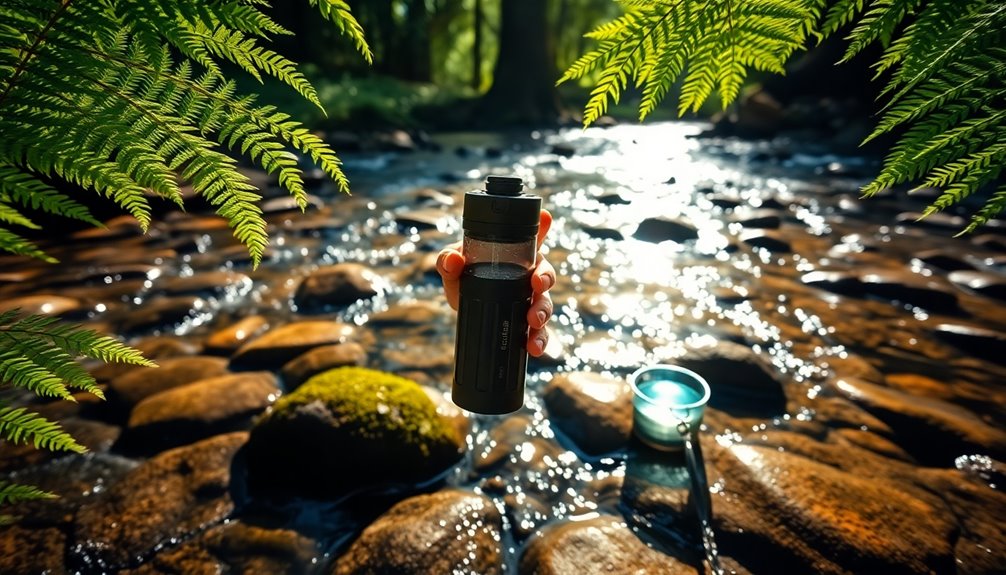
Effective filtration techniques can greatly improve the quality of your drinking water by removing harmful contaminants. One powerful method is membrane filtration, which uses high pressure to push water through membranes with tiny pores. This approach effectively filters out bacteria, viruses, and suspended solids, with ultrafiltration membranes capable of capturing particles as small as 0.01 microns. Membrane filtration is ideal for industries requiring contaminant-free water, such as beverage production.
Another effective technique is adsorptive media filtration, which employs materials like activated carbon to trap contaminants. This method excels at removing chlorine and volatile organic compounds (VOCs), enhancing the taste and odor of your water. Just remember, activated carbon filters need regular replacement due to their limited lifespan.
You can also explore physical filtration methods, such as rapid and slow sand filtration. Rapid sand filtration combines sand and activated carbon to eliminate suspended particles, while slow sand filtration utilizes biological processes for effective water treatment. Mechanical filters play a role too, removing dirt and sediment.
The Power of Distillation
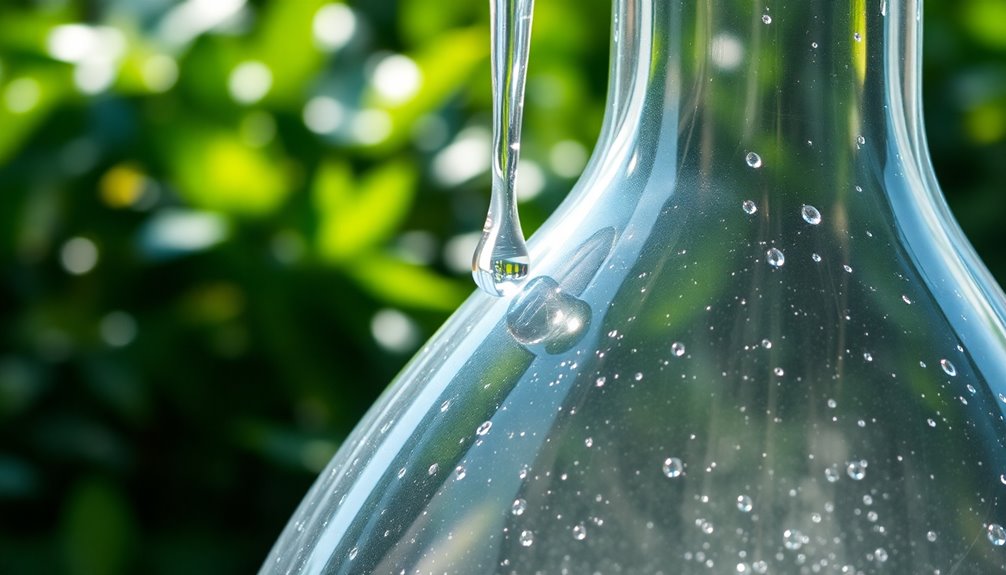
Distillation stands out as one of the most efficient methods for purifying water, leveraging the natural process of evaporation to eliminate contaminants. By heating contaminated water, you generate steam, leaving behind inorganic compounds and large non-volatile organic molecules. As the steam cools and condenses, it transforms back into liquid water, effectively removing many impurities and killing harmful microorganisms. It is essential to ensure proper condenser water flow for optimal vapor trapping during this process.
Here's a quick overview of distillation:
Component | Function | Notes |
---|---|---|
Boiling Chamber | Heats water to create steam | Temperature control is essential for efficiency |
Condensing Coils | Cools steam to form purified water | Must be kept clean for maximum performance |
Storage Tank | Holds the distilled water | Regular maintenance is critical |
While distillation can remove up to 99.5% of impurities, it's significant to highlight that some volatile organic compounds may vaporize and re-contaminate the purified water. Regular maintenance, including cleaning and flushing out pollutants, is crucial to keep your distillation unit running smoothly. Overall, distillation is a powerful tool in your water purification arsenal.
Chlorination for Quick Purification
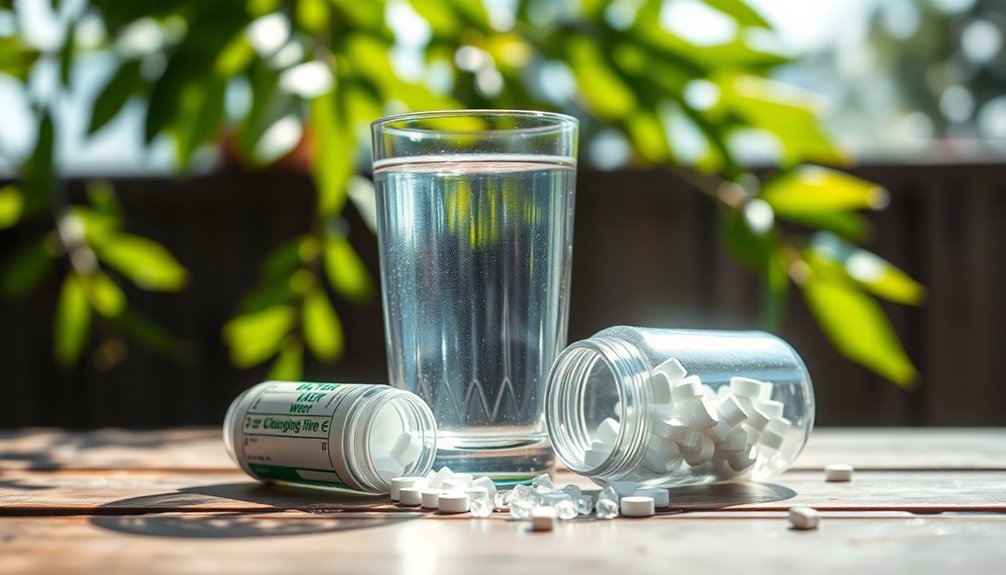
When you need a fast and effective solution for water purification, chlorination is a reliable method that quickly eliminates pathogens. You can choose from different types, including batch disinfection for emergencies or simple chlorination, which maintains a low level of free chlorine to guarantee safety. For rapid results, super-chlorination offers higher concentrations, drastically cutting down the necessary contact time.
Chlorine comes in various forms. You might use chlorine gas, sodium hypochlorite, or calcium hypochlorite, depending on your situation. If you're dealing with persistent bacteria or slime, shock chlorination can effectively kill those unwanted organisms. It's important to maintain a residual chlorine level to prevent pathogen regrowth, making sure your water stays safe long after treatment. This effectiveness is influenced by factors such as pH, temperature, and chlorine level, which must be carefully monitored for optimal results.
However, while chlorination is cost-effective and simple, be aware of potential by-products like trihalomethanes, which can be harmful. Regular monitoring of chlorine levels is essential for successful purification. Overall, chlorination not only improves water quality but also provides peace of mind in emergency situations, making it a significant skill for anyone looking to guarantee safe drinking water.
UV Purification: A Modern Approach
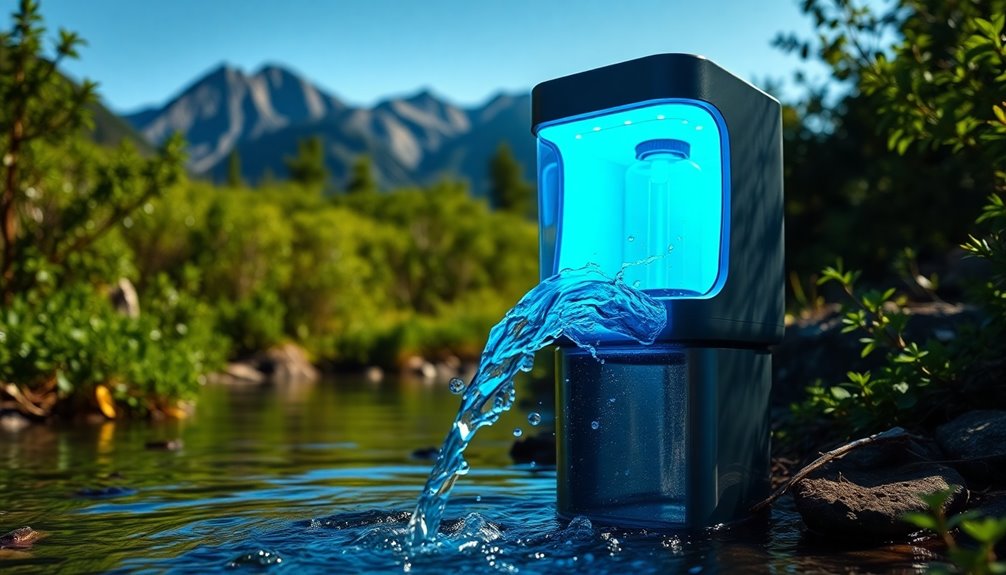
Harnessing the power of ultraviolet (UV) light, UV purification offers a cutting-edge solution for disinfecting water without the use of chemicals. This method employs UV light at a wavelength of 254 nm to penetrate microorganisms' cells, altering their DNA and preventing reproduction. The process is straightforward: pre-treated water flows into a stainless steel chamber, passes around a UV lamp, and exits as clean, treated water.
The effectiveness is remarkable, killing up to 99% of germs in under 10 seconds. Plus, UV purification is environmentally friendly, leaving no harmful chemical residues and maintaining the water's taste, odor, and pH. Additionally, it is important to note that UV purification systems are designed to eliminate 99.99% of harmful microorganisms, ensuring a high level of safety in drinking water.
However, you should be aware that UV systems don't remove particles or contaminants like heavy metals or pesticides. Pre-treatment is often necessary to eliminate turbidity and organic matter that could interfere with UV light. Installation is simple, whether you choose a point-of-use or point-of-entry system, and with no moving parts, maintenance is minimal. Just remember to replace the UV lamp annually for ongoing effectiveness. With these advantages, UV purification is a smart choice for ensuring safe drinking water.
Reverse Osmosis Explained
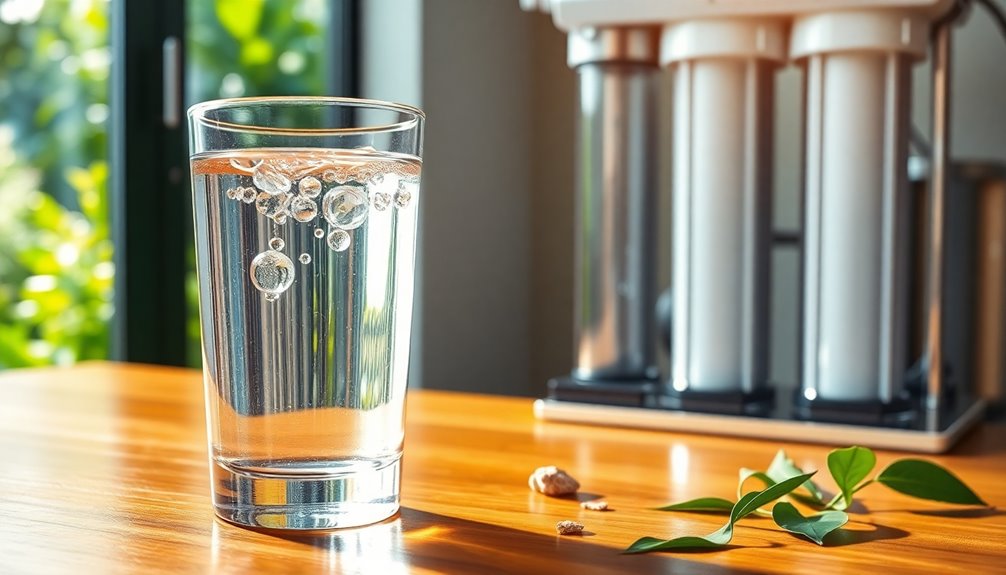
How does reverse osmosis deliver such pure water? This advanced purification process uses a semi-permeable membrane to filter out unwanted molecules and large particles. By forcing water through this membrane under high pressure, it effectively removes contaminants, achieving purity levels that can reach up to 99%.
In reverse osmosis, water molecules pass through the membrane while larger impurities like salts, minerals, and microorganisms get left behind. The system typically involves multiple stages, including pre-filters to catch larger particles, the RO membrane itself, and post-filters to polish the water. The result is purified water, known as permeate, while the concentrated contaminants are discharged. Additionally, the process requires the application of excess pressure to overcome osmotic pressure, ensuring effective separation of solutes.
This method isn't just effective; it's versatile too. You can use reverse osmosis for desalinating seawater, treating liquid wastes, or ensuring safe drinking water. Plus, RO systems are compact, making them ideal for home use. With regular maintenance, including periodic sterilization, you can keep your system contamination-free. Ultimately, reverse osmosis brings you water quality that approaches that of distilled water, ensuring you have safe, clean water to drink.
Frequently Asked Questions
How Can I Tell if My Water Is Contaminated?
To tell if your water's contaminated, look for unusual colors like brown or green, or a cloudy appearance. Notice any unpleasant odors, such as sewage or rotten eggs, and check for a metallic taste. Watch for floating debris or excessive algae blooms, which may indicate nutrient overload. Pay attention to any suspicious discharges and infrastructure issues, like low water pressure or visible sediment. If you spot these signs, it's best to get your water tested.
What Is the Shelf Life of Water Purification Tablets?
The shelf life of water purification tablets varies based on their type. Chlorine-based and NaDCC tablets last about 4-5 years unopened, while iodine tablets can last indefinitely if stored properly. Once opened, most tablets, including chlorine and NaDCC, remain effective for a year. Silver tablets can last up to 10 years unopened. Always check expiration dates and store them in a cool, dry place to maintain their effectiveness.
Can I Use Dish Soap to Purify Water?
No, you shouldn't use dish soap to purify water. It's not designed for that purpose and can actually introduce harmful chemicals, leaving behind residue that contaminates the water further. Dish soap won't kill bacteria or viruses either. Instead, focus on effective methods like boiling, chemical disinfection, or using UV light purifiers. These methods guarantee safe drinking water without the risks associated with using dish soap. Always prioritize safe practices for purification.
Is Rainwater Safe to Drink Without Purification?
Rainwater isn't safe to drink without purification. It can contain harmful contaminants like bacteria, viruses, and toxic chemicals from the atmosphere. Even if it looks clear, it may still carry pollutants that can cause illness. You should always treat rainwater before consumption. Consider filtering, disinfecting, and regularly testing the water to guarantee it's safe. Taking these precautions helps protect your health and ensures you're drinking clean water.
What Are the Signs of Waterborne Illnesses?
Waterborne illnesses can feel like a hidden storm, brewing silently before it strikes. If you experience symptoms like diarrhea, nausea, or abdominal pain, it's a sign you might be dealing with contaminated water. You could also notice fatigue, fever, or skin rashes. In severe cases, watch for profuse diarrhea or respiratory issues, which could indicate a more serious infection. Stay vigilant; these symptoms signal your body's distress from harmful pathogens.
Conclusion
In a world where clean water can feel like a treasure buried deep, mastering these purification techniques is your key to survival. By boiling, filtering, or harnessing the sun's rays, you're not just quenching your thirst; you're safeguarding your health. Picture yourself as a modern-day alchemist, transforming murky water into life-giving elixirs. Embrace these hacks, and you'll navigate the waters of uncertainty with confidence, ensuring you and your loved ones always have access to pure, safe water.
Survivalism
Survival at Home: Hacks to Prepare for Any Emergency
Knowing how to prepare your home for emergencies can save lives, but are you ready to uncover essential hacks that could make all the difference?
To guarantee your family's safety during emergencies, start by evaluating potential hazards around your home, like fire risks and fall hazards. Assemble an emergency kit stocked with non-perishable food, water, and a first aid kit. Install smoke detectors on every level and keep fire extinguishers accessible. Create a clear evacuation plan detailing escape routes and a meeting spot outside. Don't forget to address any special needs in your household, from medications to pet supplies. By following these hacks, you'll boost your preparedness and confidence. With a bit more insight, you can strengthen your emergency strategies even further.
Key Takeaways
- Create a well-stocked emergency kit with non-perishable food, water, first aid supplies, and essential medications tailored to your household's needs.
- Install smoke detectors and fire extinguishers in key areas, regularly test them, and maintain a written fire escape plan with marked exit routes.
- Ensure home safety by securing tall furniture, using non-slip mats, and keeping flammable items away from heat sources to prevent accidents.
- Establish clear communication and evacuation plans, designating safe meeting spots and practicing regularly to ensure all family members are prepared.
- Regularly review and update emergency supplies and plans to adapt to changing family needs and ensure effective response during emergencies.
Assessing Potential Hazards
When it comes to keeping your home safe, evaluating potential hazards is crucial. Start by addressing fire hazards, which claim over 3,000 lives each year. Install smoke detectors in the kitchen, bedrooms, and basement, testing them monthly and replacing batteries twice a year. Keep flammable items at least three feet away from heat sources, and never leave cooking unattended. If a pan catches fire, use a damp tea towel, not water, to smother the flames.
Next, focus on fall and tripping hazards. Confirm staircases are well-lit and clutter-free. Install safety gates to keep young children safe. Use non-slip mats in bathrooms and secure furniture to walls to prevent tip-overs. Elderly individuals are particularly vulnerable to serious complications from falls, making it essential to assess and mitigate these risks. Regular screenings for early detection of potential health issues can also help prevent accidents related to chronic conditions.
Don't overlook poisoning and suffocation hazards. Install carbon monoxide detectors near sleeping areas and store chemicals out of children's reach in clearly labeled containers. Remove choking hazards, such as small toys and cords, from accessible areas.
Assembling Your Emergency Kit
As you gather your emergency kit, start with a checklist of essential supplies to guarantee you're prepared for any situation. Think about any special considerations, like medical needs and personal preferences, that may affect what you include. Having a well-rounded kit can make all the difference when an emergency strikes. Regularly updating your kit ensures that you're equipped with relevant supplies that can effectively address any crisis.
Essential Supplies Checklist
Preparing for emergencies requires careful planning and the right supplies. An essential supplies checklist will help you stay organized and ready for anything life throws your way. Here's a quick rundown of must-have items for your emergency kit:
- Food and Water
- Stock at least a several-day supply of non-perishable food and one gallon of water per person per day. Don't forget a manual can opener! Additionally, having an air purifier can help maintain indoor air quality during emergencies by filtering out pollutants.
- First Aid and Medication
- Keep a basic first aid kit handy, along with prescription medications for at least a week. Include non-prescription meds like pain relievers, hand sanitizer, and disinfecting wipes.
- Communication and Lighting
- A battery-powered or hand-crank radio is vital for updates, so grab one if you can. Flashlights, extra batteries, and matches in a waterproof container are important for maintaining visibility and safety. Additionally, consider including a basic first aid kit that can address common injuries and health issues in emergencies.
Special Considerations Needed
Considering your unique household and environment is essential for assembling an effective emergency kit. Assess your living situation and the specific disasters that could occur in your area. Include items based on dietary preferences and verify you can replace perishables before they expire. Additionally, remember that having a survival kit enhances individual and community resilience during emergencies. Incorporating multi-functional gear can also help maximize space and ensure you have versatile tools at your disposal. It's important to include financial considerations in your emergency planning to ensure you can access essential resources when needed. Additionally, having a well-structured retirement savings plan can provide peace of mind during uncertain times.
Here's a quick table to help you visualize some crucial considerations:
Consideration | Examples | Notes |
---|---|---|
Family Needs | Baby formula, pet food | Don't forget diapers! |
Health Supplies | Prescription meds, first-aid kit | Stock at least a week's worth. |
Unique Challenges | Disability aids, hygiene items | Tailor to individual needs. |
Food & Water | Nutrient-dense bars, extra water | Consider shelf-life! |
Accessibility | Portable kits, multiple locations | Everyone should know where! |
Be certain to store items in airtight bags and easy-to-carry containers. Regularly check and update your supplies as family needs change. By addressing these special considerations, you'll create a kit that truly meets your household's needs during emergencies.
Home Safety Precautions
Home safety requires vigilance and proactive measures to protect your family from potential hazards. Start by guaranteeing your home is equipped with essential safety devices. Regular testing and maintenance will keep your family safe and informed.
Here are three key safety precautions to implement:
- Fire Safety: Install smoke alarms on every level and outside sleeping areas. Test them monthly and change the batteries twice a year. Keep fire extinguishers on every floor, especially in the kitchen, and practice a fire escape plan with your family. Additionally, ensure that your family is familiar with the escape planning process to improve preparedness. Regularly check the air quality indicators in your home to detect any potential hazards. Consider using air purifiers to reduce harmful pollutants and improve overall air quality.
- Electrical Safety: Avoid overloading outlets and use tamper-resistant receptacles. Install ground fault circuit interrupters (GFCIs) in wet areas to reduce the risk of electrical shock. Make sure to label circuit breakers for quick access during emergencies.
- General Safety: Install carbon monoxide detectors on every floor and keep stairways free of clutter. Secure tall furniture and use safety latches on cabinets to keep small children safe. Guarantee you set your water heater to no higher than 125º Fahrenheit to prevent scalding. Regular maintenance of your appliances can also prevent unexpected emergencies.
Effective Communication Plans
Effective communication plans are crucial in emergencies, guaranteeing everyone knows their roles and how to respond. You need to identify your organization's structure and the involved stakeholders, tailoring your strategies for different groups like employees, management, and external parties. This helps guarantee everyone receives the right information in a crisis. Additionally, investing in emergency mass notification software can enhance the speed and reliability of your communication efforts. Implementing a plan for positive reinforcement can also foster a collaborative atmosphere during emergencies. One way to ensure clarity is by utilizing essential survival skills to inform your communication strategies. Furthermore, establishing a home security system can provide peace of mind and enhance overall safety during emergencies.
Here's a simple overview of your communication plan:
Role | Responsibilities | Contact Method |
---|---|---|
Group Admin | Oversee communication flow | Email, Phone |
Emergency Responders | Implement safety measures | Text, Voice |
Information Officer | Disseminate critical updates | Social Media, Email |
Spokesperson | Serve as the primary communication voice | Press Releases, Interviews |
Assigning roles within your emergency communications team is crucial. Guarantee clear lines of communication between members and train them on their specific responsibilities. Develop and script precise messages tailored for various emergency scenarios. Finally, test your communication plan regularly to guarantee everyone can effectively perform their roles when it matters most.
Creating an Evacuation Strategy
In emergencies, having a well-thought-out evacuation strategy can make all the difference in guaranteeing safety. Start by identifying escape routes throughout your home. You should find two ways out of every room, including windows and doors, ensuring they're clear of obstacles and easy to open. Install emergency release devices on any security bars and consider escape ladders for upper levels. Regular practice ensures your family's safety during a fire emergency.
Next, create a written home fire escape plan. Draw a map that marks exit routes and smoke detector locations, and practice this plan regularly. Discuss it with everyone in your household to guarantee everyone understands their role.
Finally, designate a safe meeting spot outside your home where everyone knows to gather after evacuating. This spot should be visible to emergency responders and a safe distance from the house. Teach your children the importance of not going back inside once they've left.
Here's a quick checklist to help you:
- Identify and clear escape routes in every room.
- Create and practice a written evacuation plan.
- Designate and teach the meeting spot to all household members.
Preparation is key to staying safe during emergencies!
Addressing Special Needs
When emergencies strike, addressing special needs within your family is essential for guaranteeing everyone's safety. Start by incorporating specific needs into your family preparedness plan. Document individual requirements, including medications, equipment, and communication methods. Keep a thorough list of emergency contacts and medical information handy.
As you assemble your disaster supply kit, include personal supplies tailored to each person's needs. Stock extra wheelchair batteries, oxygen, catheters, and any essentials. Use Braille labels or large print for emergency supplies to assist those with visual impairments. For family members who are deaf or hard of hearing, make certain you have a weather radio with a text display and flashing alert feature. It's important to remember that additional lead time may be required for effective preparation.
Establish a support network of family, friends, and neighbors who can help during a disaster. Make sure they're aware of individual needs and capabilities. Register with local emergency services and disability organizations for added support. Inform your network about where emergency supplies are stored and provide access keys if necessary.
Lastly, prepare for potential power outages by finding alternative charging methods for medical equipment and keeping backup power supplies on hand. Always have a manual wheelchair available as a backup to power wheelchairs.
Frequently Asked Questions
How Often Should I Update My Emergency Plan?
You should update your emergency plan at least once a year to keep it relevant. However, if you make any changes to your home, like renovations or new appliances, it's vital to review it sooner. Additionally, after any drills or real emergencies, gather feedback and refine your plan. Regularly check that contact details and evacuation procedures are accurate, ensuring everyone knows what to do when an emergency strikes.
What Is the Best Way to Store Water Long-Term?
To store water long-term, use food-grade plastic, glass, or stainless steel containers, avoiding those previously used for toxic substances. Keep your containers in a cool, dark place, away from sunlight and chemicals. Treat tap water with chlorine for safety, and rotate your supply every six months to guarantee freshness. Label each container clearly as drinking water, and maintain proper sealing to prevent contamination. Regular checks will help keep your water safe and ready.
How Can I Prepare for Power Outages?
When power outages strike, you want to be as ready as a superhero! Start by keeping torches and spare batteries handy, ditching those dangerous candles. Charge your mobile devices and have a battery-operated radio for updates. Stock up on non-perishable food and at least a gallon of water per person daily. Don't forget to check your carbon monoxide detectors and have a first aid kit ready; you never know when you'll need it!
What Should I Include for Pets in My Emergency Kit?
When preparing your emergency kit for pets, start by including at least one to two weeks' worth of food and water. Don't forget collapsible bowls and a full supply of medications, along with instructions. Add a first aid kit, vaccination records, and recent photos of your pet. Keep a leash, collar with ID, and comfort items like blankets or toys handy. Finally, gather emergency contacts and vet information to stay organized.
How Do I Teach Children About Emergency Preparedness?
Imagine a brave knight facing a fierce dragon; your kids can be those knights! Teach them about emergency preparedness by turning lessons into adventures. Use stories to explain different emergencies, and create fun drills to practice. Equip them with knowledge about calling 911 and identifying safe spaces. Regularly review the plan, making it a family quest. By fostering confidence, they'll feel empowered to navigate any storm that comes their way.
Conclusion
By taking these steps, you're not just preparing for emergencies; you're gearing up to face any disaster like a superhero! With a well-thought-out plan, a stocked emergency kit, and a clear communication strategy, you can tackle whatever comes your way. Remember, even the smallest actions can make a world of difference when chaos strikes. So, roll up your sleeves, stay proactive, and you'll be ready to keep your home safe and sound in any situation!
Survivalism
Ultimate Guide to Mosquito Repellents Revealed
The ultimate guide to mosquito repellents reveals essential tips and product recommendations that could change your outdoor experience forever. Don’t miss out!
If you're looking for the ultimate guide to mosquito repellents, you've come to the right place. You'll find various options available, from the gold standard DEET to effective alternatives like Picaridin and Oil of Lemon Eucalyptus. Popular products cater to different preferences, whether you want a non-greasy feel or a pleasant scent. Remember to apply these repellents correctly and choose those suitable for children if needed. To enhance your outdoor experience and keep those pesky mosquitoes at bay, you can explore effective prevention strategies and product recommendations that keep you safe and comfortable.
Key Takeaways
- DEET remains the gold standard for mosquito protection, effective at concentrations of 20-30%.
- Picaridin and IR3535 offer similar efficacy to DEET with less irritation and are suitable for eco-conscious users.
- Oil of Lemon Eucalyptus is a natural alternative comparable to 30% DEET, but unsuitable for children under three.
- Effective prevention strategies include eliminating standing water, wearing protective clothing, and applying EPA-registered repellents as directed.
- Choose non-greasy, quick-drying options for comfort, and prioritize natural ingredients for safer, eco-friendly protection.
Overview of Mosquito Repellents
When it comes to protecting yourself from mosquitoes, understanding the various repellents available can make a big difference in your outdoor experience.
You'll find a range of options, each with its strengths. DEET is often considered the gold standard, providing effective protection at a 20-30% concentration.
If you prefer something less irritating, Picaridin offers similar efficacy with a pleasant scent.
For those seeking natural alternatives, Oil of Lemon Eucalyptus and IR3535 also deliver results, with OLE not recommended for young children.
Popular products like Cutter Backwoods and Coleman SkinSmart showcase these ingredients, catering to different preferences.
Active Ingredients Explained
Mosquito repellents contain various active ingredients, each with unique properties and effectiveness against these pesky insects.
DEET is the gold standard, providing reliable protection at concentrations of 20-30%. If you prefer less irritation, consider Picaridin, which has a pleasant scent and works well at 20%.
For a natural option, Oil of Lemon Eucalyptus (OLE) performs comparably to 30% DEET but isn't suitable for kids under three.
IR3535 is another effective choice for both mosquitoes and ticks at a 20% concentration with low toxicity.
Finally, 2-undecanone offers a promising natural alternative for eco-conscious users.
Choosing the right ingredient for your needs can enhance your protection while keeping you comfortable outdoors.
Top Mosquito Repellent Products
Looking for the best mosquito repellent products can feel overwhelming with so many options available. To simplify your search, consider the Cutter Backwoods Insect Repellent, which contains 25% DEET for effective protection, though it has a stronger scent.
If you prefer a lighter option, try Grand Tongo Town and Jungle Protection, featuring Picaridin for a non-greasy feel and pleasant aroma. Coleman SkinSmart offers 30% IR3535, a quick-drying, DEET-free choice.
For minimal scent and easy application, Proven Insect Repellent Spray with 20% Picaridin is a great pick. Natural alternatives like Sawyer Picaridin and OFF! Botanicals are also worth exploring if you seek eco-friendly options.
Choose the product that best fits your needs and enjoy your outdoor activities bite-free!
Consumer Preferences and Trends
How do consumer preferences shape the market for mosquito repellents?
You want products that are non-greasy and quick-drying, prioritizing comfort alongside efficacy. Natural ingredients are increasingly appealing, as you seek safer alternatives to harsh chemicals. Scent-free options also enhance your outdoor experience, making it more enjoyable.
With rising health and environmental awareness, eco-friendly products attract your attention, and compact packaging is becoming a must-have. Price sensitivity drives you to explore budget-friendly natural choices.
Brands are responding by developing user-friendly formulations that align with these preferences, ensuring you can enjoy the outdoors without the annoyance of mosquitoes.
Testing Methodology and Results
When choosing a mosquito repellent, understanding the testing methodology behind product effectiveness is essential. The testing followed EPA guidelines, applying a standard dose to a measured skin area and exposing products to 200 disease-free mosquitoes. The evaluation included spray quality, scent, feel, and application difficulty.
Here's a quick overview of the effectiveness ratings:
Active Ingredient | Effectiveness Rating |
---|---|
DEET (25-30%) | 75% recommended |
Picaridin (20%) | Mixed results |
Oil of Lemon Eucalyptus | Comparable to DEET |
IR3535 (20%) | High performance |
2-undecanone | Promising results |
Keep these factors in mind when selecting a repellent to guarantee you're getting the best protection against mosquitoes.
Safe Application Guidelines
Applying mosquito repellents safely is essential for ensuring effective protection without unwanted side effects.
Start by applying repellents in well-ventilated areas, keeping them away from your eyes and mouth. Follow the instructions on the label for reapplication, especially after swimming or sweating, and always wash your hands after use.
Store repellents out of reach of children to prevent accidental ingestion. For infants under six months, avoid direct application; instead, opt for mosquito netting.
If you're applying repellent on children aged 2-12, stick to Picaridin (10-20%), DEET (7-10%), or IR3535 (20%). Pregnant women should consider using Picaridin (20%) or DEET (20-30%) to protect against Zika virus.
Stay safe while keeping those pesky mosquitoes at bay!
Effective Prevention Strategies
Effective prevention strategies are essential for keeping mosquitoes at bay and reducing your risk of bites. By combining several approaches, you can create a more effective barrier against these pests.
Here are some strategies you should consider:
- Eliminate standing water around your home to disrupt mosquito breeding.
- Wear light-colored, long-sleeve clothing to make yourself less attractive to mosquitoes.
- Use mosquito nets and fans in outdoor areas to create barriers and airflow.
- Apply EPA-registered repellents as directed to enhance personal protection.
- Stay informed about local mosquito activity and follow CDC recommendations.
Frequently Asked Questions
Can I Make Homemade Mosquito Repellent Effectively?
Yes, you can make effective homemade mosquito repellent using natural ingredients like essential oils. Combine oils like citronella or eucalyptus with a carrier like water or vinegar, and apply it regularly for ideal protection.
How Long Do Mosquito Repellents Typically Last After Application?
Most mosquito repellents last around two to six hours after application, depending on the active ingredient. It is crucial to reapply as needed, especially after swimming or sweating, to maintain effective protection during outdoor activities.
Are There Any Side Effects of Using Mosquito Repellents?
Yes, using mosquito repellents can cause side effects like skin irritation, rashes, or allergic reactions. You should always test a small area first and follow application guidelines to minimize risks and guarantee safety.
What Should I Do if I Get Bitten Despite Using Repellent?
Getting bitten despite using repellent feels like a rainstorm after packing an umbrella. First, wash the area with soap and water, then apply a soothing cream or antihistamine to reduce itching and swelling effectively.
Do Mosquito Repellents Expire, and How Should I Store Them?
Yes, mosquito repellents can expire, typically after three years. Store them in a cool, dry place away from sunlight. Always check the expiration date before use to guarantee effectiveness and safety.
Conclusion
As you gear up for your outdoor escapades, remember that choosing the right mosquito repellent is like picking the perfect shield against an army of pesky foes. With the knowledge from this guide, you're equipped to fend off those relentless biters and embrace nature's beauty. So, whether you opt for a classic DEET formula or a natural alternative, you're ready to commence your adventures—bite-free and carefree, just like a summer's day should be.
Survivalism
Top Survival Tinders for Fire Success
Get ready to discover essential survival tinders that ignite quickly; knowing them could be the key to your fire-starting success!
When you're out in the wild, choosing the right survival tinder is essential. Natural options like fatwood, dry leaves, and pine needles ignite quickly and burn hot. You can also use synthetic tinders like cotton balls soaked in petroleum jelly or compact dryer lint. For convenience, fire starter sticks and magnesium shavings work wonders too. Don't forget to pack waterproof storage for your supplies. Knowing how to gather and effectively ignite your tinder can make all the difference. Stick around to discover more tips and products that can enhance your fire-starting success!
Key Takeaways
- Fatwood is an excellent natural tinder, rich in resin, igniting easily and providing a hot burn for effective fire starting.
- Cotton balls soaked in petroleum jelly serve as a reliable synthetic option, igniting quickly and burning steadily for a prolonged period.
- Dry leaves and grasses are lightweight and abundant; when dry, they provide quick ignition, making them ideal for fire starting in the wild.
- Fire starter sticks offer convenience and ease of use, making them a practical choice for emergency kits and survival situations.
- Magnesium shavings are compact and reliable, generating hot sparks that help ignite various types of tinder in different conditions.
Importance of Survival Tinders
In the wild, having reliable survival tinders is essential for your safety and comfort. They can mean the difference between warmth and exposure, cooking and hunger, or even life and death.
Whether you choose natural or synthetic options, understanding their properties helps you ignite and sustain a fire effectively. Quality tinders provide quick ignition in adverse weather conditions, enhancing your readiness for any situation.
Proper storage is vital, so keep your tinders dry in waterproof bags or containers to prevent moisture damage.
Natural Tinder Options
When it comes to starting a fire in the wild, natural tinders offer a reliable and often accessible option.
Utilizing what nature provides can greatly enhance your chances of igniting a fire quickly. Here are three excellent natural tinder options to take into account:
- Fatwood: This resin-rich wood ignites easily and burns hot, making it perfect for fire-starting.
- Dry Leaves and Grass: Lightweight and abundant, they catch fire quickly when dry, providing an excellent initial blaze.
- Pine Needles: These not only dry out quickly but also contain oils that help them ignite with minimal effort.
Synthetic Tinder Choices
While natural tinders are fantastic, synthetic options can provide a reliable backup for fire-starting in challenging conditions.
Cotton balls soaked in petroleum jelly ignite quickly and burn steadily, making them a popular choice. Dryer lint is another handy option; it's lightweight and easy to pack.
Fire starter sticks and magnesium shavings offer convenience and can be easily stored in your emergency kit. Commercial fire starters like TinderQuik are designed to catch fire with minimal effort, ensuring success even in damp weather.
Just keep in mind that synthetic tinders may come with cost and storage considerations. By incorporating these synthetic tinders into your gear, you'll enhance your chances of igniting a successful fire when it matters most.
Recommended Fire Starting Products
Effective fire-starting products can make all the difference in survival situations.
Here are three highly recommended options to keep in your gear:
- TinderQuik ($13): This product ignites easily and burns for up to 60 seconds, boosting your fire-starting success.
- Steve Kaeser Fatwood Kit ($12): It includes natural fatwood and essential fire-starting tools, making it compact and versatile for any outdoor adventure.
- Black Beard Fire Starter Rope ($17): This weatherproof rope lasts up to 4.5 hours, perfect for challenging conditions.
Effective Fire Starting Techniques
To successfully start a fire, gather your materials—dry tinder, kindling, and larger fuel—before you strike a match.
Create a solid base using fire lay methods like the teepee or log cabin style to encourage airflow. Make sure your tinder's dry; shape it into a small nest to enhance ignition.
When you're ready, use a fire starter or matches to ignite the tinder. Once the tinder catches, gradually add kindling, allowing the fire to grow.
Regularly practicing these techniques will boost your confidence and improve your skills. Remember, the key is preparation and understanding how to maximize airflow and moisture control for effective fire starting.
With practice, you'll become proficient in igniting a fire under various conditions.
Safety and Preparedness Tips
Having the right techniques for starting a fire is only part of the equation; safety and preparedness are equally important.
To guarantee you're ready for any situation, keep these tips in mind:
- Always carry various types of tinder in your survival kit, including both natural and synthetic options.
- Store tinder in waterproof containers to avoid moisture damage; airtight options with desiccants are best for long-term preservation.
- Familiarize yourself with local fire regulations and practice fire-starting techniques in different weather conditions to enhance your skills.
Unconventional Tinder Sources
When you're in a survival situation, thinking outside the box can make all the difference in starting a fire. Unconventional tinders can be surprisingly effective when traditional methods fall short. Here's a quick reference table of some unique options:
Tinder Source | Description | Pros |
---|---|---|
Stale Bread | Dried out bread can catch fire quickly | Lightweight, easy to find |
Dried Fungus | Certain fungi ignite well | Natural, lightweight |
Tuna Can with Oil | Oil acts as an excellent fuel | Long-lasting flame |
Dryer Lint | Highly flammable, easy to collect | Compact, readily available |
Crayons | Wax burns slowly, providing extended heat | Multi-use, portable |
Experiment with these options to enhance your fire-starting success!
Frequently Asked Questions
How Do I Test the Effectiveness of Different Tinders?
To test the effectiveness of different tinders, gather various materials, prepare a controlled environment, and ignite each one under similar conditions. Observe ignition time, burn duration, and ease of use to compare results effectively.
Can I Use Wet Materials as Tinder in Emergencies?
In an emergency, think of wet materials as damp matches—struggling to ignite. You can use them, but to succeed, you'll need to dry them out or combine them with dry tinder for a better chance.
What Are the Best Storage Conditions for Tinders?
To store tinders effectively, keep them in a cool, dry place. Use waterproof containers to prevent moisture. Regularly check your supplies, ensuring everything remains dry and ready for use when you need it most.
How Long Do Different Tinders Typically Burn?
Like a fleeting flame, different tinders burn with varying intensity and duration. Natural tinders might last under five minutes, while synthetic options can extend beyond ten, each offering unique advantages in your survival toolkit.
Are There Any Tinders That Are Eco-Friendly?
Yes, you can use eco-friendly tinders like dry leaves, shredded bark, or cottonwood fluff. They're natural, biodegradable, and effective. Just make certain they're dry for better ignition, and you'll be all set for your fire-making needs.
Conclusion
In the wild, finding the right tinder can feel like discovering a hidden treasure chest; it's essential for your survival. Just like a treasure map leads you to gold, knowing your tinders guides you to warmth and safety. With the right knowledge and tools, you can spark a flame that brightens even the darkest nights. So, gear up with your favorite tinders, and remember: every fire you start is a step toward mastering the great outdoors.
-
Survivalism6 months ago
Meal Preppers Near Me: Find Local Services and Tips!
-
Survivalism6 months ago
Preppers Pack Crossword: Test Your Knowledge of Survival Gear!
-
Survivalism6 months ago
Inside the Secret World of Doomsday Preppers: Are You Ready?
-
Survivalism6 months ago
AI Doomsday Scenario: Understanding the Potential Risks
-
Vetted6 months ago
15 Best Satellite Phones for Preppers: Stay Connected Anywhere, Anytime
-
Vetted6 months ago
15 Best Geiger Counters for Preppers: Top Picks for Radiation Detection
-
Survivalism6 months ago
Preppers List of Items: Essential Gear for Every Survivalist!
-
Vetted5 months ago
15 Essential Survival Gear Items You Need to Stay Prepared in the Wild