
In just three minutes, you can create a life-saving shelter in the wild. First, choose a safe location on elevated ground, away from hazards and near water. Gather dry branches, leaves, and moss to construct a sturdy A-frame or lean-to. Secure the frame with timber hitch knots and add a waterproof roof for protection. Insulate the floor with thick layers of leaves to retain heat. Regularly check for stability and comfort, ensuring your shelter remains structurally sound. By following these steps, you can enhance your chances of survival, and soon you'll discover more essential tips for outdoor safety.
Key Takeaways
- Choose an elevated location for your shelter to avoid flooding and potential hazards from unstable terrain.
- Gather dry branches and leaves quickly for construction, focusing on fallen materials to maintain ecosystem balance.
- Construct a simple lean-to or A-frame shelter using strong branches, ensuring stability and waterproofing for protection against the elements.
- Insulate the shelter's floor with natural materials like leaves or grass to retain heat and create a comfortable interior.
- Always have a backup plan with multiple shelter locations and accessible emergency supplies for unforeseen circumstances.
Choosing the Right Location

When you're choosing the right location for your shelter, it's important to prioritize safety and practicality. Start by avoiding low-lying areas that could flood or collect water runoff. Stay clear of unstable hillsides, ravines, and anything with potential falling hazards like dead trees or loose branches. Keep an eye out for predator signs, such as tracks or scat, and steer clear of heavily trafficked animal paths.
Look for flat, slightly elevated ground to promote stability and keep cold air at bay. Be mindful of the prevalent wind direction; orient your shelter away from strong winds. Avoid stagnant water to minimize mosquito risks and consider natural elements like mountains that can produce cold breezes. Understanding the environmental factors in your chosen area will further enhance your shelter's effectiveness.
You'll want your shelter within 60 yards of a water source, but at least 200 feet away to prevent contamination. Make sure it's close to abundant building materials and firewood to save energy. Choose a spot that's easily accessible, with good visibility of your surroundings to enhance safety. Finally, clear the area of debris for easier setup, and mark out necessary spaces, making certain they're far from your water source.
Gathering Materials

When gathering materials for your shelter, focus on using natural resources like branches, leaves, and moss. Look for dry and abundant options in your area to guarantee you have enough sturdy materials for both the framework and insulation. Choosing the right insulation and bedding can make a huge difference in your shelter's comfort and effectiveness. Building a shelter is essential for survival and comfort in wilderness settings, as it protects you from the elements and provides a safe space for rest.
Natural Material Selection
Gather materials from your surroundings to build a sturdy shelter in the wild. Start by looking for fallen branches or dead wood; this way, you won't harm living trees. For the ridgepole and framework, select straight, long branches, ideally from species like hazel, willow, elder, or ash, known for their flexibility. Avoid green branches unless you have no choice, as they won't provide the stability you need. In regions like Minnesota(Minnesota-foraging-fun), you can also find various wild edibles that can supplement your foraging efforts.
Next, gather leaves, ferns, and bracken from the forest floor. These will serve as insulation and roofing. Make sure the leaf matter is dry to keep moisture at bay, and use leaf litter to cover your shelter frame. Incorporate moss for soft bedding and extra insulation. Remember that child-led experimentation in material selection can lead to innovative and effective shelter designs.
Don't forget about alternative materials! Rocks, stumps, or tree clefts can act as anchor points. If you're near the coast, driftwood and seaweed are excellent resources. In deserts or tropical areas, palm fronds and bamboo can be useful. Finally, if you're in a snowy environment, consider using snow for insulation. Keep your eyes open for natural resources that suit your surroundings and needs.
Dry and Abundant Resources
Finding dry and abundant resources is key to building a sturdy shelter in the wild. Start by identifying a suitable location, looking for areas rich in debris like dead leaves, grass, and moss. Confirm the spot has plenty of sticks and branches of various sizes. Avoid hazards such as falling branches, pooling water, and insect nests. A flat, elevated area is ideal to prevent water accumulation. Additionally, selecting a location that enhances visibility for rescue can significantly increase your chances of being found in an emergency.
Next, select sturdy branches for your structure. Look for long, straight branches that can act as ridgepoles or supports. Make sure they're strong enough to hold your weight—test them by hanging or standing on them. Prioritize dry branches free from rot.
Gather additional materials to enhance your shelter. Collect smaller branches for framing and ribbing, plus leaves and grass for coverage. If needed, use rocks for windbreaks and consider vines or strips of bark for cordage.
Insulation and Bedding Options
To create a comfortable and insulated shelter, it is essential to collect a variety of natural materials that can effectively trap heat. Start by gathering leaves and pine needles, which are abundant in forested areas. Aim for a thick layer, but remember that damp materials lose insulating properties, so gather them dry. Grass and straw are lightweight options with excellent insulation, but watch for decomposition if they get wet. Additionally, using dry materials is crucial as wet materials can lead to significant heat loss.
Cattail leaves and down are fantastic for cold temperatures as they trap air efficiently; use them both inside your shelter and for clothing. For sturdiness, incorporate bark and wood chips, which provide wind protection, though they're harder to gather.
When insulating, focus on ground insulation first. Use at least 1-2 feet of leaves or grass to prevent heat loss beneath you. For the walls, aim for a minimum thickness of 1-2 feet around your shelter. Pack materials tightly to avoid gaps and consider a double-wall construction for added insulation. Regularly inspect your shelter and add more materials as needed to keep warm.
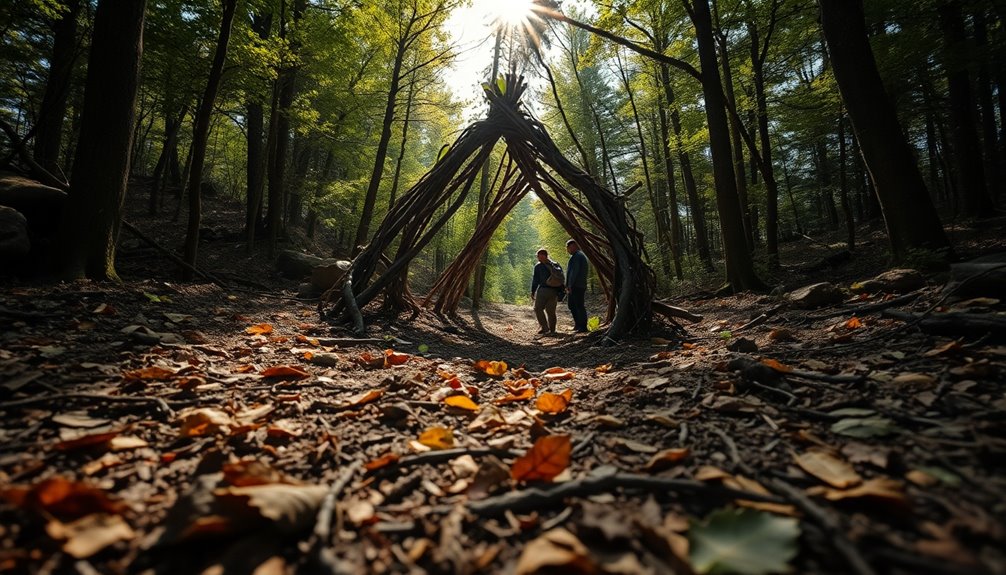
Constructing the Frame
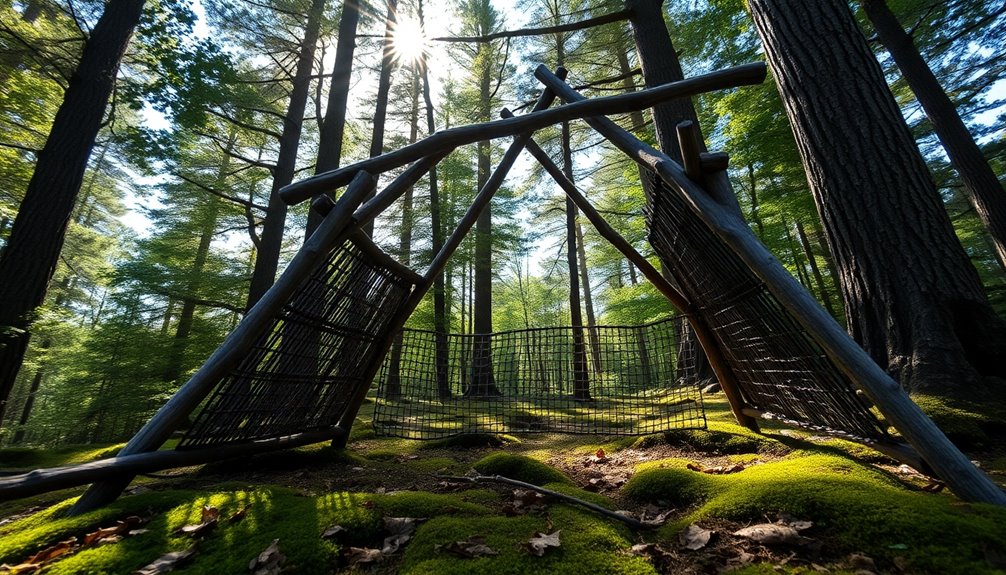
When constructing the frame for your shelter, you need to choose between a lean-to design or an A-frame structure. Each option has its own benefits, like the lean-to's simplicity and the A-frame's stability. Choosing the right design is crucial to create a sturdy frame that will support your shelter effectively.
Lean-to Frame Design
Constructing the frame for your lean-to shelter requires careful planning and sturdy materials to guarantee stability. Start by selecting a solid existing structure like a shed or garage to support your lean-to. Verify there's enough space next to it for your design, avoiding structures that are too high or wide. The stability of your shelter relies heavily on this starting point.
Next, build the back wall frame aligned with the existing structure, using 2×4 or 2×6 lumber. Make sure the corners are square for maximum stability. For the side frames, apply the same techniques to strengthen the overall structure, and attach roof joists to these frames.
Now, create the front frame, keeping it open and accessible. Use sleepers or 2×6 lumber for the corner posts, leaving space for a door. Secure the front frame to the side frames and the ground, adding double headers for the door if necessary. Incorporating a lean-to can also provide a sheltered area for relaxation and enjoyment on sunny days.
Once the frame is complete, you can focus on roofing and final assembly, making certain your lean-to is ready to face the elements. With a solid frame, you're well on your way to a safe and functional shelter.
A-frame Structure Stability
Building a stable A-frame structure requires attention to detail from the very beginning. Start by selecting a flat, dry area with good drainage, avoiding spots with deadwood or cold traps like gullies. Consider the wind direction to position your shelter effectively. It's crucial to remember that shelter construction should be prioritized immediately in adverse conditions.
Next, gather 7 to 9 large branches, each around 7 to 8 feet long. Ascertain at least 5 of these branches are thick enough to bear the weight of your shelter. Look for branches that fork at one end to serve as the A-frame arms, and include a sturdy ridge pole.
To construct the A-frame, lash two branches together in an "A" shape using a timber hitch, frapping turns, and a clove hitch. Repeat this for the other side, then stand both A-frames up and lay the ridge pole across the top, securing it with similar lashing techniques.
For added stability, incorporate horizontal branches midway down the A-frame. Ascertain the 'Y' shapes are locked to prevent sliding, and position the ribs flush with the ridge pole to keep moisture out. Cautiously use curved sticks, as they can swing inwards and reduce your interior space.
Adding Insulation

To effectively add insulation to your shelter, focus on using natural materials that are readily available in your environment. Leaves and pine needles are excellent choices, as they trap air and provide good insulation. Just be sure to collect these materials when they're dry, since damp ones can reduce their effectiveness. You might also consider using grass or straw, which are lightweight and compressible, but availability can vary based on your location. Knowing the types of insulation materials can enhance your ability to stay warm.
For enhanced insulation, build a double-wall structure to create an air gap, which offers better wind protection. Insulating the floor is essential, so pack it with leaves, grass, or pine needles to prevent heat loss to the cold ground. Regularly inspect your shelter for thin spots and add more insulation as needed.
If you're building a debris hut, use plenty of materials to trap body heat, and seal the entrance to minimize heat loss. Aim for thick layers—one to two feet around and over your shelter—to maximize warmth. Fresh debris can be periodically added to keep insulation effective, ensuring you stay warm and comfortable in the wild.
Ensuring Safety

Ensuring Safety
After adding insulation to keep warm, the next step is guaranteeing safety in your shelter. You need to focus on site selection, structural integrity, fire safety, and wildlife awareness to create a secure environment. Here are some key considerations:
- Site Selection: Avoid low-lying areas prone to flooding; choose flat, slightly elevated ground. Stay at least 200 feet away from rivers or lakes to minimize contamination risks. Additionally, look for natural barriers like hills or trees for added protection from potential threats.
- Structural Integrity: Guarantee your ridgepole and framework are secure. Use sturdy branches and tie them tightly to prevent collapse. Test stability by gently pushing or shaking the structure.
- Fire Safety: Maintain a safe distance between your fire and the shelter. Build a fire reflector wall to enhance heating efficiency and keep flammable materials away.
- Ventilation: Make sure your shelter has adequate ventilation, especially if you plan to have a fire inside. Create a ventilation hole in the roof to avoid carbon monoxide buildup.
- Wildlife Awareness: Be mindful of local wildlife. Avoid areas frequented by animals and check for signs of wildlife before finalizing your shelter location.
Creating a Comfortable Interior
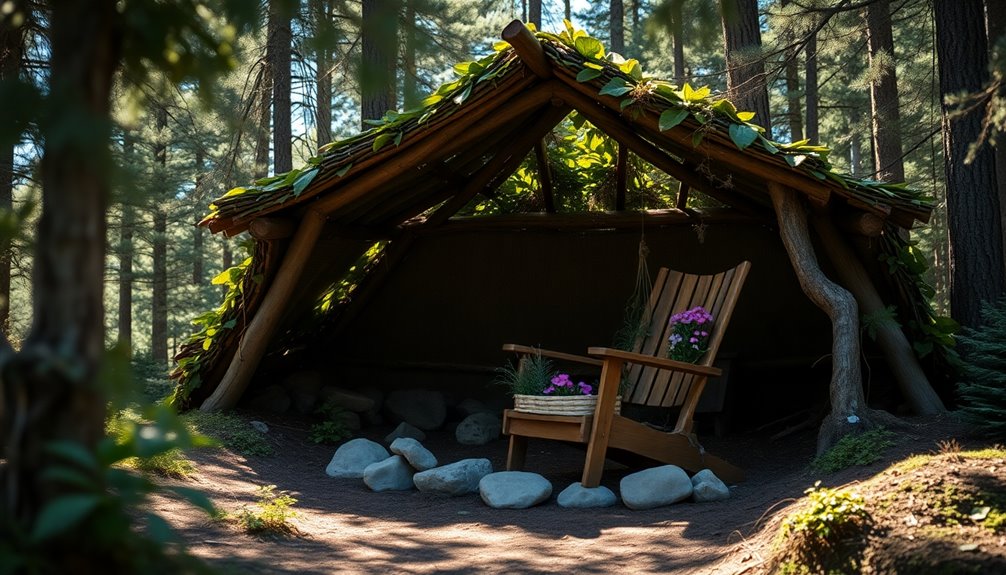
Creating a comfortable interior in your shelter can greatly enhance your experience in the wild. Start by incorporating natural light through large windows or skylights; this connection to the outdoors not only brightens your space but also fosters a soothing atmosphere. Utilize shadows creatively to intrigue and invite exploration into different areas of your shelter.
Choose materials that harmonize with nature, like FSC-labeled wood or natural cladding, ensuring they're durable and sustainable. Incorporating plant materials for bedding or insulation can enhance comfort while minimizing environmental impact. Additionally, effective management of light and shadow can foster a deeper relationship with your environment. Consider adding layered textiles like rugs or cushions to enhance warmth and comfort in your shelter.
Design your space to hover above the ground, allowing vegetation to flourish beneath, which helps integrate the landscape into your interior. Use dark palettes and warm lighting—like candles or a small fireplace—to create a cozy ambiance, especially during colder seasons.
A fluid shift between indoor and outdoor areas encourages a deeper connection to nature, while well-insulated walls protect you from the elements. Keep in mind the seasonal changes, adjusting your design elements to create varying atmospheres that enhance your shelter's coziness and functionality.
Quick Tips for Efficiency

Maximizing efficiency in shelter building can make all the difference in your outdoor experience. When you're in the wild, every minute counts, so here are some quick tips to streamline your efforts:
- Choose the Right Location: Look for flat ground, avoid dead branches, and pick a spot that stays dry and warm.
- Gather Materials Wisely: Collect abundant and dry natural materials like branches, leaves, and moss. Prioritize sturdy branches for the frame.
- Build a Solid Frame: Use two sturdy trees as anchors for a lean-to or A-frame. Secure the frame well to withstand wind and rain.
- Insulate Effectively: Layer leaves, moss, and branches to create a barrier against the elements. Start from the bottom to guarantee proper water shedding.
- Use Available Debris: Utilize nearby bark and wood pieces for additional insulation and covering; don't overlook nature's resources.
Final Thoughts on Shelter Building

Building a sturdy shelter is more than just a practical task; it's a critical skill that can greatly impact your survival and comfort in the wild. The right location, structural stability, insulation, and safety measures are essential to your success. By understanding these elements, you can create a shelter that not only protects you but also enhances your overall experience. Additionally, proper planning can significantly minimize the risk of survival situations.
Here's a quick reference table to help you remember key points:
| Aspect | Considerations |
|---|---|
| Shelter Location | Flat, elevated, away from dead branches |
| Structural Stability | Use sturdy branches, check for stability |
| Insulation | Thick layers of leaves, dry bedding for warmth |
| Safety | Distance from water, signs of wildlife |
| Weather Preparedness | Backup plan for severe weather
Frequently Asked Questions
What Are the Best Materials for Building a Shelter in Winter?
When building a shelter in winter, you'll want effective insulating materials. Use leaves and pine needles for trapping air, or opt for grass and straw for lightweight warmth. Bark and wood chips can provide durability against wind, while moss and evergreen boughs offer excellent insulation. Consider double-wall construction or ground insulation techniques to prevent heat loss. Finally, adding windbreaks can help maintain warmth inside your shelter during harsh winter conditions.
How Do I Camouflage My Shelter From Wildlife?
Did you know that about 75% of wildlife relies on visual cues to detect threats? To camouflage your shelter, you'll want to use natural materials like leaves and branches that blend with the surroundings. Smear mud on the exterior to alter its color, and regularly update your camouflage to match seasonal changes. Keep your shelter low and irregular in shape, positioning it in shadowed areas to help it remain unnoticed by wildlife.
Can I Use a Tarp Instead of Natural Materials?
Yes, you can definitely use a tarp instead of natural materials for shelter. Tarps are lightweight, durable, and easy to set up, making them a great option for quick protection. Choose a tarp that's large enough for your needs and guarantee you secure it properly to withstand wind and rain. Just remember to pick a good location, clear the area, and use some basic knots to keep everything taut and stable.
What Tools Are Essential for Efficient Shelter Building?
What tools do you think you'll need for efficient shelter building? To get started, grab a folding shovel for digging, an axe or hatchet for cutting, and a versatile knife for finer work. Don't forget paracord for lashing materials and a military poncho or tarpaulin for instant coverage. With these essentials, you'll be well-equipped to create a safe and sturdy shelter in any environment. Remember, preparation makes all the difference!
How Long Should My Shelter Last in the Wild?
Your shelter should last at least until you're rescued or can find your way back to civilization. Depending on your situation, that could mean surviving for hours, days, or even weeks. Remember, hypothermia can set in quickly without shelter, so it's essential to build one immediately. It needs to protect you from rain, wind, and extreme temperatures, acting as a microclimate to help maintain your body heat and keep you safe.
Conclusion
In the wild, your shelter’s strength and safety are essential for survival. Swiftly selecting a strategic spot and smartly sourcing sturdy supplies sets you up for success. By mastering the methods of building, you’ll create a cozy, comfortable haven. Remember, with practice and patience, you can craft a cozy retreat that protects you from the perils outside. So, stay sharp, stay safe, and savor your time in the wild with your well-built, welcoming wilderness shelter! When creating safe spaces in the wild, it’s important to assess the surrounding environment for potential dangers and make sure your shelter is well-constructed to withstand them. Taking the time to fortify your shelter with additional support and reinforcements can provide extra peace of mind. By prioritizing safety and security in your wilderness shelter, you can fully enjoy the beauty and tranquility of nature without worrying about external threats.