To weatherproof your shelter and survive any storm, start by choosing an elevated location away from hazards like dead trees. Build a sturdy frame with strong branches, securing everything tightly with cordage. Insulate the shelter using natural materials like leaves or moss, and guarantee you seal all joints to prevent water from leaking in. A waterproof tarp can provide an extra layer of protection. Also, create strategic vents for airflow without compromising stability. Regularly inspect and maintain your shelter to keep it functional. Keep it simple; there's more to learn that can help you improve your storm readiness.
Key Takeaways
- Select elevated sites away from dead trees and potential flooding for safer shelter placement during storms.
- Use sturdy, waterproof materials like tarps and overlapping natural materials to create a weather-resistant outer layer.
- Regularly inspect joints, seams, and overall structure to ensure integrity and prevent water ingress during severe weather.
- Incorporate proper ventilation by creating high and low vents to avoid condensation and maintain airflow while sealing against wind.
- Reinforce shelter stability with secure lashing of load-bearing elements and additional branches to withstand strong winds and heavy rain.
Site Selection Tips

When selecting a site for your shelter, it's crucial to take into account the surrounding environment to guarantee your safety and comfort. Start by avoiding areas near dead trees or loose branches that could fall and cause injury. Opt for elevated grounds to help prevent water accumulation during rain. Look for natural windbreaks, like hills or dense foliage, to shield your shelter from strong winds.
Ascertain the area isn't prone to flooding or flash flooding by checking the terrain. Choose a flat spot with minimal slope to prevent water pooling and ascertain the ground is dry and free from puddles. Stay away from rocky or root-filled areas, and clear any loose rocks or branches if necessary. You'll want the ground to provide adequate grip for your shelter pegs or stakes.
Be mindful of environmental hazards; check for signs of wildlife and avoid their paths, as well as toxic plants like poison ivy. Finally, select a location that gives you easy access to building materials and a nearby water source, assuring you're well-prepared for any storm that comes your way. Additionally, always ensure that your chosen site is safe from potential wildlife encounters to reduce the risk of unexpected dangers.
Building a Sturdy Frame

Building a sturdy frame is essential for the durability and safety of your shelter. Start by selecting long, sturdy branches or logs—ideally wrist-thick—for load-bearing structures. Look for materials that are dry and abundant in your area to guarantee stability. Use branches with natural forks for the arms of an A-frame, allowing the ridgepole to rest securely.
Construct the frame by leaning large branches against a central ridgepole to create an A-frame structure. A fixed-blade knife, folding saw, or hatchet will help shape and secure your frame. For a lean-to shelter, place a long branch horizontally between two trees or vertical supports. Make sure the frame is strong, as it serves as the skeleton of your shelter.
To enhance stability, space the ribs of your A-frame 6 to 12 inches apart. Anchor the shelter to the ground to prevent it from blowing away in strong winds. Use cordage like paracord to lash the A-frame together, securing it solidly. Finally, don't forget to double-check the sturdiness of the frame and make any necessary adjustments before finalizing your shelter.
Effective Insulation Techniques
To keep your shelter warm and cozy, you'll want to use effective insulation techniques. Start by gathering natural materials like leaves, grass, and moss, and layer them to create a thick barrier against the cold. Don't forget to fill any gaps, as even small openings can let the chill in and undermine your efforts. Additionally, incorporating natural insulation materials into your design will significantly enhance your shelter's ability to retain heat.
Natural Insulation Materials
Natural insulation materials offer an eco-friendly solution for enhancing your shelter's energy efficiency. By choosing plant-based options like hemp, straw, and flax, you can benefit from their renewable and biodegradable properties. Hemp, for instance, boasts strong woody fibers and low energy requirements, while straw provides excellent sound insulation and carbon storage. If you opt for cotton insulation, you'll find it made from recycled denim, which is moisture-resistant and free from harmful chemicals. Additionally, using merchant account credit processing can help you invest in these sustainable materials for your projects.
Animal-based materials, such as sheep's wool, add another layer of protection. Wool is naturally fire-resistant and can absorb moisture without losing its thermal qualities. Additionally, you might consider woolcell insulation, which combines wool and recycled paper for added fire retardance. Using dry materials is crucial to ensure effective insulation and prevent heat loss.
Recycled options like cellulose insulation, crafted from old newspapers, offer fire resistance due to borax content. Cork insulation, derived from oak bark, is not only recyclable but also contributes to a negative carbon footprint.
These natural materials effectively trap air to disrupt heat transfer, resist moisture, and absorb sound. By utilizing natural insulation, you're not just improving your shelter's comfort but also making a positive environmental impact.
Layering Techniques
Enhancing your shelter's insulation doesn't stop with selecting eco-friendly materials; how you layer them makes a significant difference in performance. Layering insulation effectively guarantees maximum thermal resistance and comfort, especially in extreme conditions. Here are some techniques you should consider:
- Double-Wall Construction: This technique creates an air gap between walls, enhancing insulation and protecting against cold drafts.
- Ground Insulation: Use natural materials like leaves or grass beneath your sleeping area to prevent heat loss to the ground, which is essential for maintaining body warmth.
- Closed-Cell Spray Foam: This material not only provides structural integrity but also resists water ingress, making it ideal for flood-prone areas. The effectiveness of closed-cell foam in moisture control is particularly crucial for underground shelters.
- Reflective Insulation: Depending on your climate, place reflective insulation either on the outside or inner side of bulk insulation to effectively combat radiant heat.
Gap Filling Methods
Effective gap filling is essential for maintaining your shelter's insulation and overall comfort. To tackle gaps, start with chinking and caulking methods. Use high-quality, flexible caulk or chinking specifically designed for log homes. Clean the gap thoroughly, apply backing material if needed, and use a chinking or caulking gun for an even application. Smooth the surface for a neat finish and allow sufficient curing time.
For larger gaps, consider low-expansion foam. After cleaning the area, apply the foam carefully, then trim excess once cured. Cover the foam with chinking or caulk for a seamless appearance.
If you're dealing with extensive damage, log splice repairs may be necessary. Remove the damaged section and replace it with treated wood, sealing joints properly. For minor gaps, mixing sawdust with resin provides a cost-effective filler. Alternatively, use flexible fillers like acrylic or epoxy, which adapt to wood movement and can be sanded and stained.
Prompt attention to gaps is essential for overall home integrity and will ensure that your gap-filling methods last longer. Regularly inspect your work and reapply as needed to maintain a tight seal. This proactive approach will keep your shelter cozy and secure against any storm.
Waterproofing Your Shelter

When waterproofing your shelter, selecting the right materials is essential for keeping the rain out. You'll want to focus on effective roof design techniques that channel water away from your sleeping area. By combining materials and layering them properly, you can create a reliable barrier against the elements. The choice of waterproofing materials can vary significantly based on your geographical location and climate.
Material Selection Strategies
Choosing the right materials for waterproofing your shelter is essential to assure warmth and comfort. You'll want to take into account both natural and synthetic options based on your environment and availability. Here are some effective materials to keep in mind:
- Leaves and Pine Needles: Abundant and effective for insulation, but make certain they're dry to maintain their properties.
- Grass and Straw: Lightweight and great for insulation, but watch out for moisture that can cause decomposition.
- Bark and Wood Chips: Durable and water-resistant, they provide excellent wind protection, although they may be harder to gather.
- Liquid Waterproofing Membranes: Flexible and adaptable, these can be applied to various surfaces for an effective barrier against water. The use of galvanised steel in structural components can enhance the overall resilience of your shelter against severe weather conditions.
When selecting materials, balance insulation and waterproofing. Look for resources that are readily available in your area, and always prioritize dry materials to prevent any loss in insulating properties. By making smart choices, you'll make certain your shelter remains a warm, dry haven during any storm.
Roof Design Techniques
A well-designed roof is vital for preventing water from entering your shelter and guaranteeing it remains dry and comfortable. There are various waterproofing techniques you can choose from, each with its own benefits.
For conventional methods, the Brickbat Coba technique involves placing bricks on rooftops with gaps filled with dense cement slurry, but it requires regular maintenance. The Lime Terracing technique offers temporary resistance using a lime molasses mixture, suitable for specific conditions. If you're on a budget, the Mud Phuska technique uses clay and cow dung for effective protection in hot climates.
Modern techniques include the Bituminous method, which uses heat-applied bitumen but may degrade under UV exposure. The Liquid Deck technique provides a flexible, water-repellent coating, while the Polyurethane Liquid Membrane forms a seamless, durable barrier—albeit at a higher cost. Proper waterproofing is essential in regions with heavy rainfall to ensure the longevity of your shelter, as regular maintenance prevents potential leaks and damage.
Membrane-based options like TPO and PVC roofing membranes are energy-efficient and durable, offering excellent protection. Whichever method you choose, verify you prepare the surface properly, as thorough cleaning and repair are vital for effective waterproofing. By selecting the right roof design, you'll safeguard your shelter against any storm.
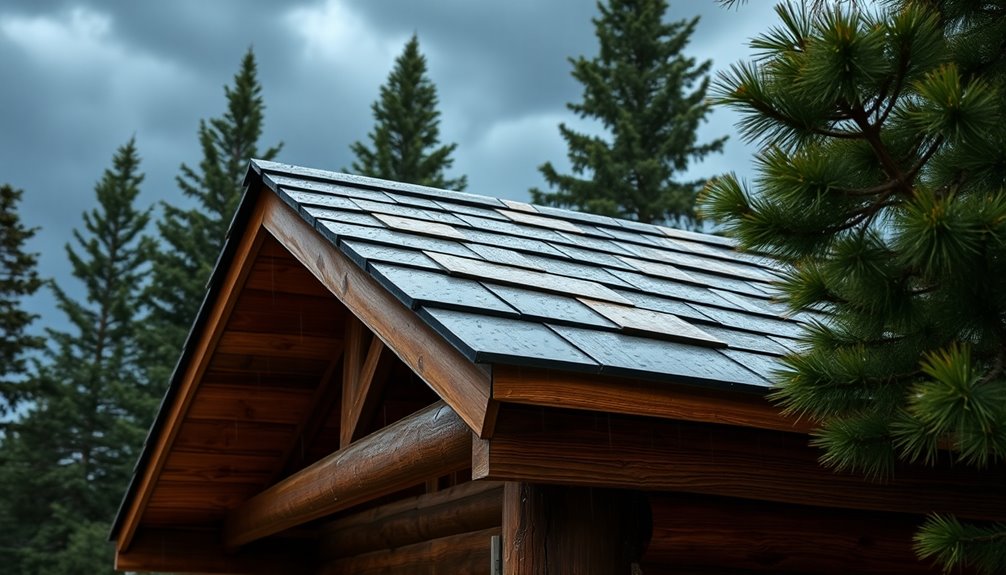
Roof Covering Strategies

Selecting the right roofing material is essential for ensuring your shelter stands up to the elements. You need to take into account durability, cost, and climate when choosing your roofing. Here are some effective options to ponder:
- Asphalt Shingles: Affordable and easy to install, but watch for damage from strong winds.
- Metal Roofing: Long-lasting and fire-resistant; however, it may need regular maintenance.
- EPDM Rubber: Durable with a 50-year life expectancy, and great for new installations.
- Bituminous Waterproofing: Economical and long-lasting, available in various applications. Burning wood emits harmful pollutants that can affect air quality, so consider alternatives for heat sources when planning your shelter. Additionally, consider using energy-efficient models to help maintain a comfortable indoor environment.
When installing your roofing, take into consideration methods that enhance waterproofing. Use products like liquid waterproofing membranes for a seamless barrier, or elevate your shed to prevent water damage. Additionally, contemplate your climate. For heavy snowfall, a flexible membrane system works best, while sloped roofs are ideal for heavy rainfall. Proper installation and sealing are essential to prevent water seepage.
Creating a Secure Entrance
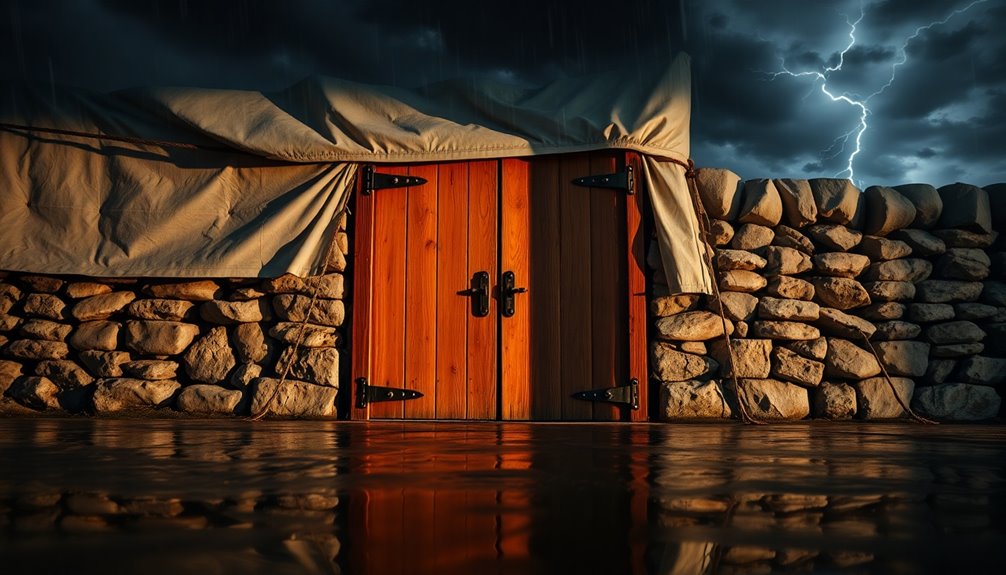
Creating a secure entrance is essential for any shelter, ensuring both safety and peace of mind. Start with a high-quality steel door designed to withstand extreme weather and debris. Consider options like Valley Storm Shelters' doors, which weigh up to 310 pounds and are tested against EF5 tornado forces. Look for features such as a Grade 1 High Security keyed lock and a spring-loaded vault-style handle with a 3-bolt reinforced locking mechanism, like those found in Atlas Safe Rooms.
Ensure your door opens outward to prevent blockage during severe weather. Incorporate steel debris protectors for added safety. Reinforced locking mechanisms are important; use a core lock anchoring system that complies with FEMA standards. These locks can resist significant force and winds up to 700 miles per hour, providing peace of mind. Additionally, consider using a high-quality steel door that has been recognized as the weakest part of any storm shelter.
Don't forget about emergency exit options. Modular panels or secondary escape hatches can be lifesavers if the main door gets blocked. Finally, anchor your shelter to a concrete slab for stability against high winds and debris, ensuring you're well-protected when storms hit.
Ensuring Proper Ventilation

After establishing a secure entrance, the next step in fortifying your shelter involves guaranteeing proper ventilation. Good airflow is essential for maintaining air quality and preventing moisture buildup, especially during storms. You can choose from several ventilation systems depending on your needs:
- Passive Ventilation: Utilizes natural forces to promote airflow.
- Mechanical Ventilation: Employs fans to actively circulate air.
- Natural Ventilation: Relies on openings like windows and doors.
- Balanced Ventilation: Combines supply and exhaust methods for efficiency.
Strategic vent placement can greatly enhance airflow. Consider these tips:
- High and Low Vents: Place vents at different heights to encourage circulation.
- Windward and Leeward Sides: Position vents based on wind direction for best results.
- Avoid Obstructions: Keep vents clear to maintain effective airflow.
- Multiple Vents: Use several vents to guarantee smooth air movement.
Additionally, inadequate airflow can lead to carbon dioxide buildup, which poses significant health risks. Don't forget to maintain your system. Regular checks and cleaning confirm your ventilation functions properly, keeping your shelter comfortable and safe during any storm.
Final Checks and Enhancements

As you finalize your shelter, conducting thorough checks and enhancements is essential to confirm it can withstand harsh weather conditions. Start by inspecting the overall sturdiness and stability of your structure. Verify all load-bearing elements are securely fastened with cordage, and check the roof for any gaps that could compromise its waterproof layer. Don't forget to seal the entrance properly to keep out wind and water.
Next, enhance your waterproofing by adding layers of leaves, grass, or moss. Utilize bark slabs from dead trees, like poplars or cottonwoods, for extra protection. Thatch your shelter with tall grass or cattails, overlapping the material for complete coverage. If available, incorporate a tarp or emergency blanket to boost waterproofing further. Fill any gaps with mud or clay for a better seal.
To improve insulation, layer smaller branches with insulating materials like leaves or pine needles, and create a raised bed to keep off the cold ground. Additionally, effective shelters facilitate better resource management and conservation of energy during challenging weather conditions. Finally, secure the structure by tying all elements together with cordage and positioning it away from hazards. Reinforce the frame with additional branches if needed, ensuring the roof angle allows for efficient rain runoff.
Frequently Asked Questions
What Materials Are Best for Building a Survival Shelter?
When building a survival shelter, you'll want to use materials that offer insulation and protection. Consider using spruce or pine branches for roofing, as they shed water well. Cattail leaves and moss can help with insulation, while bark slabs from dead trees provide sturdy walls. If you have access to tarps or rain ponchos, they're great for waterproofing. Finally, always keep cordage handy for tying everything together securely.
How Do I Choose the Right Location for My Shelter?
You'd think picking a spot for your shelter is as easy as choosing a picnic site, right? But it's not! Start by avoiding low-lying areas that flood easily. Look for slightly elevated, dry ground, away from trees that might crash down on you. Stay at least 200 feet from water sources to dodge contamination. Finally, keep an eye out for natural hazards like rockslides. Your safety depends on this thoughtful selection!
Can I Use Tarps From My Camping Gear for Waterproofing?
Yes, you can definitely use tarps from your camping gear for waterproofing! They're versatile and provide instant protection from rain and wind. Just drape them over a frame or hang them between trees to create a quick shelter. You can enhance their effectiveness by layering natural materials like leaves or grass underneath. Make sure to secure the tarp tightly to prevent flapping and to position it wisely against the wind for maximum coverage.
How Long Will a Makeshift Shelter Last in a Storm?
A makeshift shelter can last anywhere from a few hours to a couple of days in a storm, depending on its materials and construction. If you're using sturdy materials and reinforcing it against wind and rain, it might hold up longer. However, if conditions worsen, like heavy rain or strong winds, you might find it vulnerable. Always have a backup plan and be ready to seek sturdier shelter if needed.
What Should I Do if My Shelter Collapses During a Storm?
If your shelter collapses during a storm, first verify everyone’s safe and accounted for. Move to a secure area, avoiding debris and potential hazards. Use a portable radio to stay updated on the situation, and don’t go outside until authorities declare it safe. Once it’s safe, assess the damage, document it for insurance, and communicate with emergency services. Remember, your safety is the priority—stay calm and follow the necessary precautions. Remember to collect any important documents and personal belongings if you need to evacuate the area. Follow natural disaster safety tips such as turning off utilities and unplugging appliances to prevent potential hazards. Keep an emergency supply kit on hand with essentials like water, non-perishable food, and first aid supplies. Familiarize yourself with local evacuation routes and communication channels in case of future emergencies. Always prioritize your safety and be prepared for any potential natural disasters.
Conclusion
As you stand beneath your sturdy shelter, think of it as a ship braving the stormy seas. You've chosen the right spot, built a strong frame, and weatherproofed every nook and cranny. Just like a captain prepares for rough waters, you've guaranteed your haven can withstand any tempest. With proper ventilation flowing like a gentle breeze, you're ready to ride out the storm, anchored in safety and comfort. Your ship won't just survive; it'll thrive through the fiercest gales.