Connect with us

Survivalism

Survival Essentials: Best Bushcraft Knives Unveiled

Uncover the top bushcraft knives of 2024 and learn what features to look for to ensure your survival in the wild.

Published

on

top bushcraft knives revealed

When you're out in the wild, a reliable bushcraft knife is essential for survival. It can make all the difference in tasks like carving, cutting, and food prep. For 2024, some of the best options include the White River Ursus 45 and the Morakniv Companion Spark, offering a blend of quality and value. Look for features like a blade length of 3.5 to 4.5 inches, durable materials like CPM S35VN, and a comfortable handle. Proper maintenance keeps your knife in top shape. Want to discover more top picks and tips for choosing the perfect bushcraft knife?

Key Takeaways

  • Bushcraft knives are vital for outdoor survival, aiding in tasks like carving, cutting, and fire-starting.
  • The top knives for 2024 include the White River Ursus 45 and Morakniv Companion Spark, balancing quality and price.
  • Optimal blade lengths for versatility range from 3.5 to 4.5 inches, enhancing control during use.
  • Choose high-quality blade materials such as CPM S35VN or Sandvik 12C27 for durability and corrosion resistance.
  • Regular maintenance, including sharpening and cleaning, is essential for ensuring the longevity and performance of your bushcraft knife.

Overview and Importance of Bushcraft Knives

essential tools for survival

Bushcraft knives are essential tools that every outdoor enthusiast should have in their gear.

These reliable knives play an important role in wilderness survival, helping you with tasks like carving, cutting, and even fire-starting. Having a quality knife enhances both safety and efficiency, making your outdoor experience smoother and more enjoyable.

You'll find that a good bushcraft knife is crucial for food preparation and various survival tasks, directly influencing your readiness for any adventure.

When you're out in the wild, the right knife can mean the difference between success and struggle.

Invest in a dependable bushcraft knife, and you'll be well-equipped to tackle any challenge nature throws your way.

Advertisement

Your outdoor adventures will be greatly more enjoyable with this invaluable tool at your side.
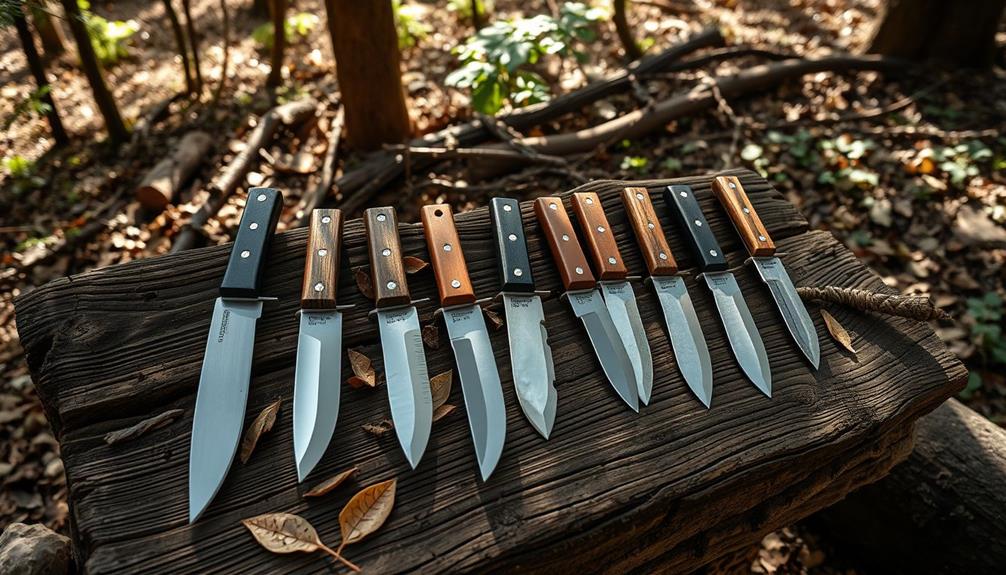
Best Bushcraft Knives of 2024

top bushcraft knives 2024

When it comes to choosing the best bushcraft knives of 2024, you'll find several options that stand out for their quality and versatility. Each knife caters to different needs, whether you're looking for a robust fixed blade or a compact folding option. Here are a few top contenders:

Knife Name Blade Material Price
White River Ursus 45 CPM S35VN $220
Morakniv Companion Spark Sandvik 12C27 $35
Helle Bleja Triple Laminated H3LSS $150
Demko FreeReign MagnaCut $200

These selections offer reliability and performance, ensuring you're well-equipped for your outdoor adventures this year. Choose wisely, as your knife can be a crucial tool in the wilderness.

Key Features and Specifications

essential attributes and details

Selecting the right bushcraft knife involves understanding its key features and specifications, which can greatly influence your outdoor experience.

First, consider the blade length; a range of 3.5 to 4.5 inches offers versatility and control for various tasks.

Next, pay attention to the blade material; options like CPM S35VN, Sandvik 12C27, and MagnaCut steel provide excellent corrosion resistance and edge retention.

The handle design is essential for comfort and grip, with materials such as G10, Micarta, and rubber enhancing ergonomics.

Advertisement

Don't overlook the sheath design, which affects portability and retention; Kydex and leather are popular choices.

Maintenance and Care

ongoing upkeep and support

Proper maintenance and care of your bushcraft knife can greatly extend its lifespan and enhance performance.

Regularly sharpen your knife to keep the edge effective and ready for use. After each outing, clean the blade thoroughly to remove dirt, sap, and moisture, preventing rust and damage.

Store your knife in a dry place, preferably in a sheath, to protect the blade's integrity. Always inspect your knife for any signs of wear or damage, such as dull edges or loose handles.

If you notice any issues, learn basic repair techniques to keep your knife in top condition.

Buying Guide

shopping tips and recommendations

After guaranteeing your bushcraft knife is well-maintained, it's time to think about what to look for when buying one.

First, consider blade length; a range of 3.5 to 4.5 inches offers versatility for various tasks.

Advertisement

Next, pay attention to blade material—choose high-quality options like CPM S35VN or Sandvik 12C27 for durability and edge retention.

Handle design is essential too; prioritize comfort and grip with materials like G10 or Micarta.

Don't overlook the sheath; it should provide portability and secure retention, whether it's Kydex or leather.

Finally, full tang construction enhances strength and balance.

Frequently Asked Questions

What Is the History of Bushcraft Knives?

Bushcraft knives have a rich history, evolving from ancient tools used for survival. As you explore their origins, you'll find that craftsmanship and functionality have shaped their design over centuries, enhancing outdoor skills and experiences. In today’s market, bushcraft knives come in a variety of styles and materials to cater to different survival needs. From traditional wooden handles to modern tactical designs, there are options for every outdoor enthusiast. Additionally, many bushcraft knives now come with expandable baton options, adding even more versatility to their functionality. These features make them essential tools for any outdoor adventure.

Advertisement

How Do I Choose the Right Size for a Bushcraft Knife?

When choosing the right size for a bushcraft knife, consider your hand size and typical tasks. A blade length between 3.5 to 4.5 inches offers versatility, ensuring you can tackle various outdoor challenges effectively.

What Are the Best Techniques for Sharpening a Bushcraft Knife?

To sharpen your bushcraft knife effectively, use a whetstone or diamond stone, maintaining a consistent angle. Regularly hone the edge and finish with a strop for a razor-sharp blade that performs reliably in the field.

Can I Use a Bushcraft Knife for Fishing or Hunting?

"If you can't stand the heat, get out of the kitchen." Yes, you can use a bushcraft knife for fishing or hunting. Its versatility makes it a reliable tool for various outdoor tasks.

What Are Common Mistakes to Avoid When Using a Bushcraft Knife?

When using a bushcraft knife, don't rush your cuts, avoid using it for prying, and keep it clean. Always cut away from your body and maintain your knife's edge for safer, more effective usage.

Conclusion

You might think that all bushcraft knives are the same, but the right one can truly transform your outdoor experience. By choosing a knife that fits your needs and preferences, you'll enhance your safety and efficiency in the wild. Remember, it's not just about having a blade; it's about having the right tool for the job. So, gear up, explore our top picks, and get ready to tackle your next adventure with confidence!

Advertisement
Continue Reading
Advertisement

Survivalism

Essential Flood Survival Kit: Be Prepared

Be ready for unexpected floods with an essential survival kit that ensures your safety and security—discover what to include for maximum preparedness.

Published

on

flood survival kit essentials

A flood survival kit is essential for your safety, ensuring you're prepared when emergencies arise. Start by packing non-perishable food and at least one gallon of water per person per day for three days. Don't forget waterproof clothing and sturdy boots for protection; also include a NOAA weather radio for real-time alerts. Prepare evacuation supplies like a first aid kit and keep important documents handy. Regularly check and update your kit to maintain its effectiveness. By being proactive and prepared, you can better face flooding challenges. For more tips on assembling the perfect kit, you'll want to keep exploring.

Key Takeaways

  • Pack non-perishable food and at least one gallon of water per person per day for three days in your survival kit.
  • Include waterproof clothing, sturdy boots, and essential gear for protection against flooding conditions.
  • Equip your kit with communication tools like NOAA weather radios and portable generators for power outages.
  • Familiarize yourself with local evacuation routes and pack important documents and first aid supplies for emergencies.
  • Regularly maintain and update your survival kit to ensure all items are fresh and functional.

Importance of Flood Survival Kits

essential flood survival supplies

Flood survival kits are essential for ensuring your safety and well-being during emergencies. When you live in flood-prone areas, being prepared can make all the difference.

By customizing your kit, you address specific challenges you might face during a flood, such as power outages or lack of clean water. Create a checklist to include items that meet your unique needs, like medications or personal documents.

Assess local flood risks and familiarize yourself with available emergency resources. Regularly evaluate and update your kit, keeping it ready for any situation.

Engaging with your community can enhance your understanding of local flood risks, while collaborating with neighbors strengthens your support network during emergencies.

Being prepared is your best defense against flooding.

Advertisement

Essential Food and Water Supplies

critical nutritional resource management

When preparing your flood survival kit, essential food and water supplies should be a top priority. Pack non-perishable food items like canned goods, energy bars, and waterproof ration bars to guarantee you have enough nutrition during emergencies.

Don't forget to include a minimum of one gallon of water per person per day, aiming for at least three days' worth. Water purification tablets or reliable survival water filters are vital for securing clean drinking water.

Consider portable cooking devices for meal preparation if conditions allow. Always check expiration dates on food supplies and replace them as needed.

Being proactive with food and water will help keep you and your loved ones nourished and hydrated during a flood situation.

Personal Clothing and Gear

individual apparel and equipment

Packing the right personal clothing and gear is essential for staying safe and comfortable during a flood emergency. Focus on waterproof clothing, including a rain poncho and quick-drying materials, to keep you dry and warm.

Don't forget sturdy, waterproof boots; they'll protect your feet from contaminated water and debris. Layering is key, so pack lightweight clothing that can be easily removed or added based on changing weather conditions.

Consider bringing gloves and a hat for added protection. A waterproof backpack can help keep your essentials dry.

Advertisement

Additionally, pack items like shovels or sandbags, which can assist in flood prevention efforts. Being equipped with the right clothing and gear will help you navigate through challenging flood situations more effectively.

Communication and Detection Tools

tools for communication detection

Equipping yourself with reliable communication and detection tools is essential for staying informed and safe during a flood emergency. Invest in a NOAA weather radio to receive real-time alerts about impending floods.

Keep an emergency contact list handy, making sure family members can reach each other. Water alarms can help you detect localized flooding early, giving you a heads-up to act quickly.

Don't forget smartphone apps that provide weather updates and alerts from emergency services for added convenience. If power goes out, a portable generator can keep essential devices running.

Evacuation Supplies and Planning

emergency preparedness and supplies

In the event of a flood, having the right evacuation supplies can make all the difference in guaranteeing your safety and quick relocation.

First, familiarize yourself with local evacuation routes and plan your escape ahead of time. Pack essential items like a first aid kit, flashlight, and portable phone charger in an easily accessible bag.

Don't forget important documents and an emergency contact list. Consider including a NOAA weather radio for real-time updates.

Advertisement

If you have pets, make sure you have leashes, carriers, and pet supplies ready. Signal flares can help alert rescuers if needed.

Regularly review your evacuation plan with your family, so everyone knows what to do when disaster strikes. Being prepared can save lives.

Maintaining Your Survival Kit

survival kit maintenance tips

Regular maintenance of your survival kit is essential to ascertain it's always ready when you need it most. Keeping your supplies fresh and functional ascertains you're prepared for any emergency. Check your kit at least every season, updating as necessary.

Item Frequency of Check Notes
Water Purification Every 6 months Replace filters as needed
Non-Perishable Food Annually Rotate stock for freshness
First Aid Supplies Every 3 months Check expiration dates
Emergency Tools Every season ascertain they're in working order

Including Pets in Emergency Plans

emergency plans for pets

When planning for emergencies like floods, don't forget about your pets; they rely on you for safety and well-being.

Make sure to include essential supplies for them in your flood survival kit. Pack at least three days' worth of food and water, along with portable bowls.

Don't forget leashes, carriers, and any medications they might need. Identification tags and microchips are vital for their safe return if you get separated.

Create a pet-friendly evacuation plan, including designated pet-friendly shelters or hotels.

Advertisement

Regularly check and update your pet supplies, ensuring everything's in good condition.

Frequently Asked Questions

How Can I Customize My Flood Survival Kit for Specific Needs?

You can customize your flood survival kit by evaluating your specific needs, including food preferences, medical requirements, and local risks. Regularly review and update your supplies to guarantee they meet your family's unique circumstances.

What Are the Best Portable Cooking Devices for Emergencies?

For emergencies, consider portable cooking devices like camping stoves, solar cookers, or compact propane grills. They're lightweight, easy to use, and guarantee you can prepare meals even when traditional cooking methods aren't available.

How Do I Create a Community Flood Preparedness Plan?

Think of your community as a puzzle; each piece represents a neighbor. To create a flood preparedness plan, gather everyone, share resources, assess risks, and build a supportive network that can withstand any flood challenge together.

What Should I Do With Important Documents During a Flood?

During a flood, secure important documents in waterproof bags or containers. Store them high up, away from potential water damage. Make digital copies too, ensuring you can access them easily if needed.

Advertisement

How Can I Ensure My Pets Remain Calm During Emergency Evacuations?

To keep your pets calm during evacuations, create a familiar environment by bringing their favorite toys and blankets. Practice short trips beforehand, and use soothing voices to reassure them while maintaining a steady pace.

Conclusion

As you gather your flood survival kit, remember that every item could make a difference when the waters rise. Imagine facing an unexpected flood without the essentials—what would you wish you'd prepared? Don't leave your safety to chance; take action now. Update your supplies, involve your loved ones, and make certain your pets are included in your plans. When the moment comes, you'll be ready to face the uncertainty with confidence and resilience. Don't wait—prepare today!

Continue Reading

Survivalism

Top Picks for Food Preservation Essentials

Incredible food preservation essentials await you, ensuring your ingredients stay fresh and flavorful—discover the must-have tools that can transform your kitchen!

Published

on

essential food preservation tools

When it comes to food preservation essentials, you'll want quality tools that enhance freshness and extend shelf life. Start with a reliable vacuum sealer to keep air out, and consider Mylar bags with oxygen absorbers for long-term storage. Canning jars work perfectly for fruits and sauces, while food dehydrators help create healthy snacks by removing moisture. Don't forget the importance of airtight containers to prevent spoilage. Regularly monitor your food storage conditions and replace oxygen absorbers as needed to maintain quality. Stick with these tips, and you'll enjoy fresher food for longer—stay tuned for more insights!

Key Takeaways

  • Opt for quality vacuum sealers to keep air out and extend the life of perishables for 1-3 years.
  • Invest in Mylar bags with oxygen absorbers for long-term storage, preserving food for 5-30 years.
  • Use canning jars for effective preservation of fruits, vegetables, and sauces in airtight conditions.
  • Employ food dehydrators to remove moisture, creating long-lasting and nutritious snacks.
  • Choose airtight containers to prevent moisture and pests, maintaining food quality over time.

Importance of Food Preservation

essential for preventing waste

While you mightn't think about it daily, food preservation is essential for ensuring the safety, quality, and longevity of the food you consume. By preventing spoilage and extending shelf life, you reduce waste and save money.

Proper preservation methods keep harmful bacteria and mold at bay, lowering the risk of foodborne illnesses. Additionally, maintaining flavor, texture, and nutritional value is vital for a satisfying eating experience.

As you store food, consider how preservation techniques can enhance your meals and protect your family's health. With effective food preservation, you're not just prolonging shelf life; you're also ensuring that the food you eat remains delicious and safe, making every bite a pleasure.

Key Preservation Techniques

essential conservation methods

Food preservation methods are varied and effective, each serving a specific purpose to keep your food safe and tasty.

You can utilize techniques like freezing, which halts bacterial growth and keeps your food fresh for months.

Canning is another great option, preserving food in airtight jars to guarantee longevity.

Advertisement

Dehydrating removes moisture, preventing spoilage while maintaining flavor and nutrients.

Fermentation not only preserves but also enhances taste and health benefits.

Finally, pickling involves soaking food in brine or vinegar, offering a zesty twist while extending shelf life.

Each method has its advantages, so choose the ones that best suit your needs and preferences to enjoy your food for longer.

Essential Food Preservation Tools

key food storage equipment

A variety of essential food preservation tools can make a significant difference in how you store and maintain your food.

First, investing in quality vacuum sealers helps keep air out, extending the life of your perishables. Mylar bags are another great option, especially when paired with oxygen absorbers, as they prevent oxidation and spoilage.

Advertisement

Don't forget about canning jars; they're perfect for preserving fruits, vegetables, and sauces. A dependable food dehydrator can also help you make snacks while reducing moisture content.

Best Practices for Food Storage

effective food preservation techniques

Effective food storage practices are essential for maintaining the quality and safety of your food. To maximize freshness, follow these guidelines:

Storage Method Ideal Temperature Shelf Life Extension
Refrigeration 32°F – 40°F 1-4 weeks
Freezing 0°F or lower 6 months – 1 year
Vacuum Sealing Room Temperature 1-3 years
Mylar Bags with O2 Absorbers Room Temperature 5-30 years

Keep your food in airtight containers to prevent moisture and pests. Label items with dates and contents for easy identification. Regularly check for spoilage and rotate stock to use older items first. Following these practices will help you enjoy fresher, safer food.

Evaluating Food Preservation Products

analyzing food storage solutions

When it comes to preserving your food, selecting the right products can make a significant difference in maintaining quality and extending shelf life.

Start by evaluating the specific needs of your food items; consider factors like moisture content, storage duration, and packaging type. For instance, if you're using oxygen absorbers, verify they're appropriate for the size of your containers and the type of food.

Look for reputable brands that offer clear absorption capacities and include indicators for replacement. Don't forget to assess compatibility with your chosen storage materials, such as Mylar bags or vacuum-sealed containers.

Common Preservation Mistakes

avoiding preservation pitfalls

Many home preservers overlook critical steps that can jeopardize their efforts. One common mistake isn't sealing containers properly. If there's any air left, oxidation can occur, leading to spoilage.

Another error is using insufficient oxygen absorber sizes for large quantities of food. This can result in inadequate preservation, diminishing your food's shelf life.

Advertisement

Ignoring storage conditions, like temperature and humidity, is also a significant oversight. High humidity can lead to spoilage, especially with certain foods.

Finally, don't forget to check expiration dates on your oxygen absorbers. Using expired products won't provide the protection you need.

Maintaining Food Quality Over Time

ensuring long term food freshness

Maintaining food quality over time is essential for enjoying your stored items at their best. To achieve this, consider using oxygen absorbers in your packaging. They effectively absorb oxygen, preventing spoilage and extending shelf life.

Pair these absorbers with Mylar bags or vacuum-sealed containers for ideal results. Always store your oxygen absorbers in airtight containers and seal them immediately after use.

Be cautious not to use them with high-humidity foods, as this could lead to spoilage. Regularly monitor storage conditions and replace absorbers when you open containers for extended periods.

Frequently Asked Questions

How Do Oxygen Absorbers Work in Food Preservation?

Oxygen absorbers work by absorbing oxygen within sealed packaging, which prolongs food freshness and shelf life. They inhibit bacteria and mold growth, keeping your food safe and flavorful while preventing spoilage and reducing waste.

Advertisement

Can Oxygen Absorbers Be Reused After Opening?

When it comes to reusing oxygen absorbers, you can't have your cake and eat it too. Once opened, they lose effectiveness, so it's best to use fresh ones for ideal food preservation.

What Foods Should Not Be Stored With Oxygen Absorbers?

You shouldn't store high-humidity foods like fruits, vegetables, and certain cheeses with oxygen absorbers. They can absorb moisture, leading to spoilage and health risks. Always check food compatibility before using absorbers for preservation.

How Long Do Oxygen Absorbers Last Once Opened?

Once opened, oxygen absorbers last about 4-6 hours before losing effectiveness. To maximize their lifespan, store them in airtight containers immediately after use, ensuring you seal them tightly to prevent moisture from spoiling their function.

Are There Any Safety Concerns With Using Oxygen Absorbers?

Yes, there are safety concerns with using oxygen absorbers. You should guarantee they're used appropriately, avoiding high-humidity foods and sealing containers properly. Always monitor storage conditions to prevent spoilage and potential foodborne illnesses.

Conclusion

In summary, mastering food preservation can feel like wielding a magic wand that transforms your kitchen into a waste-free wonderland. By choosing the right tools and techniques, you can guarantee your favorite ingredients stay fresh and flavorful for what seems like an eternity. Remember to follow best practices and avoid common pitfalls to truly elevate your food storage game. Embrace these essentials, and enjoy the satisfaction of knowing your food is well-protected and your waste is minimized!

Advertisement
Continue Reading

Survivalism

Master Canning Ravioli for Emergency Preparedness

Master the art of canning ravioli for emergency preparedness and learn essential tips that will ensure your meals are ready when you need them most.

Published

on

ravioli canning for emergencies

Mastering canning ravioli is a smart move for emergency preparedness. Start with fresh or frozen uncooked ravioli and a pressure canner, which is essential for safely processing low-acid foods. Use a flavorful broth or sauce as your canning liquid. Verify your jars are sterile and filled with ravioli, leaving a 1-inch headspace. Seal jars properly and process them at 240°F for safety. Once cooled, store sealed jars in a cool, dark place. With your ravioli ready, you'll have meals on hand when you need them most. Stick around to discover more handy tips and techniques!

Key Takeaways

  • Use fresh or frozen uncooked ravioli and a flavorful broth or sauce for optimal taste and preservation during canning.
  • Ensure a pressure canner reaches 240°F (116°C) to safely process low-acid foods like ravioli.
  • Sterilize jars and lids thoroughly to prevent spoilage; inspect for cracks before use.
  • Store sealed jars in a cool, dark place and label with date and contents for easy access.
  • Regularly check sealed jars for spoilage after canning to ensure food safety during emergencies.

Understanding the Canning Process

mastering canning techniques explained

Understanding the canning process is essential for safely preserving ravioli and other low-acid foods. Canning involves placing food in airtight jars and using heat to create a sterile environment, which prevents spoilage and foodborne illnesses.

For ravioli, you'll need to use a pressure canner, as it guarantees the internal temperature reaches 240°F (116°C), essential for low-acid foods. Start with fresh or frozen uncooked ravioli and prepare a flavorful canning liquid, like broth or sauce.

Fill the jars with ravioli, maintaining a 1-inch headspace, and release air bubbles. Properly process the jars for the recommended time to guarantee safety.

Necessary Equipment for Canning

essential canning supplies list

When you're ready to can ravioli, having the right equipment is vital for success.

You'll need sturdy canning jars and fresh lids to guarantee a proper seal. A pressure canner is essential for safely processing low-acid foods like ravioli.

Here's a quick list of what you should gather:

Advertisement
  • Canning Jars: Use pint or quart-sized jars, making sure they're free from cracks.
  • Pressure Canner: This maintains the necessary temperature to avoid spoilage.
  • Jar Lifter: Important for safely handling hot jars right out of the canner.

With these tools in hand, you're set to start the canning process efficiently and safely, making sure your ravioli is preserved for future meals.

Ensuring Safety During Canning

canning safety guidelines implementation

Safety is always a top priority during the canning process. To prevent foodborne illness, always use tested recipes from reliable sources.

When working with low-acid foods like ravioli, make sure you use a pressure canner to reach the necessary temperature for safe preservation. Inspect your jars and lids for any cracks or imperfections before starting; faulty equipment can lead to spoilage.

Utilize a jar lifter to handle hot jars, minimizing the risk of burns. Keep your workspace clean and organized to avoid contamination.

Regularly check the pressure during processing, and if it drops, restart the timing. Finally, inspect sealed jars after cooling for any signs of spoilage, such as bulging lids or off odors.

Sterilization of Jars and Lids

jar and lid sterilization

To guarantee your canning process is successful, proper sterilization of jars and lids is essential. Start by washing your jars in hot, soapy water, rinsing thoroughly.

Then, immerse the jars in a boiling-water canner for at least 10 minutes to eliminate any contaminants. For the lids, soak them in hot water (not boiling) to soften the sealing compound, assuring a tight seal.

Here's what you need to remember:

Advertisement
  • Use clean, undamaged jars to prevent spoilage.
  • Boil jars for 10 minutes to assure sterilization.
  • Soak lids in hot water to enhance sealing effectiveness.

Proper Sealing Techniques

effective sealing methodologies explained

Proper sealing techniques are essential for guaranteeing the longevity and safety of your canned ravioli. Start by wiping the rims of your jars with a clean, damp cloth to remove any food particles. This step prevents contamination and guarantees a tight seal.

Next, use a magnetic wand to place sterilized lids onto each jar, followed by screwing on the bands until they're fingertip tight. Be careful not to overtighten, as this can interfere with the sealing process.

Once filled and sealed, process your jars immediately in a pressure canner according to your recipe instructions. Proper sealing keeps your ravioli safe and flavorful for years, so take the time to do it right!

Cooling and Storing Canned Ravioli

properly store canned ravioli

After processing your jars, let them cool down completely on a wire rack or a clean dishtowel for 12 to 24 hours.

Once cooled, check the seals by pressing down in the center of each lid; if it pops back, your seal is good.

To guarantee your canned ravioli stays fresh, follow these storage tips:

  • Store sealed jars in a cool, dark place (50°F to 70°F).
  • Keep jars away from direct sunlight to prevent spoilage.
  • Label each jar with the date and contents for easy reference.

Creative Cooking Ideas

innovative culinary recipe inspiration

Canned ravioli opens up a world of culinary creativity that you can easily explore in your kitchen. You can transform this convenient staple into a variety of delicious dishes.

Try making a hearty casserole by layering ravioli with marinara sauce, cheese, and your favorite vegetables. For a unique twist, stuff bell peppers with ravioli and bake them with a sprinkle of cheese on top.

Advertisement

If you're craving soup, combine canned ravioli with broth, fresh herbs, and vegetables for a quick meal. Elevate your dish by adding gourmet toppings like freshly grated Parmesan or a drizzle of pesto.

With a bit of imagination, your canned ravioli can shine in countless delightful ways!

Frequently Asked Questions

How Long Can Canned Ravioli Be Stored Safely?

Canned ravioli can safely be stored for 1 to 2 years if kept in a cool, dark place. Check seals regularly and discard any jars with bulging lids or off odors to guarantee safety.

Can I Reuse Canning Lids for Sealing?

You can't reuse canning lids for sealing. They're designed for one-time use to guarantee a proper seal. Always use new lids to maintain food safety and quality in your canning process.

What Are the Signs of Spoiled Canned Ravioli?

You might think canned ravioli lasts forever, but look for bulging lids, off odors, or unusual colors. If you notice any of these signs, discard the jars to guarantee your safety. Always check before consuming!

Advertisement

Can I Can Homemade Ravioli Instead of Store-Bought?

Yes, you can homemade ravioli! Just make certain they're fresh and uncooked for the best texture. Follow proper canning techniques, using a pressure canner to guarantee safety and prevent spoilage. Enjoy your delicious creations!

Is It Safe to Can Ravioli With Meat Fillings?

Yes, it's safe to can ravioli with meat fillings if you use a pressure canner. Make certain you follow tested recipes and proper processing times to avoid foodborne illnesses and guarantee safe preservation.

Conclusion

By mastering the art of canning ravioli, you're not just storing food; you're crafting a safety net for your future. Like a treasure chest brimming with culinary delights, your pantry will become a source of comfort and nourishment in challenging times. With the right techniques and a bit of practice, you'll enjoy the satisfaction of having delicious, homemade meals at your fingertips. So roll up your sleeves, get started, and savor the rewards of your efforts!

Continue Reading
Advertisement

Affiliate disclaimer

As an affiliate, we may earn a commission from qualifying purchases. We get commissions for purchases made through links on this website from Amazon and other third parties.

Vetted

must have survival gear checklist must have survival gear checklist
Vetted3 months ago

15 Essential Survival Gear Items You Need for Your Next Adventure

I uncover the 15 essential survival gear items you can't afford to miss for your next adventure—will you be prepared...

essential survival gear checklist essential survival gear checklist
Vetted3 months ago

15 Essential Survival Gear Items You Need to Stay Prepared in the Wild

Harness the power of 15 essential survival gear items to thrive in the wild—discover what you need to stay prepared...

durable survival gear essentials durable survival gear essentials
Vetted3 months ago

15 Most Durable Survival Gear Essentials for Ultimate Preparedness

Amass your survival skills with these 15 durable gear essentials that promise to elevate your preparedness—discover what you might be...

essential survival gear checklist essential survival gear checklist
Vetted3 months ago

15 Essential Survival Gear Items Everyone Should Have in Their Kit

Just when you think you're prepared, discover the 15 essential survival gear items that could make all the difference in...

essential gear for adventurers essential gear for adventurers
Vetted3 months ago

15 Coolest Survival Gear Must-Haves for Every Adventurer

Adventure awaits with these 15 coolest survival gear must-haves that every adventurer needs to thrive—discover what essentials could transform your...

affordable survival gear essentials affordable survival gear essentials
Vetted3 months ago

15 Best Affordable Survival Gear Essentials for Every Adventurer

Check out these 15 affordable survival gear essentials every adventurer needs to stay prepared—discover what could save your life in...

ultimate camping survival essentials ultimate camping survival essentials
Vetted3 months ago

15 Best Camping and Survival Gear for Your Ultimate Outdoor Adventure

Achieve outdoor excellence with the 15 best camping and survival gear essentials—discover what you can't afford to leave behind!

essential survival gear checklist essential survival gear checklist
Vetted3 months ago

15 Best Backpack Survival Gear Essentials for Every Adventurer

Incredible backpack survival gear essentials await every adventurer—discover what you need to be fully prepared for any outdoor challenge!

top preppers backpacks reviewed top preppers backpacks reviewed
Vetted3 months ago

15 Best Backpacks for Preppers: Gear Up for Any Situation

Overview of the 15 best backpacks for preppers reveals essential features that could make all the difference in your survival...

ideal locations for preppers ideal locations for preppers
Vetted3 months ago

15 Best Places for Preppers to Live: Secure Your Future in These Ideal Locations

Discover the top 15 locations perfect for preppers seeking safety and sustainability, but which one will secure your future best?

essential long term survival foods essential long term survival foods
Vetted3 months ago

15 Best Prepper Foods to Store for Long-Term Survival and Peace of Mind

With the right prepper foods, you can ensure long-term survival and peace of mind—discover the essential items you need to...

top prepper resources guide top prepper resources guide
Vetted3 months ago

15 Best Prepper Sites to Help You Get Prepared for Anything

Join the journey to discover the 15 best prepper sites that can transform your emergency preparedness strategy—are you ready to...

Advertisement

Trending