To build a safe wilderness shelter from natural materials, start by choosing a flat, well-drained site near water but away from flood zones. Gather strong, flexible branches for the frame, then layer bark, leaves, and moss for waterproofing and insulation. Reinforce the structure for stability and add natural sealants for weatherproofing. Maintain your shelter over time by inspecting and repairing it regularly. For detailed tips on construction and upkeep, continue exploring these essential strategies.
Key Takeaways
- Choose a flat, well-drained site near water, protected by natural windbreaks for a safe and stable shelter foundation.
- Select sturdy, flexible branches and poles for a durable structural framework secured with natural bindings.
- Use layered bark, leaves, and mud to create waterproof and insulating coverings for weather resistance.
- Regularly inspect and maintain the shelter, trimming nearby vegetation and repairing structural damage promptly.
- Keep the shelter environment clean and free of pests by removing debris and managing vegetation around the site.
Assessing Your Environment and Gathering Resources
Before building a shelter, it’s vital to thoroughly assess your environment and gather available resources. Start by observing wildlife interaction; animals often signal safe areas or indicate hazards. Pay attention to animal tracks, droppings, and behavior to identify safe zones and potential dangers. Next, focus on edible plant identification—look for recognizable plants, berries, and greens that can supplement your nutrition. Be cautious and verify your findings, as misidentification can be dangerous. Collect sturdy natural materials like branches, leaves, and bark that can be used for shelter construction or insulation. Gathering these resources early guarantees you have what you need when building your shelter. Staying aware of your surroundings and understanding local flora and fauna is indispensable for safety and survival. Utilizing portable camping tools can significantly simplify the gathering and construction process, making your shelter more efficient and secure. Additionally, understanding fire safety principles is crucial when working with natural materials to prevent unintended wildfires. Being familiar with local grocery store hours can help you plan efficient resource collection trips, especially in unfamiliar areas or when relying on nearby stores for supplies. Furthermore, recognizing nutrient-rich ingredients in your environment can improve your overall health and energy levels during prolonged stays outdoors.
Choosing the Optimal Shelter Site
When selecting a shelter site, you need to evaluate the terrain features to guarantee stability and safety. Look for natural windbreaks like trees or rocks to shield you from harsh weather. By choosing a location with these considerations in mind, you’ll improve your comfort and protection in the wilderness. Additionally, considering projector placement and sightlines can help ensure your shelter is positioned for optimal visibility and minimal disruption. It’s also helpful to assess environmental impact to minimize your footprint and preserve the natural surroundings. Incorporating knowledge of sustainable materials can further enhance your shelter’s eco-friendliness and durability in the wilderness. Understanding sound mixing techniques can also be beneficial if you plan to create a quiet, insulated space that reduces external noise. Recognizing local climate patterns can aid in selecting the most suitable site for seasonal weather variations.
Assess Terrain Features
How can you identify the best location for your wilderness shelter? Start with terrain analysis—look for flat or gently sloping ground to prevent water pooling. Prioritize sites near reliable water sources, but avoid areas prone to flooding or runoff. Use this table to evaluate terrain features:
| Feature | Why It Matters | What to Look For |
|---|---|---|
| Elevation | Prevents flooding | Slightly elevated ground |
| Drainage | Keeps area dry | Natural slopes or ditches |
| Water sources | Ensures supply but reduces risk of flooding | Nearby streams or groundwater |
Additionally, understanding the terrain features can help you select a safe and sustainable shelter site. Recognizing soil stability can further influence your choice, as stable ground reduces the risk of collapse or shifting. Being aware of headphone compatibility can be useful if you need to listen to weather alerts or communication devices in the wilderness. It’s also important to consider cookie management practices to protect your privacy and optimize your online research during planning. Incorporating knowledge of signs of spoilage in food sources can be beneficial when foraging or storing supplies safely in your shelter.
Consider Shelter Windbreak
Selecting a shelter site that benefits from natural wind protection can substantially improve your comfort and safety. To maximize shelter wind protection, consider windbreak design when choosing your location. A good windbreak blocks or diverts strong gusts, reducing heat loss and wind chill. Look for natural features like large rocks, dense trees, or terrain that shields your site from prevailing winds. Position your shelter on the leeward side of these features to create effective shelter wind protection. Avoid open areas or exposed ridges where wind speeds are higher. By carefully selecting a site with an ideal windbreak, you’ll lessen the impact of harsh weather, conserve energy, and create a more livable, secure shelter from natural materials. Additionally, evaluating shelter safety and potential risks can help ensure your shelter remains a reliable refuge during adverse conditions. Considering dreams of natural elements and their influence on your environment can also guide you toward choosing a more protected location. Incorporating natural windbreaks, such as bushes or constructed barriers, can further enhance your shelter’s resilience against the elements. Recognizing the importance of vibrational energy in creating a safe and comfortable shelter can help you select the optimal site that aligns with your intentions. Moreover, understanding how water features like ponds or streams can influence local microclimates may aid in selecting the most advantageous spot for your shelter.
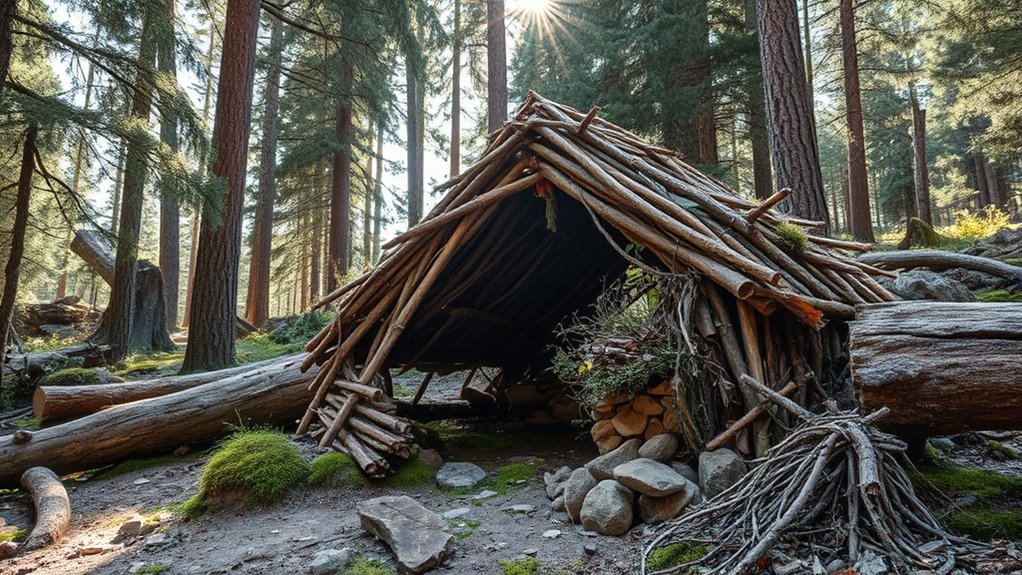
Building a Frame Using Branches and Poles

Start by selecting strong, flexible branches and sturdy poles that can support your shelter. Arrange them into a solid framework, ensuring the structure is stable and balanced. Use natural bindings like vines or strips of bark to secure everything tightly in place. Incorporating well-anchored support structures helps ensure your shelter remains stable during adverse weather conditions. To enhance the durability of your shelter, consider hybrid bike principles such as lightweight materials and versatile design to adapt to different terrains and weather scenarios.
Selecting Strong Branches
When building a sturdy shelter frame, choosing strong branches is essential for ensuring stability and safety. Focus on branch selection by inspecting wood strength carefully. Look for branches that are straight, free of cracks, and free of signs of rot or insect damage. The best wood strength comes from branches that feel dense and solid when you tap them or squeeze gently. Avoid branches that are brittle or overly flexible, as they won’t hold up under weight or wind. Test a few by bending them slightly; if they snap or bend easily, skip those. Strong branches provide a reliable framework that won’t easily collapse or break. Proper branch selection makes your shelter safer, more durable, and better able to withstand outdoor conditions. Additionally, understanding the quality of wood can help you choose the most durable materials for your shelter. Recognizing wood strength allows for better assessment of each branch’s suitability for supporting weight and resisting environmental stress. Moreover, selecting branches with durable wood ensures your shelter will last longer in outdoor conditions.
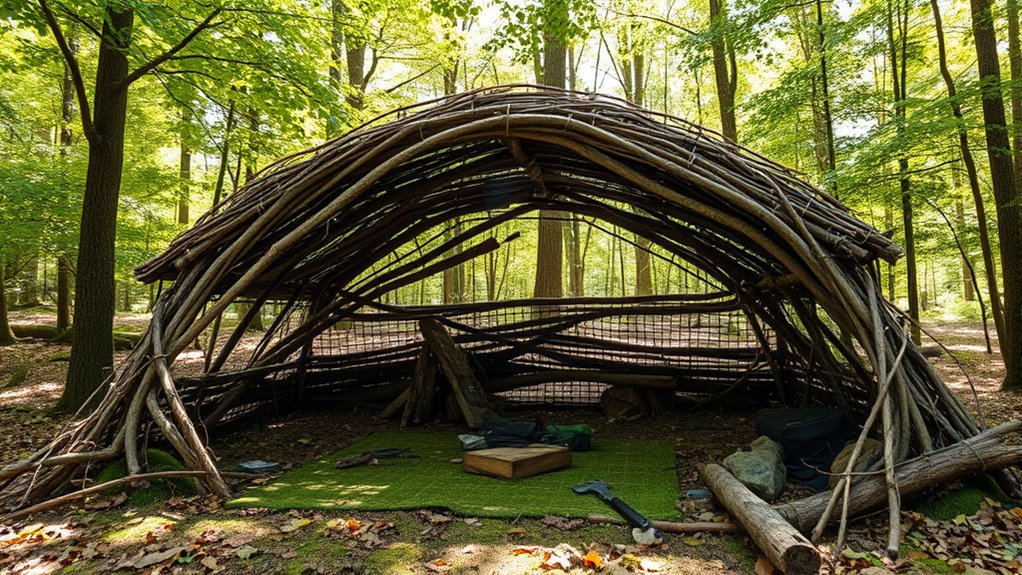
Arranging Structural Framework
Once you’ve identified strong, durable branches, the next step is arranging them into a stable framework. Focus on creating a basic skeleton that supports your shelter’s structure. Place larger poles vertically to serve as the main supports, then connect them with horizontal branches to form the walls and roof. Pay attention to the interior decoration by positioning branches so they are not only sturdy but also visually appealing. A well-structured frame enhances the aesthetic design, giving your shelter a natural, harmonious look. Keep the framework balanced and secure, ensuring it can withstand wind and weather. Remember, a solid framework is the foundation for a safe, comfortable shelter that blends seamlessly into the wilderness environment. Using proper support techniques can further reinforce the stability of your shelter.
Securing With Natural Bindings
To make certain your shelter stays sturdy, you need to secure the branches and poles with natural bindings. Natural cordage, like strips of bark or twisted vines, provides strong, biodegradable support. Use vine binding to tie intersecting branches tightly together, ensuring the frame holds its shape. Wrap the vine multiple times around joints, pulling firmly to eliminate slack. Focus on creating a tight, secure knot to prevent shifting under wind or weight. When binding, aim for even tension to avoid loosening over time. If available, use flexible, thick vines that can be easily twisted and tied. Proper vine binding not only strengthens your structure but also keeps your shelter sustainable and environmentally friendly. With these techniques, your frame remains stable and ready for further construction.
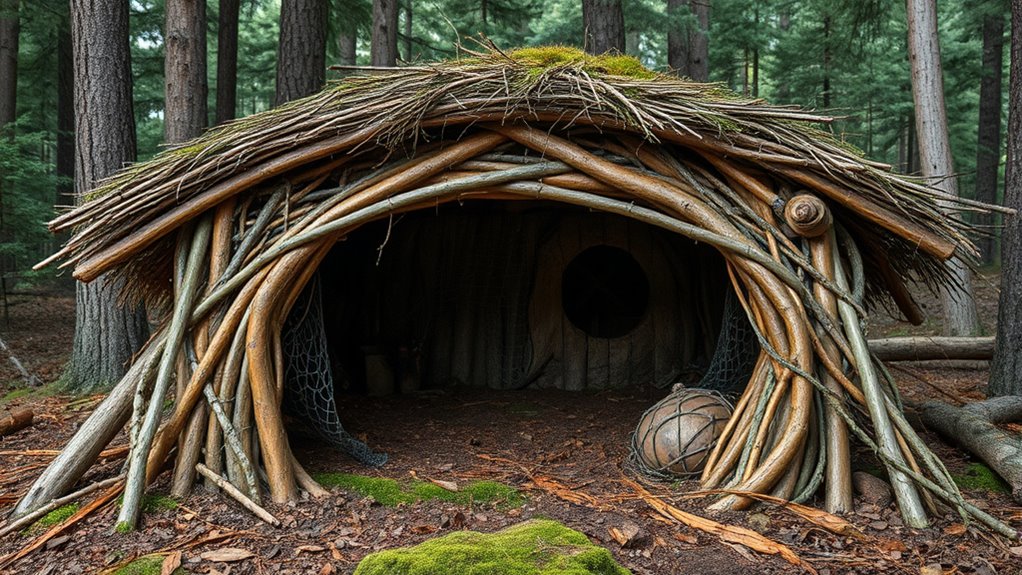
Creating a Weather-Resistant Roof and Walls

A weather-resistant roof and walls are essential for guaranteeing your shelter can withstand the elements. To achieve this, focus on natural waterproofing methods, like layering bark, leaves, or mud over your walls and roof. These materials help shed rain and block wind. Applying weatherproof sealants made from natural resins or plant-based substances enhances protection by sealing gaps and preventing water intrusion. Make certain your roof slopes slightly to allow water runoff, using sturdy branches or logs as a frame. Cover the structure thoroughly, overlapping materials to create a continuous barrier. Regular maintenance, like reapplying sealants and replacing worn natural coverings, keeps your shelter resilient. Combining natural waterproofing with weatherproof sealants creates a durable, safe haven that endures harsh weather conditions.
Insulating the Shelter With Natural Materials
Insulating your shelter with natural materials is essential for maintaining warmth and comfort, especially in colder weather. Natural insulation provides better thermal protection by trapping heat and reducing drafts. You can use materials like leaves, moss, bark, or straw to insulate walls and floors effectively. Imagine this:
| Material | Placement | Benefits |
|---|---|---|
| Leaves | Layered inside walls | Traps heat, lightweight |
| Moss | Under sleeping area | Insulates floors, retains warmth |
| Bark | Exterior wall lining | Adds barrier, durability |
| Straw | Between wall layers | Air pockets for insulation |
| Pine Needles | Roof insulation | Keeps cold air out |
These natural insulators create a thermal barrier, ensuring your shelter stays warm and cozy.
Securing the Structure for Stability and Safety

Ensuring your shelter remains stable and safe begins with securing its structure against wind, shifting ground, and other environmental forces. Focus on foundation stability to prevent collapse, and ensure load distribution is balanced across the support points. To do this effectively:
- Use large, flat stones or logs as a solid base to prevent sinking or shifting.
- Reinforce joints with sturdy bindings like vines or strips of bark to evenly distribute weight.
- Anchor the structure to surrounding trees or sturdy stakes driven deep into the ground to resist wind and ground movement.
Proper foundation stability and load distribution help your shelter withstand environmental forces, providing a safe refuge. Focus on these key steps to maintain integrity and safety in your wilderness shelter.
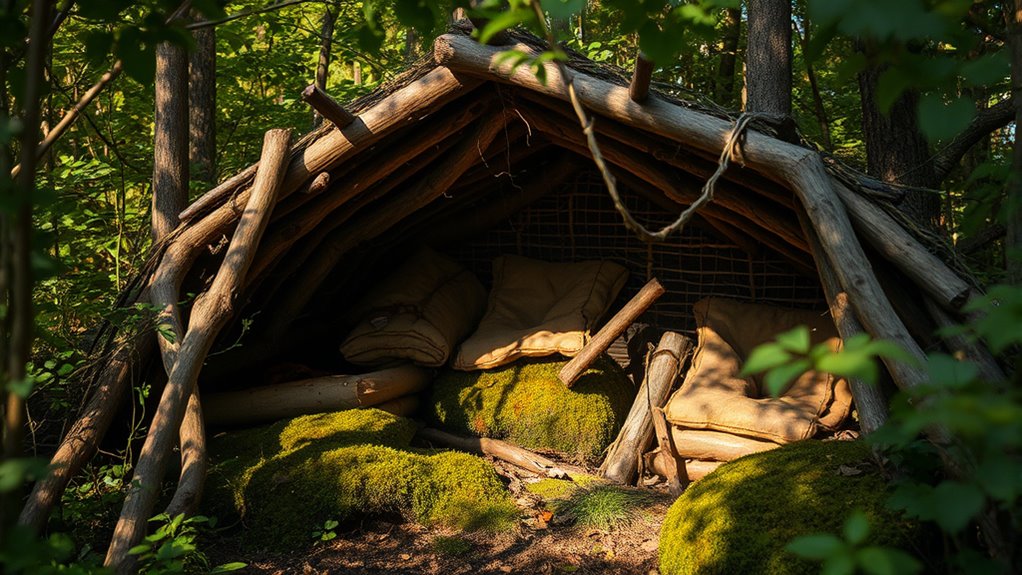
Adding Comfort and Ventilation Features

To make your wilderness shelter more livable, focus on adding comfort and ventilation features that promote airflow and temperature regulation. Proper adding ventilation prevents stuffiness and reduces humidity, keeping you dry and comfortable. Maximize comfort by creating openings or gaps that allow fresh air to flow in and stale air to escape. Consider installing simple vents, leaving gaps in walls, or using natural materials like bark or leaves for adjustable covers. These features help regulate temperature, especially during hot days or cool nights. Here’s a quick overview:
| Feature | Purpose | Tips |
|---|---|---|
| Vent openings | Improve airflow | Position high and low vents |
| Windbreaks | Reduce drafts | Use natural barriers |
| Insulation layers | Maintain warmth or coolness | Use leaves or moss |
Camouflaging and Protecting Your Shelter From Wildlife
Camouflaging and protecting your shelter from wildlife is crucial to maintain safety and guarantee your presence remains undetected. Using natural camouflage helps your shelter blend seamlessly into the environment, reducing chances of unwanted attention. To enhance wildlife deterrence, consider these steps:
- Cover your shelter with leaves, branches, or dirt to break up its shape and match the surroundings.
- Keep food stored away from your shelter, ideally in sealed containers or hanging from a tree.
- Minimize noise and movement around your shelter, as loud sounds can attract curious or aggressive animals.
These techniques help prevent wildlife from discovering your shelter, ensuring a safer, more discreet refuge. Proper camouflage and deterrence are essential for wilderness survival and maintaining peace with local animals.
Maintenance and Adaptation of the Shelter Over Time
Regular upkeep is essential to keep your shelter functional and safe over time. Continually check for damage, rot, or wear, and repair or reinforce as needed. Long-term adaptation involves adjusting your shelter to changing conditions, such as weather or wildlife activity. Regularly replace worn materials and ensure proper drainage to prevent water damage. Use the table below to plan your shelter maintenance:
| Task | Frequency | Key Tips |
|---|---|---|
| Inspect structural | Weekly | Look for rot or loose parts |
| Reinforce walls | Monthly | Add natural binders or supports |
| Clear drainage | After heavy rain | Keep water away from foundation |
| Replace coverings | Every season | Use waterproof natural materials |
| Trim nearby vegetation | Bi-monthly | Prevent damage and pests |
Consistent shelter maintenance guarantees safety, while long-term adaptation helps your shelter endure and thrive.
Frequently Asked Questions
How Long Does It Typically Take to Build a Wilderness Shelter?
Building a wilderness shelter usually takes anywhere from a few hours to a full day, depending on your experience and the complexity of the design. You’ll need time for shelter construction, like assembling and securing materials, and material gathering, which involves collecting natural resources like branches, leaves, or bark. With proper planning and efficient material gathering, you can create a reliable shelter quickly, ensuring you stay protected from the elements.
Can Natural Materials Effectively Withstand Extreme Weather Conditions?
Think of natural materials as nature’s armor—capable of weather resistance and material durability when chosen wisely. You can craft shelters that withstand extreme weather, but success depends on selecting sturdy materials like thick branches, bark, and layered leaves. Proper construction techniques enhance their resilience, turning simple natural elements into a fortress. While they may not rival modern materials, with skill and care, natural shelters can effectively endure harsh conditions.
What Are the Best Natural Insulation Materials Available in the Wild?
When considering the best natural insulation materials in the wild, natural fiber insulation and animal fur bedding top the list. Natural fiber insulation, like wool or plant fibers, offers excellent thermal resistance and moisture management. Animal fur bedding provides exceptional warmth and insulation, especially in cold climates. Combining these materials can create a more effective shelter, keeping you warm and protected from the elements with readily available, natural resources.
How Do I Prevent Pests and Insects From Entering the Shelter?
To prevent pests and insects from entering your shelter, you should set up insect barriers like fine mesh screens around openings and vents. Use pest control methods such as natural repellents like citronella or neem oil around entry points. Keep your shelter clean and dry, and seal any gaps or cracks with mud or natural sealants. These steps create a barrier, making it harder for pests to get inside and ensuring your shelter stays safe and comfortable.
Is It Safe to Use Certain Plants or Materials for Building?
You should always consider plant toxicity and material safety before using plants or natural materials for your shelter. Some plants can be toxic or cause allergic reactions, so research each species carefully. Avoid materials treated with chemicals or that may harbor pests. Use only safe, non-toxic, and natural materials you’re confident are free of harmful substances. Prioritize your safety by choosing plants and materials known for their safety and suitability in wilderness settings.
Conclusion
Building an improvised wilderness shelter might seem intimidating, but with natural materials and a bit of effort, you can create a safe, comfortable refuge. Even if you’re worried about durability, regular maintenance and adjustments will keep it sturdy over time. Remember, your shelter is a crucial lifeline, offering protection and peace of mind. So trust your instincts, gather what you need, and turn natural resources into your own dependable wilderness haven.