Survivalism
Decoding Urban Rescue Markings for Safety
Stay informed on urban rescue markings to ensure your safety during emergencies; discover what these symbols truly mean and how they can save lives.
Understanding urban rescue markings is essential for your safety during emergencies. These symbols quickly convey critical information. For example, a diagonal slash indicates an ongoing search, while an "X" within a square warns of dangerous areas. Familiarizing yourself with FEMA and INSARAG markings helps you assess hazards and navigate safer routes. Recognizing these signs can prevent confusion and allow you to make informed decisions when it matters most. This knowledge not only aids in the rescue process but also empowers you to stay calm in crises. By exploring more, you'll discover additional insights into these life-saving symbols.
Key Takeaways
- Familiarize yourself with the FEMA marking system, using diagonal slashes for ongoing searches and "X" for hazardous areas.
- Understand INSARAG markings: (G) indicates safe entry, while (N) signals dangerous entry points.
- Recognize that completed searches are marked with an "X" and additional team details for clarity.
- Knowing the meaning of rescue markings enhances safety and effective decision-making during emergencies.
- Community awareness of these symbols can reduce confusion and improve response efforts in crisis situations.
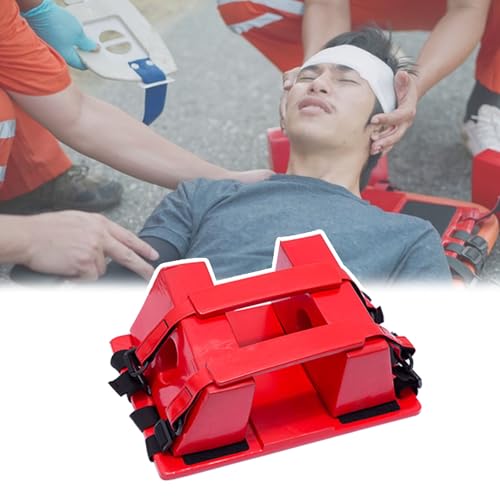
Overview of USAR Operations
When disasters strike, urban search and rescue (USAR) teams are ready to spring into action. These highly trained teams consist of over 140 skilled members organized into task forces, prepared to tackle the challenges posed by emergencies like earthquakes and floods.
You'll find that they're self-sufficient for the first 72 hours, equipped with over 60,000 pounds of specialized gear valued at $1.4 million. Integration of medical personnel guarantees immediate care during rescues, which helps manage chaotic situations effectively.
Regular drills and training improve their readiness and response times, while continuous communication among team members enhances safety. By coordinating with various agencies, USAR teams can maximize their effectiveness in saving lives during critical operations.
Importance of Rescue Markings
Effective communication during USAR operations can greatly impact the outcome of rescue efforts, and that's where rescue markings come into play.
These markings enhance decision-making, allowing teams to coordinate effectively and minimize risks. By using clear symbols, you can quickly identify search statuses, hazards, and completed searches.
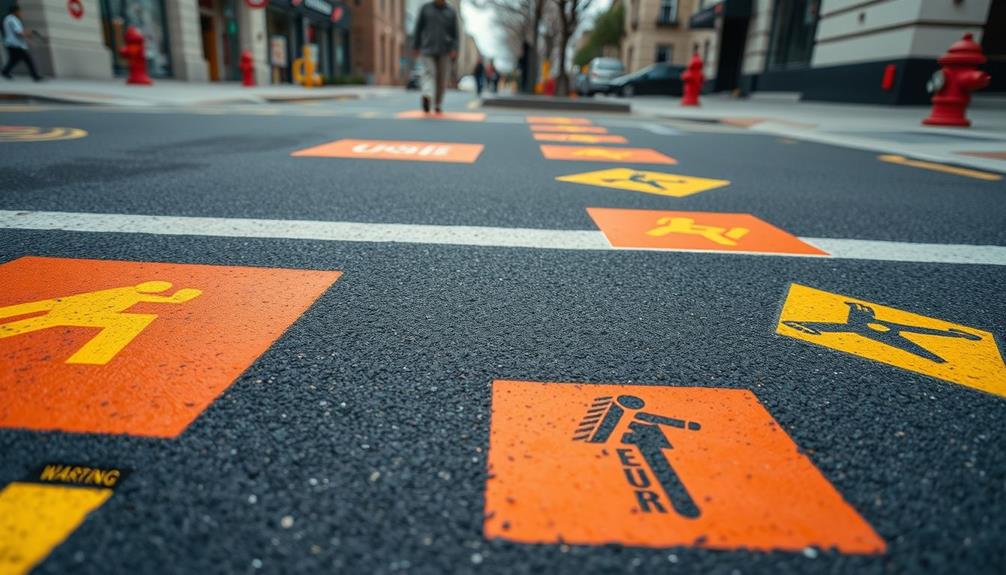
For instance, a single diagonal slash indicates an ongoing search, while an "X" symbolizes a completed search with crucial information attached.
Familiarizing yourself with these markings not only boosts your safety but also streamlines the rescue process. Accurate markings help prevent confusion and guarantee every team member knows the situation at a glance.
Ultimately, understanding and utilizing rescue markings can markedly enhance your effectiveness during critical rescue operations.
FEMA Marking System Explained
Understanding the FEMA marking system is crucial for anyone involved in urban search and rescue operations. This system uses specific symbols to convey critical information about a structure's search status and hazards.
For instance, a single diagonal slash means an ongoing search, while an "X" within a square indicates danger, prohibiting entry. Once a search is completed, the "X" will often include additional details, such as the team's name and the date.
These clear markings help reduce confusion and enhance safety, allowing rescuers to communicate effectively. Familiarity with these symbols is important, as they streamline operations and guarantee that everyone involved knows the current conditions and risks, ultimately leading to more effective rescue efforts.
INSARAG Marking Significance
The INSARAG marking system plays an essential role in urban search and rescue operations by providing important information at entry points of structures.
When you encounter these markings, you can quickly assess the safety status of a building. Each marking indicates whether the entry is safe (G) or dangerous (N), helping you make informed decisions during chaotic situations.
The system also includes the team's name, ensuring accountability and clear communication among rescuers.
You'll find a 1-meter square box at entry points, which contains critical details like the search status and times of operations.
Understanding these markings can prevent confusion, reduce risks, and streamline rescue efforts, ultimately enhancing the effectiveness of the operation.
Common Symbols and Their Meanings
Familiarity with common symbols used in urban search and rescue operations can greatly enhance your ability to navigate emergency situations.
For instance, a single diagonal slash indicates an ongoing search, showing that rescuers are still active in that area. An "X" within a square warns of hazards, advising against entry. When a search is complete, you'll see an "X" accompanied by additional information, ensuring clear communication about the status.
The INSARAG markings provide essential details at entry points, denoting safe (G) or dangerous (N) entries, along with the team name and timestamps.
Understanding these symbols not only helps you stay safe but also aids in effective coordination during rescues, making your awareness critical in emergencies.
Impact on Rescue Coordination
Effective communication through urban search and rescue markings considerably enhances rescue coordination during emergencies.
When you understand these markings, you can quickly assess the situation and determine the safest routes for rescue operations. Each symbol conveys critical information about search status, hazards, and team accountability, enabling you to make informed decisions.
For instance, an ongoing search marked by a diagonal slash informs you that the area is still under investigation, while an "X" within a square warns you to keep out.
Community Awareness and Safety
Understanding urban rescue markings can greatly boost community awareness and safety during emergencies. When you recognize these symbols, you empower yourself and others to respond effectively. By familiarizing yourself with the markings, you can contribute to a safer environment for everyone. For example, knowing the symbols for designated evacuation routes or emergency assembly areas can guide people to safety in times of crisis. Understanding the markings for fallout shelter essentials can also ensure that necessary supplies and resources are readily available during emergencies. By educating ourselves and others about urban rescue markings, we can create a more prepared and responsive community.
Here are some key points to evaluate:
- Informed Decisions: Knowing the meanings of markings helps you make quick, informed choices during a disaster.
- Reduced Panic: Awareness can minimize confusion and panic, keeping emotions in check when every second counts.
- Community Support: Sharing knowledge fosters a sense of unity and support within your neighborhood.
- Enhanced Safety: Understanding these markings can save lives, ensuring you and your loved ones can navigate dangerous situations more safely.
Preparing for Emergency Situations
Recognizing urban rescue markings is just the first step in ensuring your safety during emergencies. To prepare effectively, stockpile supplies for at least 72 hours, including non-perishable food, water, and medical necessities. Reinforce your home with secure doors and windows to enhance safety. Familiarize yourself with local emergency marking systems like FEMA and INSARAG so you can navigate efficiently. Building strong community ties will provide mutual aid and support during crises.
Preparation Tips | Key Actions |
---|---|
Stockpile Supplies | Gather food, water, and meds |
Secure Your Home | Reinforce doors and windows |
Learn Markings | Know FEMA and INSARAG systems |
Build Community Ties | Foster connections with neighbors |
Frequently Asked Questions
How Can I Volunteer for USAR Teams in My Area?
To volunteer for USAR teams in your area, contact local emergency management agencies or search for community organizations. They often hold training sessions and welcome dedicated individuals enthusiastic to help in times of crisis.
What Are the Qualifications Needed to Join a USAR Task Force?
Did you know USAR teams typically have over 140 skilled members? To join a task force, you'll need specialized training, relevant experience, and often certifications in first aid, rescue techniques, or emergency management.
How Often Do USAR Teams Conduct Training Exercises?
USAR teams regularly conduct training exercises, often several times a month. These drills enhance your skills, guarantee readiness, and foster teamwork, helping you respond effectively during actual emergencies and improve overall operational efficiency.
Are There Age Restrictions for Participating in USAR Operations?
When it comes to age restrictions for USAR operations, you'll find that most teams prefer members to be at least 18. After all, they need mature individuals ready to jump into action during emergencies.
What Should I Do if I See USAR Markings at a Disaster Site?
If you see USAR markings at a disaster site, stay calm. Don't enter marked areas, follow instructions from rescue personnel, and provide assistance only if you're trained. Your safety is the priority during such operations.
Conclusion
You've learned how essential Urban Search and Rescue markings are in emergencies, but did you know that understanding these symbols could save lives? By recognizing and interpreting these signs, you don't just become a passive observer; you actively contribute to rescue efforts. In chaotic situations, your awareness can mean the difference between confusion and clarity. So, take the time to familiarize yourself with these markings—your knowledge could help guide responders and keep your community safe when it matters most.
Survivalism
Cowboy Survival Gear: Must-Have Essentials
Unlock the secrets of essential cowboy survival gear that ensures your safety and comfort on the rugged frontier—discover what you can’t afford to miss!
To thrive in the rugged frontier, you need must-have cowboy survival gear. Start with reliable firearms like the Colt Single Action Army and a good fixed-blade knife, such as a Bowie. Don't forget a sturdy canteen to keep hydrated. Pack durable foods like jerky and hardtack for long journeys. A sturdy bedroll with a tarp guarantees comfort and shelter. Invest in good clothing, sturdy boots, and a wide-brimmed hat for protection. Finally, carry ropes for ranch tasks and navigation tools like a compass. Equip yourself well, and you're ready for the wild. There's much more to contemplate as you prepare your gear!
Key Takeaways
- Reliable firearms like the Colt Single Action Army Revolver and Winchester Model 1873 Rifle ensure protection and quick reload capabilities on the frontier.
- Essential knives, including a mid-sized sheath knife and a Bowie knife, provide versatility for various tasks such as skinning game and meal preparation.
- A durable canteen holding 2 to 2.5 quarts of water is vital for hydration, with soaking fabric to keep water cool.
- Sturdy clothing and footwear made from wool and leather, along with a wide-brimmed hat, offer protection against harsh weather conditions.
- A well-stocked first aid kit, complete with antiseptic wipes and pain relief medication, is crucial for managing injuries in the wilderness.
Firearms and Ammunition
When traversing the rugged frontier, carrying reliable firearms and ammunition is essential for your safety and sustenance.
You'll want to choose firearms like the Colt Single Action Army Revolver and the Winchester Model 1873 Rifle. The Colt revolver is favored for its reliability and .45 caliber ammunition, while the Winchester rifle is prized for its quick reload capabilities—critical in both hunting and defense situations.
Keep extra ammunition stored in leather or canvas belts, ensuring you have easy access to common calibers like .45 and .44-40.
It's crucial to keep your firearms within reach, whether in thigh pockets or saddle pouches, so you can respond swiftly to any threats or hunting opportunities that arise.
Your survival relies on the readiness of your gear.
Essential Knives
Having a reliable knife is a must for any cowboy maneuvering the rugged frontier. A good mid-sized sheath knife, with a blade length between 5 to 7 inches, strikes the perfect balance between portability and functionality. You'll find fixed-blade knives, like Bowie or camp knives, invaluable for their durability.
Knife Type | Purpose | Key Features |
---|---|---|
Bowie Knife | Skinning game | Curved blade |
Camp Knife | Meal prep | Versatile design |
Sheath Knife | Cutting rope | Easy carry |
Don't forget to keep your blade sharp using natural materials like granite or sandstone on the go. With the right knife, you're equipped to tackle daily tasks and survive in the wild.
Hydration and Canteens
Staying hydrated is essential for any cowboy on long rides across the rugged frontier. A reliable canteen, typically holding 2 to 2.5 quarts, guarantees you have enough water for the journey.
Look for one made of metal or leather, often with straps for easy carrying. On hot days, you can use soaking fabric coverings to keep your water cool.
Remember, conserving water is key; fill your canteen at natural sources whenever possible. A well-maintained canteen isn't just gear; it's a lifeline.
With proper hydration, you'll stay sharp and ready for whatever challenges the trail throws your way. Don't underestimate the power of water—it's as vital as your trusty saddle or reliable steed.
Staple Foods
For a cowboy traversing the rugged frontier, having a stash of staple foods is essential for survival.
You'll want to pack dried beans, salt pork, jerky, and hardtack biscuits, as these items are lightweight and have long shelf lives.
Coffee, brewed from roasted beans, is vital for energy during exhausting days, and don't forget sugar to sweeten it.
These foods not only provide sustenance but also comfort during long journeys.
You can store them in durable containers that are easy to pack in your saddlebags.
Cooking Equipment
Packing the right cooking equipment can make all the difference when preparing meals on the trail. Start with durable cast iron skillets and coffee pots, which can handle the heat of an open fire and last a lifetime.
Don't forget tin plates and cups for easy serving and cleanup. Lightweight cookware is essential for practicality, ensuring you can manage your gear with ease.
A food dehydrator can enhance your meal options, allowing you to carry lightweight ingredients while still enjoying variety. Season your cast iron properly for ideal cooking performance.
With the right tools, you'll not only prepare tasty meals but also build your skills in outdoor cooking, making every campfire a memorable experience.
First Aid Supplies
When you're out on the rugged frontier, having a well-stocked first aid kit can mean the difference between a minor setback and a serious crisis.
You'll want to be prepared for cuts, scrapes, and other injuries that can happen during your adventures. Make sure your kit is portable and lightweight, so it's easy to carry on long rides.
Here are some essential items to include:
- Adhesive bandages for minor cuts and blisters
- Antiseptic wipes to clean wounds and prevent infection
- Gauze pads and tape for larger injuries
- Pain relief medication to ease discomfort
Being proactive about first aid can keep you healthy and focused on surviving the wild.
Clothing and Footwear
During long days on the trail, wearing the right clothing and footwear is crucial for your comfort and safety.
Choose durable materials like wool and leather that protect you from harsh weather. Sturdy boots are essential; they should be waterproof and provide good ankle support for traversing rugged terrain.
A wide-brimmed hat will shield you from the sun and rain, while a bandana can serve multiple purposes, like a dust mask or sweatband.
Layering your clothing allows you to adapt quickly to changing temperatures.
Remember, investing in quality gear not only enhances your comfort but also guarantees you're ready for any challenges the trail throws your way.
Stay prepared and keep your focus on the adventure ahead!
Shelter and Sleeping Gear
Setting up a comfortable sleeping arrangement is essential for maintaining energy on long cattle drives. A good night's sleep can make all the difference in your stamina and focus.
Choose your gear wisely to guarantee restful nights under the stars. Here are some must-have items for your shelter and sleeping gear:
- Bedroll: Use wool blankets or a quality sleeping bag for warmth and comfort.
- Tarp or Canvas: Create a makeshift shelter to protect you from the elements.
- Sleeping Pad: Insulate yourself from the cold ground and add a layer of comfort.
- Pillow: Bring a lightweight option or stuff a spare clothing item for better neck support.
With the right gear, you'll be ready to face the challenges of the trail.
Ropes and Piggin Strings
Ropes and piggin strings are indispensable tools in the cowboy's toolkit, essential for catching cattle and managing horses effectively.
You'll find various types of ropes that cater to different ranching tasks, from securing loads to roping livestock. Mastering the use of a lariat is essential; typically, these ropes range from 60 to 80 feet, allowing for precise cattle catching.
Piggin strings, which are thin leather strips, are particularly useful for tying down calves during branding, ensuring a secure hold without causing harm.
The durability of both ropes and piggin strings allows them to withstand the rugged conditions of ranch life, making them critical components of your survival gear.
In short, having the right ropes and piggin strings is key to your success as a cowboy.
Navigation Tools
While you traverse the vast and often uncharted landscapes of the frontier, having reliable navigation tools is essential for your safety and success. You can't rely on instinct alone; equipping yourself with the right tools will keep you on the right path.
- Compass: Helps you maintain your direction in the wilderness.
- Maps: Detailed maps provide geographical awareness and route planning.
- Sextant: Essential for celestial navigation in remote areas.
- Trail Markers: Familiarize yourself with natural markers to guide your way.
With these navigation tools at your side, you'll confidently navigate through diverse terrains, ensuring you reach your destination safely.
Don't underestimate the importance of knowing where you're and where you're headed!
Frequently Asked Questions
What Are the Best Materials for Cowboy Hats?
When choosing materials for cowboy hats, you'll want durable options like felt or straw. Felt provides warmth and water resistance, while straw keeps you cool. Both materials offer comfort and style for your rugged adventures.
How Do I Choose the Right Spurs for My Horse?
To choose the right spurs for your horse, consider your riding style and the horse's responsiveness. Look for spurs that fit comfortably on your boots and provide subtle cues without causing discomfort or harm to your horse.
What Types of Personal Hygiene Items Should I Carry?
Did you know that 75% of travelers neglect personal hygiene? To stay fresh, pack soap, towels, a toothbrush, toothpaste, and deodorant. Keeping clean boosts morale and well-being during your adventures. Don't underestimate the importance!
How Can I Effectively Store Tobacco While Traveling?
To effectively store tobacco while traveling, use an airtight container to keep it fresh and prevent moisture. Consider adding a small humidity pack, and store it in a cool, dark place for best results.
What Are Common Uses for Bandanas in Cowboy Life?
In cowboy life, you use bandanas for dust masks, sweatbands, and first aid. They also serve as handkerchiefs, sun protection, and even makeshift pouches, proving essential for everyday tasks and unexpected challenges on the trail.
Conclusion
As you saddle up for your cowboy journey, remember that preparation is key. With firearms for protection, knives for utility, and hydration to keep you healthy, you're set for success. Don't forget your sturdy clothing and reliable navigation tools to guide you through the great unknown. Embrace the wild with confidence, equipped with essential gear that'll help you thrive. So, gear up, grab your essentials, and gallop into the glorious frontier of adventure!
Survivalism
Garage Doors: Vulnerable Entry Point for Burglars
Uncover the surprising vulnerabilities of garage doors that make them an easy target for burglars—learn how to protect your home effectively.
Garage doors can be a major weak spot for your home. In fact, about 30% of break-ins involve garage access. Intruders can get in as quickly as six seconds, often using simple tools or universal remotes. Many homeowners neglect proper security, with 60% failing to secure their garages adequately. To protect yourself, consider installing high-security locks, reinforcing doors, and using smart openers with encryption. You might also look into security cameras for real-time monitoring. Understanding these vulnerabilities can help you bolster your home's defenses, and there's much more to explore about enhancing your garage security.
Key Takeaways
- 30% of break-ins utilize garage access, highlighting its vulnerability as an entry point for burglars.
- Intruders can bypass garage systems in as little as six seconds, making quick access a significant risk.
- Many homeowners neglect to secure garages properly, with 60% failing to implement adequate security measures.
- Weak locks and manual release mechanisms are common targets for burglars looking to exploit garages.
- Insurance claims for garage thefts have increased by 15%, indicating a growing trend in garage-related break-ins.
Overview of Garage Break-Ins
When it comes to home security, many people overlook their garage, making it a prime target for burglars. Did you know that around 30% of break-ins involve garage access? Intruders can break in within as little as six seconds, often exploiting unlatched doors.
Unfortunately, 60% of homeowners don't secure their garages properly, leaving them vulnerable. Most break-ins occur during daylight hours, which adds to the urgency of reinforcing your garage security. Urban areas report increased incidents, pointing to the need for enhanced precautions.
With insurance claims for garage thefts rising by 15%, it's essential to take action now. Securing your garage not only protects your belongings but also strengthens your overall home safety.
Don't wait until it's too late!
Common Entry Techniques
Burglars use a variety of common entry techniques to exploit the vulnerabilities found in garage doors. One popular method involves using universal remotes to bypass garage door systems easily.
They might also manipulate manual release mechanisms, employing simple tools like a coat hanger to gain access. Weak locks and hinges present another target, as cutting power to automatic systems can leave doors vulnerable.
Many burglars focus on poorly secured side doors or windows, revealing significant gaps in garage security. By understanding these techniques, you can better prepare and safeguard your home against potential break-ins, ensuring that your garage doesn't become an easy entry point for intruders.
Stay vigilant and recognize the risks associated with your garage door's security.
Effective Prevention Measures
To effectively protect your garage from break-ins, it's vital to implement a combination of proactive measures.
Start by regularly evaluating your garage security and conducting maintenance checks on your door systems. Consider installing high-security locks, including manual locks that require internal access for engagement.
Smart garage door openers with encryption can also enhance your security. Temporarily cut the release cord or use a zip tie to hinder easy access for burglars.
Reinforce your doors and windows with security film, and install motion-sensor lighting outside to deter intruders.
Physical Security Upgrades
Enhancing the physical security of your garage is essential for protecting your home from potential break-ins. Start by installing a Garage Shield to block access to the release mechanism, making it harder for intruders to manipulate.
Use durable materials like heavy-duty metal or reinforced plastic for effective installation. Opt for long screws during lock installation to guarantee better anchoring, and consider products like the Prime Line Garage Door Deadlock for added durability.
Regularly check the engagement of your locks and verify the integrity of the release cord. Reinforcing doors and windows with security film can also deter unwanted entry.
Technological Solutions
Modern technology offers a range of innovative solutions to bolster your garage security. Security cameras act as a strong deterrent, while smart garage door openers provide enhanced control. You can receive alerts directly on your smartphone, keeping you informed in real-time. Biometric access systems add an extra layer of protection by ensuring only authorized users can enter.
Here's a quick look at some technological options:
Technology Type | Key Features | Benefits |
---|---|---|
Security Cameras | Real-time monitoring, alerts | Deters burglars |
Smart Garage Openers | WiFi connectivity, remote access | Convenient control |
Alarm Systems | Motion detection, loud alerts | Immediate response to threats |
Biometric Access Systems | Fingerprint/scanner entry | High security, no keys needed |
Mobile Apps | Real-time notifications | Control from anywhere |
Incorporating these technologies can greatly improve your garage's security.
Insurance Considerations
While securing your garage may seem like a simple task, it can greatly impact your insurance considerations. Insurers often assess the security of your garage when determining your policy rates and coverage. If your garage is a weak point, you might face higher premiums or even denial of claims related to theft.
To guarantee you're adequately covered, consider these factors:
- Upgraded locks that deter unauthorized access.
- Security cameras that document any suspicious activity.
- Alarm systems specifically designed for garage protection.
Investing in these enhancements not only bolsters your home's security but also strengthens your position with insurance providers.
Ultimately, a secure garage could lead to lower premiums and greater peace of mind.
Community Awareness and Resources
Community engagement plays a crucial role in enhancing garage security awareness among homeowners. By participating in local workshops and neighborhood watch programs, you can learn effective strategies to protect your garage. Sharing resources and experiences with your neighbors fosters a safer environment.
Resource | Description |
---|---|
Neighborhood Watch | Organizes community patrols and alerts. |
Local Workshops | Offers practical security tips and tools. |
Online Safety Forums | Shares advice and experiences with peers. |
Home Security Assessments | Professional evaluations of home safety. |
Community Alerts | Notifies residents of suspicious activities. |
Utilizing these resources not only strengthens your garage security but also promotes a culture of vigilance within your community. Together, you can effectively reduce the risk of garage break-ins.
Frequently Asked Questions
How Can I Tell if My Garage Door Is Secure?
To tell if your garage door's secure, check the locks, verify it closes tightly, and inspect for weak spots. Consider installing a security system and reinforce with durable materials for added protection against intruders.
What Should I Do Immediately After a Garage Break-In?
After a garage break-in, you should secure the area, contact the police, document the scene with photos, inform your insurance company, and evaluate your security measures to prevent future incidents. Stay vigilant and proactive.
Are There Specific Garage Door Brands Known for Better Security?
When you're choosing a garage door, remember that not all brands are created equal. Brands like Clopay and Amarr offer enhanced security features, but you'll want to dig deeper for the best protection available.
How Often Should I Replace My Garage Door Locks?
You should replace your garage door locks every few years or immediately after a security breach. Regular maintenance guarantees ideal function and security, protecting your belongings and providing peace of mind in your home.
Can I Reinforce My Garage Door Without Replacing It?
Imagine your garage door standing strong against the elements. You can definitely reinforce it without replacing it—adding sturdy locks, using security film, or installing a Garage Shield can bolster its defenses effectively and easily.
Conclusion
In a world where your garage can be both a sanctuary and a target, it's essential to take action. Imagine the peace of mind that comes with knowing you've secured your home versus the anxiety of a break-in. By understanding the risks and implementing effective measures, you can transform your garage from a vulnerable entry point into a stronghold for your safety. Don't let complacency cost you; take charge and protect what matters most.
Survivalism
Craft Sugardine: A Natural Healing Solution
You won’t believe how easy it is to craft Sugardine, a natural healing solution that transforms wound care—discover its secrets!
Crafting Sugardine is simple and rewarding. You'll need white granulated sugar and povidone-iodine in a 3:1 ratio. This mixture harnesses sugar's moisture-drawing properties to prevent infection, while the povidone-iodine delivers strong antibacterial support. Apply a thick paste over wounds and cover it with a sterile bandage for ideal results. Regularly check the area and reapply as needed. Sugardine is not just cost-effective; it boosts healing and can strengthen the bond between you and your horse. Want to learn about its preparation, application, and added benefits? There's more to uncover!
Key Takeaways
- Combine white granulated sugar and povidone-iodine in a 3:1 ratio to create Sugardine, a potent natural healing solution.
- Mix until a thick paste forms, ensuring even consistency for effective wound coverage and antibacterial properties.
- Store Sugardine in a clean, airtight container in a cool, dry place to maintain its potency and prevent contamination.
- Apply a generous layer to the wound, covering it with a sterile bandage for optimal healing and stability.
- Regularly monitor the treated area and reapply as necessary, seeking veterinary advice for deep wounds or unusual changes.
Understanding Sugardine
When you consider effective wound care for horses, understanding Sugardine is essential. This unique mixture combines granulated sugar and povidone-iodine, resulting in a potent antibacterial solution.
Sugardine's strong antibacterial properties are crucial for preventing infections, especially after abscesses or severe thrush. It promotes the formation of granulation tissue, enabling faster healing and recovery for your horse.
Historically, veterinarians have reported significant improvements in healing times and reduced infection rates with its use. Plus, Sugardine acts as a natural antiseptic for minor wounds, making it an excellent choice for everyday care.
Best of all, it's a cost-effective alternative to commercial antiseptics, easy to prepare with ingredients you likely have on hand.
Essential Ingredients
Understanding the ingredients that make up Sugardine is key to utilizing its benefits effectively. The primary components are white granulated sugar and povidone-iodine solution.
Sugar acts as a moisture-drawing agent, creating an environment that helps prevent infection, while povidone-iodine provides strong antibacterial properties. For best results, maintain a 3:1 ratio of sugar to povidone-iodine.
If you want to enhance the antiseptic effect, consider adding additional iodine. Honey can also be incorporated for its natural healing properties.
Always verify your ingredients are clean and free from contaminants. These essential ingredients work together to promote faster healing and infection prevention, making Sugardine a powerful tool for equine wound care.
Preparing Sugardine
To prepare Sugardine effectively, you'll need to gather the right materials: white granulated sugar and povidone-iodine solution. Combine these ingredients to create a potent healing paste. Use a 3:1 ratio of sugar to povidone-iodine for the best consistency.
Here's a quick reference table for your preparation:
Ingredient | Amount | Purpose |
---|---|---|
White Granulated Sugar | 3 parts | Draws moisture from wounds |
Povidone-Iodine Solution | 1 part | Prevents infection |
Optional: Iodine | As desired | Enhances antiseptic properties |
Optional: Honey | A small amount | Provides additional healing benefits |
Mix thoroughly until you achieve a thick paste. Store the mixture in a clean, airtight container and label it for future use.
Effective Application Techniques
Applying Sugardine effectively is crucial for maximizing its antibacterial benefits. Start by mixing it to a snowball-like consistency for tough tissue or adjust to a runnier texture for better coverage.
Once prepared, evenly distribute a generous layer of Sugardine across the wound to guarantee full contact. Cover the area with a sterile bandage to protect it and keep the Sugardine in place. Use wrapping techniques similar to a poultice for added stability.
Reapply as necessary, especially after washing or if the bandage is changed. Regularly check the treated area to assess healing progress and make adjustments to the application as needed.
This method helps guarantee that your Sugardine works effectively for maximum healing.
Safety Precautions
After guaranteeing effective application techniques for Sugardine, it's important to contemplate safety precautions.
First, always keep Sugardine out of reach of children and pets to prevent accidental ingestion. When applying, wear gloves to protect your hands from potential irritation or allergic reactions.
If you notice any unusual changes in the wound, such as increased redness, swelling, or discharge, seek medical advice immediately. Avoid using Sugardine on deep or serious wounds without consulting a veterinarian.
It's crucial to monitor the treated area regularly for signs of infection.
Finally, make sure all ingredients are clean and free from contaminants during preparation to guarantee safety and efficacy.
Taking these precautions helps assure a positive experience with Sugardine.
Storage Guidelines
Storing your Sugardine properly is vital to maintain its effectiveness and safety. Keep it in a cool, dry place, away from direct sunlight and humidity. An airtight container is best, as it prevents moisture from altering the mixture.
Aim to use your Sugardine within a few weeks for ideal results, as its potency can diminish over time. If you notice any changes in color or smell, it's time to discard it. Always label the container with the date of preparation to keep track.
Benefits of Natural Healing
Natural healing offers a range of benefits that extend beyond mere physical recovery; it fosters a deeper connection between you and your horse. Embracing natural methods like Sugardine can enhance your bond while promoting overall well-being.
Here are three key advantages:
- Holistic Approach: Natural healing considers the whole horse, addressing emotional and physical aspects, which can lead to a more balanced recovery.
- Reduced Side Effects: Using natural ingredients minimizes the risk of adverse reactions compared to synthetic medications, ensuring safer healing.
- Cost-Effective: Natural solutions like Sugardine are often more budget-friendly, allowing you to care for your horse without breaking the bank.
Frequently Asked Questions
Can Sugardine Be Used on Animals Other Than Horses?
Yes, you can use sugardine on other animals, but always check with a veterinarian first. Its antibacterial properties benefit various species, yet each animal's specific needs and sensitivities should be considered for safe application.
How Does Sugardine Compare to Commercial Wound Care Products?
When it comes to wound care, you'll find sugardine's cost-effectiveness and natural properties often beat commercial products. It packs a punch against infections while promoting faster healing, making it a strong contender in equine care.
Is There a Shelf Life for Sugardine After Preparation?
Yes, sugardine has a shelf life of a few weeks after preparation. Store it in a cool, dry place, and discard it if you notice any changes in color or smell. Always guarantee cleanliness.
What Are Signs That Sugardine Is Not Working Effectively?
If you notice increased redness, swelling, or discharge from the wound, it might indicate that sugardine's not working effectively. You should reassess the treatment and consult a healthcare professional for further guidance.
Can I Use Sugardine on Human Wounds as Well?
Imagine a wise gardener tending to both flowers and weeds. You can use sugardine on human wounds, but remember its primary design is for animals. Always consult a healthcare professional before applying it to yourself.
Conclusion
Incorporating sugardine into your horse care routine is like giving your horse a warm, nurturing hug in times of need. This natural remedy not only promotes healing but also stands as a reliable shield against infections. With a simple preparation and application process, you can harness the power of sugardine to guarantee your horse recovers swiftly and effectively. Embrace this cost-effective solution, and watch your horse thrive as its wounds heal with care and comfort.
-
Survivalism4 months ago
Preppers Pack Crossword: Test Your Knowledge of Survival Gear!
-
Survivalism4 months ago
Meal Preppers Near Me: Find Local Services and Tips!
-
Survivalism4 months ago
Inside the Secret World of Doomsday Preppers: Are You Ready?
-
Survivalism4 months ago
AI Doomsday Scenario: Understanding the Potential Risks
-
Vetted4 months ago
15 Best Satellite Phones for Preppers: Stay Connected Anywhere, Anytime
-
Survivalism4 months ago
Preppers List of Items: Essential Gear for Every Survivalist!
-
Survivalism4 months ago
Mastering Hurricane Preparedness: Your Essential Guide
-
Vetted3 months ago
15 Most Durable Survival Gear Essentials for Ultimate Preparedness