Survivalism
Master the Art of Safe Backpacking
Keep your adventures safe and enjoyable by mastering essential backpacking skills; discover what tools and tips will elevate your journey today.
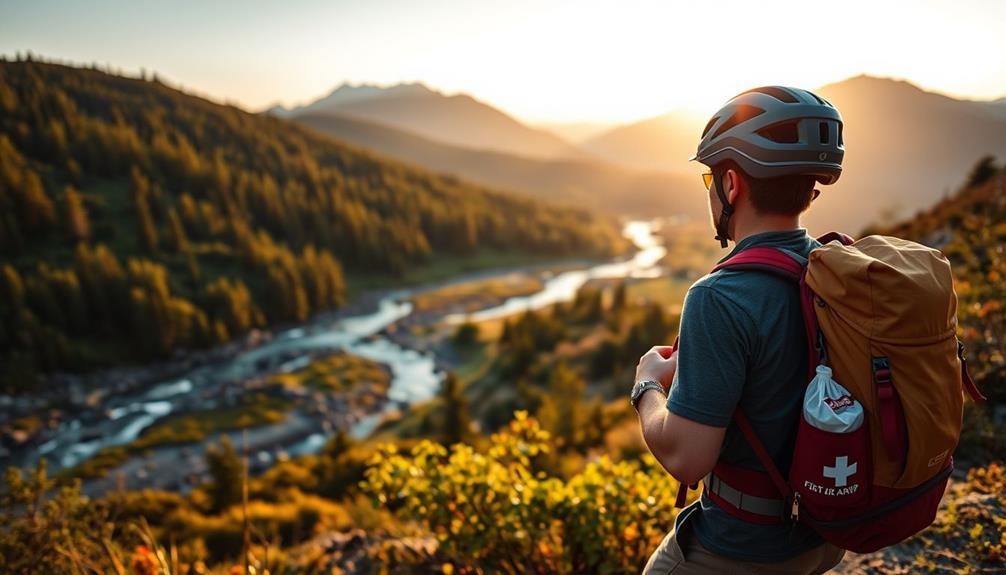
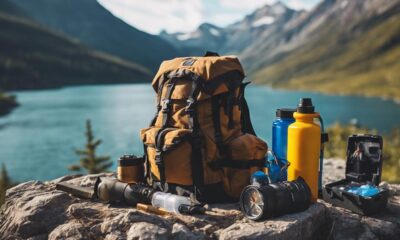
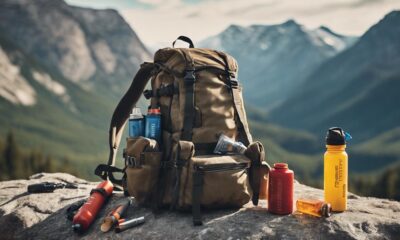
To master the art of safe backpacking, start with thorough preparation. Pack a well-stocked first aid kit, reliable navigation tools, and water purification supplies. Choose a durable, lightweight shelter that suits your environment. Layer your clothing wisely to adapt to changing conditions, and don't forget sun safety: wear long sleeves, broad-spectrum sunscreen, and stay hydrated. Bring dependable illumination like headlamps or lanterns for nighttime tasks. Always have an emergency plan in place, and keep learning about backpacking best practices. There's so much more to explore that can enhance your safe backpacking adventures ahead.
Key Takeaways
- Equip yourself with essential survival gear, including a well-stocked first aid kit and reliable navigation tools like a compass and physical maps.
- Practice layering clothing strategies to adapt to changing weather conditions and maintain comfort throughout your backpacking trip.
- Choose the right shelter based on terrain and weather forecasts, utilizing durable tents or emergency thermal blankets for insulation.
- Prioritize sun safety by wearing protective clothing, applying sunscreen, and staying hydrated to prevent sun-related issues during your hike.
- Continuously learn about backpacking techniques and emergency preparedness through online resources, books, workshops, and community engagement for improved safety.
Essential Survival Gear

Packing essential survival gear is important for ensuring safety during your backpacking adventures.
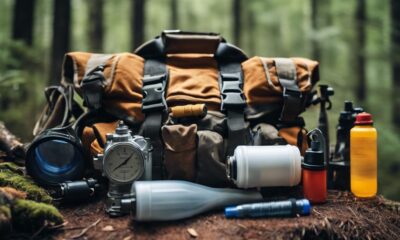
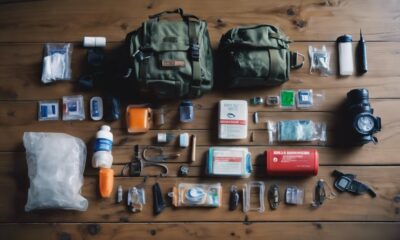
Start with a well-stocked first aid kit, including adhesive bandages, antiseptic wipes, tweezers, and pain relievers. A multi-tool is a must; it combines pliers, a knife, and screwdrivers in one compact device.
Don't forget emergency thermal blankets for cold weather—they're lightweight and provide critical insulation. Water purification supplies are essential for drinking safety, ensuring you stay hydrated without risking illness.
Finally, familiarize yourself with navigation tools like a compass and physical maps, as these can prevent disorientation in the wilderness.
Each item in your survival kit enhances your readiness and confidence, allowing you to focus on enjoying the journey ahead.
Effective Navigation Techniques

Knowing how to navigate effectively can make all the difference in your backpacking experience. Start by equipping yourself with a physical map and a reliable compass. Familiarize yourself with using these tools before hitting the trail; practice regularly to build confidence.
Download offline mapping apps for added security, but don't rely solely on your phone. Check your location frequently to avoid disorientation, especially in unfamiliar terrain. Understanding the landscape is essential, so study the area beforehand to identify potential hazards.
Choosing the Right Shelter

When selecting the right shelter for your backpacking trip, consider the specific conditions you'll face, as a well-chosen shelter can greatly impact your comfort and safety.
Look for durable tents that offer protection from rain, wind, and insects while remaining lightweight and compact for easy transport. If you're facing unpredictable weather, an emergency thermal blanket can provide essential insulation.
Tarps can be a versatile option, allowing you to create quick shelter configurations against rain or sun. Always assess the terrain and weather forecast before deciding.
Layering Clothing Strategies

To guarantee comfort and adaptability during your backpacking adventure, mastering layering clothing strategies is essential. Layering helps you regulate your body temperature and respond to changing weather conditions effectively.
Here's how to layer properly:
- Base Layer: Choose moisture-wicking fabrics like Merino wool or synthetic materials to keep sweat away from your skin.
- Mid Layer: Opt for insulating materials such as fleece or down to trap body heat, especially in colder environments.
- Outer Layer: A waterproof and windproof jacket protects you from the elements, ensuring you stay dry and warm.
- Adjustability: Be ready to add or remove layers based on your activity level and weather changes to maintain comfort.
With these strategies, you'll be prepared for whatever nature throws your way!
Sun Safety Measures

Protecting yourself from the sun during your backpacking adventures is essential for maintaining health and enjoyment.
Start by wearing lightweight, long-sleeved sun hoodies and a wide-brimmed hat to shield your skin and face. Apply broad-spectrum sunscreen with at least SPF 30, reapplying every two hours or after swimming or sweating.
Don't forget polarized sunglasses to protect your eyes from harmful UV rays and to reduce glare. Seek shade whenever possible, especially during peak sun hours between 10 a.m. and 4 p.m.
Staying hydrated is also vital, as dehydration can exacerbate sun-related issues.
Reliable Illumination Options

After ensuring your skin is safeguarded from the sun, it's important to evaluate reliable illumination options for your backpacking trips.
Good lighting keeps you safe and helps navigate in the dark. Here are four essential options to weigh:
- Headlamps: These provide hands-free lighting, making them perfect for setting up camp or cooking at night.
- Lanterns: Great for illuminating your campsite, they create a warm ambiance and often have adjustable brightness.
- Glow Sticks: Lightweight and portable, they're handy as emergency backups or for marking your path.
- Flashlights: A classic option, choose a durable, water-resistant model with a strong beam for longer visibility.
Continuous Learning Resources

Continuous learning is essential for anyone venturing into the wilderness. To enhance your skills, explore various online platforms that offer insights on gear, first aid, and advanced survival techniques, including mastering bug out bags for better preparedness.
Books can also be invaluable resources, providing in-depth knowledge you can reference before and during your trips. Don't overlook local workshops; they offer hands-on learning experiences that are vital for practical skills.
Engaging in community groups and forums lets you share experiences and gather survival strategies from fellow adventurers. Additionally, stay updated on best practices for survival kits, navigation, and emergency situations.
Preparing for Emergencies

Being ready for emergencies can make all the difference during a backpacking trip. To guarantee you're prepared, follow these essential steps:
- Pack a First Aid Kit: Include adhesive bandages, antiseptic wipes, and pain relievers. A tourniquet can be lifesaving for severe injuries.
- Carry Navigation Tools: Bring a compass and physical maps to help you stay oriented in unfamiliar terrain.
- Have Emergency Gear: Include thermal blankets for warmth and water purification supplies to guarantee safe drinking water.
- Develop an Emergency Plan: Know what to do in various scenarios, whether you get lost or encounter a medical issue.
Frequently Asked Questions
What Are the Best Hiking Trails for Beginners?
You'll find beginner-friendly hiking trails like the Appalachian Trail's easy sections, Mount Tamalpais in California, or the scenic Blue Ridge Parkway. These paths offer manageable distances and stunning views, making them perfect for new hikers.
How Do I Choose the Right Backpack Size?
Choosing your backpack size's like finding the perfect pair of shoes; it needs to fit comfortably. Measure your torso and consider your gear's weight. A well-fitted pack enhances your journey, making every step enjoyable.
What Are the Signs of Dehydration During Hiking?
During hiking, you'll notice signs of dehydration like thirst, dry mouth, fatigue, dizziness, or dark urine. If you experience these symptoms, it's essential to drink water and take breaks to rehydrate effectively.
How Can I Safely Store Food While Backpacking?
To safely store food while backpacking, use airtight containers to prevent moisture and pests. Hang food in a bear bag or use a bear canister, keeping it away from your campsite to avoid attracting wildlife.
What Should I Do if I Encounter Wildlife?
When faced with wildlife, remember the thrill of nature's wild heart. Stay calm, avoid sudden movements, back away slowly, and give them space. Keep your distance; respect their territory, and you'll guarantee a safe encounter.
Conclusion
By mastering the art of safe backpacking, you're not just preparing for your next adventure; you're embracing a lifestyle that values exploration and self-reliance. It's true that the more you know, the safer and more enjoyable your experiences will be. So, challenge yourself to learn those navigation skills, pack that survival gear, and understand the beauty of nature's unpredictability. With the right preparation, you'll discover that the wilderness isn't just a place; it's an experience waiting to unfold. You’ll also want to consider the importance of proper food storage and how to safely purify water. These are essential skills that will ensure you stay nourished and hydrated on your journey. Additionally, incorporating expert tips on knife concealment can further enhance your safety in the wilderness. With all of these tools and knowledge at your disposal, you can confidently embark on your backpacking excursions with a greater sense of security and preparedness.
Survivalism
First Aid Basics for Kids: The Must-Know Tips for Every Child
Always be prepared to handle emergencies with essential first aid skills for kids that can save lives—discover the must-know tips inside!

Knowing first aid basics is essential for every child. You should learn to recognize emergencies like choking, burns, and bleeding. Practice calling 911 and stay calm while providing details to the dispatcher. For minor injuries, like cuts, clean them properly and apply ointment and a bandage. Always have a well-stocked first aid kit on hand. Teach kids to role-play different scenarios, so they're prepared. Understanding wound care, including monitoring for infection, is crucial too. These skills can make a real difference in emergencies, and there's more valuable info to help you feel ready for any situation.
Key Takeaways
- Teach kids to recognize choking signs and how to respond by calling for help or performing back blows.
- Explain the importance of cooling burns under running water for 10 minutes and covering them with a non-stick dressing.
- Instruct children on cleaning cuts and scrapes with soap and water, applying antibiotic ointment, and covering with a bandage.
- Encourage children to identify emergencies and practice dialing 911, emphasizing clear communication about the situation.
- Role-play emergency scenarios with kids, reinforcing the need for calmness and quick action during real emergencies.
Recognizing Emergencies

When it comes to keeping kids safe, recognizing emergencies is essential. Choking is a common risk, especially for toddlers who explore their world by putting objects in their mouths. If you see a child unable to speak, cough, or make sounds, they might be choking. Look for signs like clutching their throat or neck, and be ready to act quickly. For infants, if they turn blue or become unresponsive, you need to act immediately. Immediate action is crucial to prevent asphyxiation in such cases. Additionally, if you have pets, be aware that they can also choke on small objects, so keeping small items out of reach is important for overall safety.
Burns are another serious concern. They can happen from hot liquids, flames, chemicals, or electrical sources. If you notice redness, swelling, blisters, or pain, cool the burn under running water for at least ten minutes. Always cover the burn with a clean, non-stick dressing. Remember that burns from chemicals can be particularly dangerous, requiring immediate rinsing and medical assistance.
Allergic reactions and poisoning also require your attention. Watch for difficulty breathing, blue or gray skin, or vomiting, which could indicate a serious issue. If a child has ingested something harmful, don't hesitate to call the Poison Control Center.
Lastly, look for signs like unconsciousness, fainting, or severe bleeding. These situations call for immediate medical help. Recognizing these emergencies can make a significant difference in keeping kids safe.
Basic First Aid Skills

Basic first aid skills are essential for anyone caring for kids, as they help address minor injuries effectively and confidently. When dealing with cuts and scrapes, start by cleaning the area with soap and water. After that, apply antibiotic ointment to prevent infection and cover it with a bandage. Remember to change the bandage daily or whenever it gets dirty, and always wash your hands before and after providing care.
For burns or scalds, cool the affected area immediately by running cool tap water over the burn for about 10 minutes. If that's not possible, use a cool, wet compress instead. Remove any clothing or jewelry near the burn, apply a topical antibiotic ointment, and cover it with a non-stick dressing. Teaching children about first aid encourages them to take responsibility for their own safety and the safety of others.
If you encounter bleeding, apply firm, steady pressure with a clean cloth or bandage. Elevate the injured area above heart level if you can. Use gauze to absorb blood and avoid using a tourniquet unless you're trained. Always keep gloves handy to prevent infection, guarantee the scene is safe, and keep a well-stocked first aid kit nearby.
Calling for Help

Knowing how to call for help is vital in an emergency. You should learn the emergency number, like 911, and practice what to say to guarantee clear communication. Staying calm and providing essential details can make all the difference when help arrives. Additionally, it's important to teach children to identify local emergency helpers so they know who can assist them in different situations.
Emergency Number Importance
In urgent situations, calling 911 can be the difference between safety and danger. It's a special number designed for emergencies like fires, car accidents, and serious medical issues. Remember, 911 isn't for minor problems such as losing a toy or needing homework help. Misusing this number, especially for prank calls, can divert help when it's truly needed.
Here's a quick guide on when to call 911:
| Situation | Action |
|---|---|
| Someone is hurt and can't get up | Call 911 immediately |
| There's a fire | Get to safety, then call 911 |
| You feel unsafe | Call 911 from a safe spot |
| Minor injury (like a small cut) | Do NOT call 911 |
Practice using both cell phones and landlines to dial 911, and guarantee you know how to use emergency features. Role-playing different scenarios can make you more prepared. Stay calm and clearly explain the situation when talking to the operator. Being ready to call 911 can help save lives, so take this responsibility seriously!
Clear Communication Essentials
When emergencies strike, clear communication can make all the difference. You need to describe the emergency clearly to the dispatcher. Is it a fire, injury, or medical issue? Explain how serious the situation is, what happened, and if there are any immediate dangers. Be specific about who's injured and what help they need.
Next, provide your exact location. Include the address, any apartment number, and nearby landmarks. This helps responders find you quickly. If you're safe before calling 911, mention that too.
Prepare to answer key questions from the dispatcher. They might ask, "What is the emergency?" or "Where are you?" Make sure to provide details about who needs help and their condition, like if they're awake or bleeding. Regular updates about emergency procedures can also help you feel more prepared and confident when communicating in a crisis.
Staying calm during the call is vital. Remember, 911 operators are trained to handle nervous callers, so trust them. Follow their instructions carefully, and stay on the line until they tell you to hang up. Your clear communication can help save lives, so practice these essentials whenever you can!
Treating Minor Injuries

When you treat minor injuries, it's important to know the right steps for managing cuts, scrapes, burns, and sprains. You can help someone feel better by quickly applying the appropriate first aid techniques. Let's go over how to handle these common injuries effectively. For example, when dealing with a cut, it's essential to apply pressure to slow bleeding and use a clean cloth to prevent further injury.
Minor Burn Treatment Steps
Minor burns can happen quickly, but knowing how to treat them can make a big difference in recovery. First, cool the burn by immersing it in cool tap water or applying cold, wet compresses for about 10 minutes. This helps ease the pain and stops the burning process. If clothing is on fire, remember to stop, drop, cover, and roll. Next, remove any clothing or jewelry around the burn to prevent further damage.
Once you've cooled the area, gently clean it with cool water, avoiding scrubbing. Don't use ice or home remedies like butter, as they can cause infection. Monitor for blisters, letting them heal naturally. Applying petroleum jelly two to three times daily can help maintain moisture and prevent risk of scarring. Cover the burn with a nonstick, sterile bandage.
Manage pain with over-the-counter medication like acetaminophen or ibuprofen. Once healed, protect the area from the sun using broad-spectrum sunscreen to minimize scarring. Finally, educate yourself and others about fire safety to help prevent future burns. Keeping water heaters set to 120°F and supervising kids in the kitchen can make a big difference.
Managing Cuts and Scrapes
Cuts and scrapes are common injuries, especially for active kids. When you get one, the first step is to wash your hands with soap and water to keep everything clean. If the bleeding is heavy, apply gentle to firm pressure with a clean cloth or bandage, and elevate the injured area above your heart if you can. If the cloth gets soaked, place another one on top without lifting the first. Keep the pressure on for about 10 to 15 minutes.
Once the bleeding stops, clean the wound with soap and water, avoiding scrubbing. Let cool running water wash away any dirt for several minutes. Don't use hydrogen peroxide or iodine, as these can irritate the area. If you see debris, use sterilized tweezers to remove it. Remember to contact a healthcare provider if you notice persistent bleeding that does not stop after 15 minutes of applying pressure.
After cleaning, apply an antiseptic lotion or cream, followed by petroleum jelly to keep the wound moist. Cover it with an adhesive bandage or gauze pad, changing the dressing regularly. Finally, check for signs of infection like increased warmth, redness, or swelling, and reach out to a healthcare provider if you're concerned about healing.
Sprains and Strains Care
Experiencing a sprain or strain can be painful and frustrating, especially for kids who love to play and stay active. These injuries often happen when you twist, stretch, or fall, affecting your ankles, knees, or wrists during sports or playtime. If you feel pain, swelling, or warmth in the area, it's important to take care of it right away.
Start by resting the injured area. Avoid putting weight on it to prevent further injury. Apply ice for 20 minutes every hour to help reduce swelling. You can also use an elastic bandage for compression, which can provide support. Elevating the injured area above heart level is another great way to minimize swelling. It's important to remember that active teens are at higher risk for these types of injuries due to their increased participation in sports. Additionally, similar to how individuals with BPD struggle with emotional dysregulation, kids may also find it challenging to manage their feelings when dealing with an injury. Understanding the importance of first aid kits can also help ensure that you're prepared for any minor injuries. You should also keep an eye on the battery level of any devices you use to assist in monitoring the injury to ensure they remain operational.
If the pain doesn't improve after a few days, or if there's a popping sound during the injury, you should see a doctor. Pay attention to any numbness, significant swelling, or difficulty moving the joint. These could be signs of a more serious issue. Remember, taking the right steps can help you recover and get back to your favorite activities sooner!
Emergency Preparedness

Being prepared for emergencies is essential for keeping kids safe and ensuring they know how to react in critical situations. Start by teaching your child how to dial emergency numbers like 911 and explain when to use them. They should know to provide their name, location, and the details of the emergency, including the condition of anyone injured.
Help your child recognize common emergencies, such as choking, bleeding, burns, and unresponsiveness. Teach them to stay away from sharp objects and hot surfaces to prevent injuries. If clothing catches fire, they should remember to "Stop, Drop, and Roll." Explain the dangers of downed power lines and the smell of gas, and what actions to take if they encounter these situations.
Create a family emergency plan together, including evacuation routes and meet-up locations. Prepare an emergency kit stocked with essentials like water, nonperishable food, flashlights, and blankets. Don't forget to add kid-friendly activities to keep them calm. Regularly review how to stay safe during various natural disasters, emphasizing the importance of avoiding flooded areas and the necessity of using seatbelts in vehicles. Additionally, it's important to practice your emergency plan regularly with your child so they feel confident in their responses during a crisis.
Reporting Incidents

Accurate incident reporting is essential for ensuring the safety and well-being of children in any environment. When an incident occurs, it's vital to document it properly. Here are four key steps you should follow:
- Complete the report immediately: Fill out the incident report form right after the event to capture accurate details. Timely documentation helps in identifying common hazards and preventing future incidents.
- Include essential information: Make sure to write down the date, time, and location, along with a factual account of what happened—avoid speculation.
- Document all involved parties: List the names and contact information of everyone involved, including witnesses, to add credibility to your report.
- Notify guardians promptly: Inform the child's parents or guardians about the incident and provide them with copies of the documentation.
Role-Playing Scenarios

Regularly engaging in role-playing scenarios can considerably enhance children's understanding of first aid and emergency responses. By simulating common emergencies, like choking, you can teach your child how to perform the Heimlich maneuver or deliver back blows. Practicing how to treat minor injuries—like cuts and burns—by applying bandages and antibiotic ointment helps reinforce their knowledge.
You might also want to role-play scenarios involving broken limbs, where your child can practice using a sling or splint. Don't forget to cover other emergencies, such as nosebleeds, bug bites, and stings. It's vital to teach kids how to call for help, including dialing 911 and providing important information. Incorporating hands-on activities like creating mini first aid kits can further enhance their understanding of essential items.
Incorporating props, like mannequins or dolls, can make learning even more engaging. Using puppets for younger children makes the process entertaining while still educational. Encourage teamwork and effective communication during these exercises, as kids learn to work together in emergencies. Role-playing not only builds their confidence but also reinforces significant skills. After each session, offer feedback to help them improve and solidify their understanding.
Understanding Wound Care

Understanding how to care for wounds is essential for keeping your child safe and healthy. When a cut or scrape occurs, knowing what steps to take can make all the difference. Here's a quick guide to wound care:
- Clean the Wound: Always wash your hands first. Then, gently clean the wound with mild soap and cool water, avoiding scrubbing. Remove any dirt particles with a clean cloth.
- Stop Bleeding: Apply pressure using a clean cloth or bandage for 5 to 10 minutes. Don't lift the cloth to check; just replace it if it soaks through.
- Apply Treatment: After cleaning, use an antiseptic lotion and cover the area with an adhesive bandage or gauze. Change the dressing often to keep it clean and dry.
- Promote Healing: Keep the wound moist with petroleum jelly or a healing ointment. Monitor daily for signs of infection, and guarantee your child's tetanus shots are up to date.
Staying Calm in Emergencies

In the heat of an emergency, staying calm can make a world of difference for both you and your child. When you remain composed, you're able to think clearly and make quick, informed decisions. Your calmness sets an example, helping your child feel secure and reducing their anxiety. Children often mirror adult reactions, so your behavior plays an essential role in how they respond to emergencies.
To help your child understand emergencies, explain them simply and honestly. Let them know that these unexpected events require fast action and that there's a plan to handle them. Introduce trusted helpers like teachers and firefighters, emphasizing teamwork in emergencies. Open dialogue about fears and concerns can also help your child feel more prepared.
Practice makes perfect. Regular emergency drills prepare your child for various situations, whether it's knowing how to "stop, drop, and roll" or understanding evacuation routes. Role-playing can also help reinforce these skills.
Frequently Asked Questions
What Should I Do if I'm Afraid During an Emergency?
If you're afraid during an emergency, it's important to acknowledge that feeling scared is completely okay. Take a deep breath and remind yourself that help is available. Talk about your feelings with someone you trust, and don't hesitate to ask questions. Sticking to your usual routine can also provide comfort. Remember, you're not alone, and seeking help from a trusted adult can make the situation feel less overwhelming.
How Can I Help a Friend Who Is Scared?
It's ironic how fear can turn a brave face into a trembling mask. To help your friend who's scared, start by offering your presence—sometimes, just being there speaks volumes. Ask them what they need and listen without judgment. Engage in calming activities, like breathing exercises, to ease their anxiety. Remind them they're not alone, and together, you can navigate through the fear. Reassure them that it's okay to feel scared; it'll pass.
What if I Can't Remember Emergency Numbers?
If you can't remember emergency numbers, don't panic. Start by writing them down and keeping that list in visible spots at home, like on the fridge. You can also save them in your phone or create emergency contact cards to carry. Practice dialing these numbers with a trusted adult, so you feel more comfortable. Remember, staying calm and knowing where to find help is just as important as remembering the numbers.
Can I Use My Phone for First Aid Tips?
Did you know that 70% of people feel unprepared to handle emergencies? You can absolutely use your phone for first aid tips! Download the American Red Cross First Aid App for step-by-step guides, videos, and interactive quizzes. It even has a 9-1-1 button for emergencies. Plus, you can store important medical info and emergency contacts on your lock screen, ensuring you're always ready to respond when it matters most.
How Can I Practice First Aid Safely at Home?
To practice first aid safely at home, start by gathering your first aid supplies and reviewing their use. Set up scenarios with a friend or family member to role-play different injuries, like cuts or burns. Make sure to emphasize cleanliness by washing hands before and after each practice. You can also watch instructional videos together to reinforce techniques. Regularly check your first aid kit, ensuring everything's stocked and up-to-date for real emergencies.
Conclusion
In emergencies, being prepared can turn you into a superhero! With these first aid basics, you'll know how to recognize situations that need attention, treat minor injuries, and call for help when necessary. Remember, staying calm is key; it helps you think clearly and act swiftly. By practicing these skills and role-playing scenarios, you're not just learning—you're gearing up to save the day when it counts the most. You've got this!
Survivalism
Essential Survival Towels for Every Adventure
Navigating your next adventure requires essential survival towels that offer versatility and durability—discover which ones will elevate your outdoor experience!

When you're gearing up for your next adventure, essential survival towels are your best friend. These lightweight, compact options, made from materials like microfiber, absorb moisture quickly and dry fast. The 4Monster Microfiber Towel can soak up seven times its weight and packs down easily for your kit. You'll also appreciate their versatility; they're perfect for hygiene, drying off, or even providing an emergency shelter. With proper care, these towels last through tough conditions. Want to know which specific towels might suit your adventure style? There's more to explore!
Key Takeaways
- Choose towels with high absorbency, like the 4Monster or Lunatec, to effectively soak up moisture during your adventures.
- Opt for quick-drying materials such as microfiber or viscose to ensure comfort and prevent dampness.
- Select compact and lightweight towels that can easily fit into survival kits without adding bulk.
- Consider versatile uses, from personal hygiene to emergency shelter, to maximize each towel's functionality.
- Regular maintenance, including washing with mild detergent, is essential for durability and performance over time.
Overview of Survival Towels

When you're out in the wild, having a reliable survival towel can make all the difference. These towels are designed to absorb more moisture relative to their weight, ensuring you stay dry when it matters most.
Materials like microfiber or viscose dry quickly, often within two hours, allowing you to keep using them without delay. Their compact and lightweight designs make them easy to pack into your survival kit.
Beyond drying off, survival towels serve multiple purposes, from maintaining hygiene to creating makeshift shelters in emergencies. Regular checks and washing with mild detergent help maintain their durability, ensuring they remain effective even in tough conditions.
Choosing the right towel can enhance your outdoor experience considerably.
Top Survival Towel Recommendations

Survival towels are essential gear for any adventurer, and selecting the right one can elevate your outdoor experience.
For high absorbency and lightweight options, consider the 4Monster Microfiber Towel, which absorbs seven times its weight. If you need something compact, the Lunatec Microfiber Towel measures just 11 x 18 inches, yet still absorbs six times its weight and dries quickly.
The Lightload Towel expands to a generous 36 x 60 inches when wet, making it versatile while packing down small for easy transport.
Each of these towels is designed for practicality, ensuring you stay dry and comfortable on your adventures. Choose one that best fits your needs, and you'll be well-equipped for any situation that arises.
Key Features to Consider

Choosing the right survival towel involves more than just picking the first one you see. You should consider absorbency first; a towel that soaks up liquid relative to its weight is important.
Look for quick-drying materials like microfiber or viscose, which can dry within hours, allowing for continuous use. Comfort matters too; make sure the towel feels good against your skin, especially after physical activities.
Size and weight are essential for easy packing; choose one that fits your personal needs without adding bulk. Finally, durability is critical; a towel should withstand tough conditions and regular washing.
Versatile Use Cases

Many outdoor enthusiasts find that versatile use cases for survival towels make them invaluable gear. Whether you're camping, hiking, or engaging in sports, these towels serve multiple purposes. They keep you clean, dry your gear, and can even act as makeshift shelters in emergencies.
| Use Case | Description | Benefit |
|---|---|---|
| Hygiene Maintenance | Wipe hands or face | Promotes cleanliness |
| Drying Off | Quick-dry after swimming | Keeps you comfortable |
| Gear Wiping | Clean equipment after use | Enhances gear longevity |
| Emergency Shelter | Provides cover in unexpected rain | Increases safety and comfort |
With their lightweight and compact design, survival towels are essential for any adventure, ensuring you're always prepared for whatever comes your way.
Care and Maintenance Tips

To keep your survival towel in top shape, regular care and maintenance are essential. Follow these tips to guarantee longevity and performance:
- Wash regularly: Clean your towel to prevent odor and bacteria buildup; use mild detergent.
- Air dry: Whenever possible, let your towel air dry to maintain its integrity and avoid damage.
- Avoid fabric softeners: These can reduce absorbency, making your towel less effective in emergencies.
- Store properly: Keep your towel in a dry, ventilated area to prevent mildew and maintain freshness.
Frequently Asked Questions
How Do I Choose the Right Size Towel for My Needs?
When choosing the right size towel, consider your activities and packing space. For travel, opt for compact towels. For larger needs, like drying off or hygiene, select bigger options that still fit comfortably in your gear.
Can I Use Survival Towels for Pets?
Survival towels serve splendidly for your pets. They're lightweight, quick-drying, and versatile, making them perfect for post-bath drying or outdoor adventures. Just guarantee they're soft and safe against your furry friend's skin!
Are Survival Towels Eco-Friendly?
Survival towels can be eco-friendly, especially when made from sustainable materials. You should look for options that use biodegradable fibers and guarantee proper care to extend their lifespan, reducing waste and environmental impact.
What Is the Lifespan of a Typical Survival Towel?
Typically, a good survival towel lasts around two to five years with proper care. If you wash it regularly and store it correctly, you'll maintain its absorbency and durability for countless adventures ahead.
Can Survival Towels Be Used in Cold Weather?
Yes, survival towels can be used in cold weather. They help keep you dry, reducing the risk of hypothermia. Just make sure they're made from quick-drying materials to maintain functionality and comfort in chilly conditions.
Conclusion
To sum up, having the right survival towel can truly enhance your outdoor adventures. Whether you're facing sudden rain or need a lightweight option for your backpack, these towels are essential. So, why settle for a regular towel when you can invest in one that's designed for the wild? Equip yourself with a high-quality survival towel, and you'll be ready to tackle any challenge nature throws your way, ensuring every outing is enjoyable and stress-free.
Survivalism
Signaling for Help: The Simple Signals That Save Lives
Join us to discover essential signaling techniques that could save your life in emergencies—because knowing how to call for help can make all the difference.

In emergencies, knowing how to signal for help can save your life. Use hand signals like waving both arms to attract attention or raising your arms overhead for a pickup. If you're needing urgent medical assistance, lying down with your arms outstretched can be very effective. For electronic signals, make emergency calls or activate distress signals like EPIRB. Visual signals like flares or smoke can catch rescuers' eyes from afar. You might also learn discreet codes to ask for help in public situations. There's a lot more you can do to guarantee your safety in critical times.
Key Takeaways
- Hand signals like waving arms or raising them overhead effectively attract attention from aircraft or nearby rescuers in emergencies.
- Electronic signals, such as using emergency calls or activating distress transponders, provide accurate location reporting for swift rescue.
- Visual signals, including handheld flares and smoke signals, are essential for catching the eye of rescuers from a distance.
- Discreet requests, like the "Angela Code" or "Angel Shot," help individuals seek assistance safely in public venues without alarming others.
- Community awareness of signaling methods and emergency resources can significantly enhance survival outcomes during crises.
Hand Signals for Emergency Situations

When you find yourself in an emergency, knowing the right hand signals can be a lifesaver. If you need immediate help, wave both arms up and down vigorously to catch the attention of helicopters or airplanes. This method avoids any confusion that might arise from a single-handed wave. To indicate you need to be picked up, stand up and raise your arms over your head.
If medical assistance is required, lie down on the ground and stretch your arms over your head. For ground-to-air signaling, create large, visible signs using letters or symbols that are at least 5.5 meters (18 feet) tall. Make sure you follow international ground-to-air signals for civilian rescue situations, as they provide specific arm and hand positions that can clearly communicate your distress. Additionally, using the hand signal for help can increase the chances of being recognized and rescued quickly.
Electronic Signals for Help

When you're in an emergency, knowing how to send an electronic signal for help can be lifesaving. You can use methods like emergency calls, satellite communication tools, and personal locator devices to alert rescuers. Understanding these options guarantees you can effectively communicate your distress situation. Additionally, being aware of the Signal for Help can provide a discreet way to indicate your need for assistance in situations where electronic means may not be feasible.
Emergency Call Methods
In emergencies, knowing how to use electronic signals for help can be lifesaving. Whether you're on the water or in the air, utilizing the right methods can guarantee that help arrives quickly. Here are some key electronic call methods you should be aware of:
- Marine Distress Signals: Use VHF channel 16 or the DSC distress button on your marine radio for immediate help.
- Aviation Alerts: Transmit a distress alert on 121.5 MHz or set your transponder to 7700 to signal an emergency.
- Automated Beacons: Activate an EPIRB on 406 MHz for accurate location reporting, or use an ELT in an aircraft to alert rescue services. Distress signals can be transmitted through various methods, including radio signals, visual displays, or audible sounds.
These electronic signals enhance your chances of being located and rescued. Always have these devices on hand and know how to use them. In critical moments, the ability to communicate your location effectively can make all the difference. Don't underestimate the power of technology; it's designed to save lives when you need it most.
Satellite Communication Tools
Emergency situations can arise anywhere, often in areas lacking cell service. In these instances, satellite communication tools become lifesavers. They allow you to communicate via overhead satellites, relaying your position and distress calls to global rescue providers. With real-time tracking capabilities, your location can be monitored by predetermined recipients or search-and-rescue personnel, enhancing your chances of a quick response. Furthermore, it's essential to remember that all boats must carry a minimum of three signals for both day and night use, ensuring safety even in remote situations.
These tools are portable and quickly deployable, making them ideal for disaster response or national emergencies. They're compatible with various communication tools used by first responders and support high-speed data, voice, and Internet access. The technology behind these devices includes medium-Earth orbit satellites, which improve detection and location accuracy, allowing for faster response times.
Additionally, features like the Return Link Service confirm that your distress signal has been received, often within 10-20 minutes. Satellite communication tools enable nearly instantaneous detection of distress signals, greatly enhancing survival probabilities. By facilitating on-the-move communications for emergency personnel, they improve situational awareness and response times, contributing to the rescue of over 48,000 people worldwide.
Personal Locator Devices
Personal Locator Devices (PLDs) serve as essential tools for signaling help in remote locations where traditional communication methods may fail. These devices integrate multiple technologies to guarantee your safety when you're far from assistance. They rely on GNSS for accurate positioning and utilize 406 MHz satellite connectivity, assuring you can reach help no matter where you are.
Key features that make PLDs indispensable include:
- Multi-Technology Integration: They combine AIS for quicker local notifications and NFC for smartphone access to beacon data.
- Reliable Communication: PLDs transmit distress messages through the Cospas Sarsat rescue system and confirm message receipt via the Galileo satellite network.
- User-Friendly Interface: You can easily check battery life, perform self-tests, and access detailed GNSS data through your smartphone. Additionally, the operational life of many PLDs exceeds 24 hours, ensuring prolonged functionality during emergencies.
While PLDs function independently of cellular networks, keep in mind that they require a clear view of the sky for best performance. Understanding these features can greatly enhance your safety during outdoor adventures. With a PLD, you're not just exploring; you're guaranteeing that help is always within reach.
Visual Signals to Attract Attention

Utilizing visual signals to attract attention is an essential aspect of maritime safety. When you find yourself in an emergency, using effective visual distress signals can mean the difference between life and death. Handheld flares are portable and ideal for signaling nearby vessels or aircraft, while parachute rockets soar higher, making them visible over long distances. During daylight, smoke signals produce dense, colored smoke, guaranteeing you're seen.
Signal mirrors can reflect sunlight, creating a bright flash that catches the eye from afar. Multi-star flares, a type B pyrotechnic visual distress signal, release multiple stars to enhance visibility. It's important to remember that international standards, established by the International Maritime Organization, guarantee these signals are universally recognized, facilitating swift responses from mariners worldwide. Furthermore, knowledge of standard marine distress signals is crucial for all boaters to ensure effective communication during emergencies.
Remember that different signals work best at different times. Parachute rockets and smoke signals shine during daylight and at night, while bright colors help stand out against ocean backdrops. Always combine various signals for maximum impact and make sure all crew members are trained in their use. By being prepared and equipped, you can effectively communicate your location in emergencies, leading to quicker rescue operations.
Public Place Assistance Codes

When you're in a public space and feel unsafe, knowing the right codes can make a difference. Codes like "Asking for Angela" or requesting an "Angel Shot" provide discreet ways to signal for help. Understanding these options empowers you to take action when you need it most. Additionally, being aware of Place of Service Codes can help you identify nearby facilities that offer assistance in emergencies.
"Asking for Angela" Code
The "Asking for Angela" code provides a discreet way for individuals to signal they need help in public places, particularly bars and venues. Initiated in England in 2016, this campaign aims to protect individuals from potential sexual assault by using a simple codeword. When someone feels unsafe, they can ask staff for "Angela," a fictitious employee.
Here's how the process works to guarantee your safety:
- Immediate Assistance: The staff understands the code and swiftly intervenes to help you get home safely, whether by escorting you or calling a taxi.
- Discreet Intervention: Staff may ask the other party to leave, guaranteeing your comfort without escalating the situation publicly.
- Training and Awareness: Venues train their staff on how to recognize the code and respond appropriately, creating a safer environment for everyone. This initiative has been implemented in various countries, including the US and Australia, inspiring similar campaigns worldwide.
This initiative has gained traction, inspiring similar campaigns in various countries. By raising awareness about the "Asking for Angela" code, you empower yourself and others to seek help when necessary, fostering a culture of safety and support in public spaces.
"Angel Shot" Request
Requesting an "Angel Shot" serves as an essential tool for individuals seeking help in potentially dangerous situations at public venues. This discreet code alerts trained staff to provide immediate assistance without drawing attention. To effectively implement this initiative, establishments must establish clear written policies and train all customer-facing personnel, including hosts, servers, and security teams. Role-playing scenarios help staff respond instinctively and with discretion.
When you request an Angel Shot, you can expect various types of assistance, such as arranging safe transportation home, a watchful escort to your vehicle, or discreet relocation to a secure area. Staff members are trained to assess the situation and involve law enforcement if necessary, ensuring your safety is a priority. Staff training is critical for effective responses, as it helps to ensure that personnel understand their duty of care towards vulnerable guests.
While the initiative promotes a welcoming environment and deters potential threats, establishments must also navigate challenges. Overexposure of the code could diminish its effectiveness, so periodically changing the signal may be wise. Ultimately, the Angel Shot initiative aims to empower individuals to seek help without fear, fostering a sense of security in public spaces.
Rescue Equipment and Techniques

Effective rescue operations hinge on the right equipment and techniques, guaranteeing both safety and efficiency in critical situations. It's important to choose tools wisely to minimize risks and maximize effectiveness.
Here are some key pieces of rescue equipment and techniques to take into account:
- Basic Tools: Long bars and cribbing blocks are essential for lifting heavy debris safely. Using cribbing and leveraging techniques ensures that heavy debris is moved without causing further harm to those trapped underneath.
- Lighting: Headlamps and flashlights provide hands-free lighting to navigate and work in low visibility conditions.
- Communication: Walkie-talkies and Personal Locator Beacons (PLBs) are crucial for staying connected and sending distress signals.
When lifting or moving debris, it's necessary to use cribbing and leveraging techniques. You should always lift slowly and guarantee even weight distribution to prevent collapse. Training in these techniques, often included in Community Emergency Response Team (CERT) training, can be invaluable in emergencies. Also, securing the area from hazards like live electrical wires is non-negotiable.
Being prepared with the right equipment and techniques can make a significant difference in the outcome of a rescue operation, potentially saving lives while keeping you and others safe.
Importance of Situational Awareness

While maneuvering any emergency situation, having situational awareness can greatly impact your effectiveness and safety. It enhances your decision-making and problem-solving skills by providing the essential information you need to make prompt choices. When faced with unexpected crises, your ability to evaluate potential outcomes quickly can be life-saving. This skill is particularly important in high-stakes professions like law enforcement, healthcare, and aviation. Additionally, engaging in organization-wide training can significantly bolster your situational awareness skills.
Moreover, situational awareness mitigates risks and prevents accidents. By recognizing potential hazards early, you can take proactive measures to avoid injuries or accidents. This heightened awareness also aids in spotting warning signs that may indicate a threat, reducing the likelihood of dangerous situations.
In team settings, situational awareness improves communication and dynamics. When everyone shares a common understanding of the situation, teamwork flourishes, making it easier to support one another in tough environments. It boosts efficiency and productivity by allowing you to anticipate obstacles and allocate resources effectively. This foresight minimizes downtime and keeps operations running smoothly. Ultimately, honing your situational awareness can be the difference between a successful response and a missed opportunity for safety.
Recognizing Signs of Danger

Situational awareness plays an essential role in recognizing signs of danger, especially in potentially abusive situations. You need to be vigilant about behaviors that may indicate someone is in trouble. Here are key signs to watch for:
- Controlling behavior: If someone restricts a partner's freedom or closely monitors their activities, it's a red flag. This often leads to isolation from friends and family, trapping the victim in a harmful environment.
- Physical violence and threats: Never ignore any threats, especially those involving harm. If you notice a pattern of escalating violence or hear threats to kill, take them seriously. Strangulation is particularly dangerous and indicates high risk.
- Emotional and psychological abuse: Intense jealousy or possessiveness, alongside emotional manipulation, can make a person feel worthless or afraid. If someone seems withdrawn or changes around their partner, it may indicate deeper issues.
Community Support and Resources

Community support and resources play an indispensable role in guaranteeing safety and recovery during crises. Local communities activate incident management through established command structures, securing quick coordination. When needed, State Emergency Operations Centers (SEOCs) step in to provide additional support and resources. By adhering to the National Incident Management System (NIMS), communities can effectively manage responses to emergencies.
For individuals with special needs, various resources exist to guarantee their safety. Emergency Power Planning helps those reliant on battery-dependent devices, while organizations such as Protection & Advocacy and Disability Councils offer essential support. The SAMHSA Disaster Distress Helpline is available 24/7 for crisis counseling, and Rx Open helps locate open pharmacies in disaster-impacted areas.
Animal welfare also plays an important role in community support. Animal rescues provide indispensable rehabilitation and medical care, while resources like Ready.gov: Pets and Animals guide pet owners in emergency preparedness. In 2023, 6.5 million cats and dogs entered shelters and rescues across America, highlighting the importance of community engagement during emergencies.
Effective communication is key during crises. Delivering critical information in culturally and linguistically appropriate ways guarantees everyone knows available resources. Community Preparedness programs enhance awareness, helping you and your neighbors create solid emergency plans for a safer, more resilient community.
Real-Life Stories of Rescue

Rescue stories from around the world reveal the remarkable resilience of the human spirit in the face of dire circumstances. Take Juliane Koepcke, who survived a 10,000-foot fall from a plane in the Peruvian rainforest in 1971. Despite a broken collarbone and injuries, she spent 11 days in the jungle, battling insect bites and a maggot infestation, before finally reaching a logging camp where workers provided her with first aid.
Then there's the incredible story of Nando Parrado and Roberto Canessa, who endured 72 days in the Andes after a plane crash. They hiked to lower altitudes for help, leaving notes attached to rocks to communicate with villagers. Eventually, 16 survivors were rescued. These stories highlight essential points:
- Survival Requires Resilience: The human spirit often prevails against overwhelming odds.
- Signaling is Important: Effective communication can mean the difference between life and death. Knowledge of techniques can empower individuals in crisis.
- Community Matters: Support from others plays a critical role in recovery and rescue.
These real-life tales remind us of the power of hope, resourcefulness, and the importance of signaling for help when needed.
Frequently Asked Questions
How Can I Teach Others About These Signals Effectively?
To teach others about these signals effectively, start by choosing a clear, simple signal that everyone can recognize. Explain its purpose and practice it in various scenarios. Use demonstrations and real-life examples to reinforce understanding. Encourage regular drills to maintain familiarity and proficiency. Provide constructive feedback and involve peers to support each other. Finally, integrate the signal into daily routines, ensuring everyone knows when and how to use it consistently.
Are There Any Apps for Signaling Emergencies?
Yes, there are several apps available for signaling emergencies. These apps let you trigger panic alerts, verify alarms, and even communicate in real-time with monitoring stations. You can customize the signals based on your needs, choosing between silent or audible alerts. Many integrate seamlessly with security panels, guaranteeing a quick response in critical situations. With these tools at your fingertips, you're better equipped to secure your safety and get help when you need it.
What Should I Do if I See Someone Signaling for Help?
If you see someone signaling for help, approach the situation with caution and care. Assess their safety and the immediate environment. Reach out discreetly, letting them know you're there to help. Listen to their needs without judgment and offer support. If the situation seems life-threatening, don't hesitate to call emergency services. Guarantee your response is safe and respectful, maintaining their privacy while providing the assistance they need.
How Can Children Learn About These Signals Safely?
To help children learn about emergency signals safely, start by explaining what emergencies are and the importance of recognizing signals. Use role-playing to simulate scenarios, allowing them to practice calling 911 and identifying safe signals. Incorporate fun activities, like drawing visual signals or making sounds like sirens. Encourage discussions about real-life situations while emphasizing staying calm. With practice and understanding, they'll feel more confident in responding appropriately during emergencies.
Are These Signals Recognized Internationally?
Yes, these signals are recognized internationally. When you use them, you're communicating effectively with others, regardless of their location. The International Maritime Organization guarantees that signals like SOS and MAYDAY are standardized across countries, so everyone understands their meanings. This uniformity helps in emergencies, allowing rescue units to respond quickly. Familiarizing yourself with these signals can be essential, especially if you ever find yourself in a distressing situation at sea.
Conclusion
In today's fast-paced world, knowing how to signal for help can truly be a lifesaver. Whether it's using hand signals, electronic devices, or visual cues, every second counts. Just like sending a smoke signal in ancient times, clear communication is essential in emergencies. Stay aware of your surroundings and recognize the signs of danger—your quick actions could make all the difference. Remember, you're never alone; community support is just a call away when you need it most.
-

 Survivalism6 months ago
Meal Preppers Near Me: Find Local Services and Tips!
-
 Survivalism6 months ago
Preppers Pack Crossword: Test Your Knowledge of Survival Gear!
-

 Survivalism7 months ago
Inside the Secret World of Doomsday Preppers: Are You Ready?
-

 Survivalism7 months ago
AI Doomsday Scenario: Understanding the Potential Risks
-

 Vetted6 months ago
15 Best Satellite Phones for Preppers: Stay Connected Anywhere, Anytime
-

 Vetted7 months ago
15 Best Geiger Counters for Preppers: Top Picks for Radiation Detection
-
 Survivalism6 months ago
Preppers List of Items: Essential Gear for Every Survivalist!
-
 Vetted5 months ago
15 Essential Survival Gear Items You Need to Stay Prepared in the Wild


