Survivalism
Top Expandable Baton Picks for Safety
Prepare to discover the best expandable batons for safety and learn essential tips that could make all the difference in an emergency.
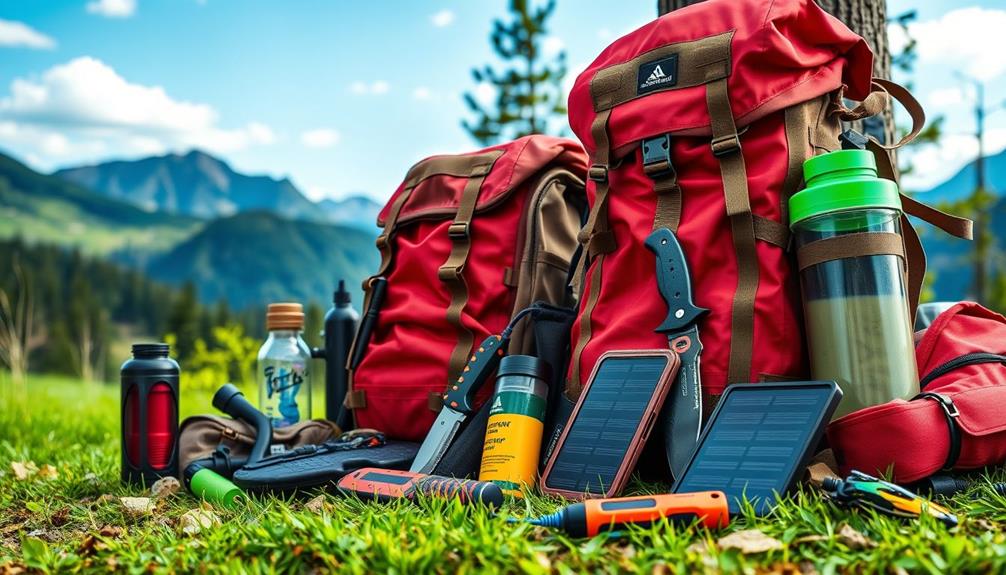
When choosing an expandable baton for safety, you can't go wrong with a few top picks. The PS Expandable Baton is lightweight and easy to handle, perfect for beginners. If you want durability, try the Cold Steel 26, known for its balance. For seasoned users, the ASP Friction Airweight offers strength and quick deployment. Remember, factors like weight, material, and grip design matter a lot in your decision. Always check your local laws on ownership and carry practices. Want to know more about effective use and maintenance tips? There's much to explore to guarantee you're fully prepared. Don’t forget to also consider your self-defense options beyond just an expandable baton. It’s important to have the best pepper spray options on hand as well, such as Sabre Red Pepper Gel and POM Pepper Spray. These can provide additional protection and can be a valuable tool in dangerous situations. Just like with the expandable baton, be sure to familiarize yourself with local laws and regulations regarding the use and carry of pepper spray.
Key Takeaways
- PS Expandable Baton: Ideal for beginners, it's lightweight and compact, making it easy to deploy in self-defense situations.
- Cold Steel 26: Known for its durability and balance, this baton suits users of all experience levels.
- ASP Friction Airweight: Offers a combination of strength and effortless deployment, perfect for professionals seeking reliable performance.
- Material and Weight: Choose batons made of strong steel; lighter options enhance control and handling in high-stress situations.
- Training and Maintenance: Regular practice and care, such as lubricating joints, are essential for effective and safe baton usage.
Understanding Expandable Batons
What makes expandable batons an effective choice for self-defense? Their versatility stands out, allowing you to carry a compact tool that extends quickly when needed.
Originally used by law enforcement, these batons offer a balance of reach and impact, helping you deter threats without resorting to lethal force. Their non-lethal nature minimizes potential harm to others, making them a responsible choice for personal protection.
However, effective use requires practice; you'll need to build confidence and improve your response to various situations. With the right training, expandable batons can empower you to handle confrontations effectively, ensuring you feel safer in potentially dangerous environments.
Embrace the learning process to maximize their benefits in self-defense scenarios.
Essential Features to Consider
When choosing an expandable baton, there are several essential features you should consider to confirm it meets your needs. Focus on the weight, as lighter batons are easier to handle. Material matters too; strong steel offers durability. Additionally, consider the baton's length when extended, typically ranging from 16 to 26 inches.
Feature | Description |
---|---|
Weight | Lighter batons are easier to control |
Material | Strong steel is preferred for impact |
Length | Extends between 16 to 26 inches |
Grip Design | Textured grips enhance handling |
Balancing these features confirms you'll have a reliable tool for self-defense that you can effectively wield when needed.
Legal Guidelines for Ownership
Steering through the legal landscape surrounding expandable batons is essential for any potential owner. Laws vary greatly by state and country, so you'll need to research your local regulations before making a purchase or carrying one.
For instance, California prohibits ownership and carrying, while Massachusetts allows ownership but bans public carry. States like New York, Washington, and Washington D.C. permit ownership with certain restrictions.
Additionally, some jurisdictions may require a permit for carrying or using an expandable baton. Misuse or failure to comply with these laws could lead to serious legal consequences.
Always stay informed and make certain you're abiding by the rules to avoid any unwanted legal issues while considering your self-defense options.
Recommended Expandable Batons
Choosing the right expandable baton can greatly enhance your self-defense capabilities.
For beginners, the PS Expandable Baton is a fantastic choice—it's lightweight, compact, and easy to deploy.
If you're looking for something more robust, consider the Cold Steel 26. Its durability and balance make it suitable for both novices and experienced users.
Professionals might prefer the ASP Friction Airweight, which combines strength with effortless deployment.
Each of these options caters to different needs, ensuring you find one that fits your comfort level and proficiency.
Tips for Maintenance and Care
Maintaining your expandable baton is essential for ensuring its reliability and longevity. Regular cleaning prevents rust and corrosion, while lubrication keeps the joints functioning smoothly. Before each use, inspect your baton for any signs of damage or wear.
Maintenance Task | Frequency |
---|---|
Clean and dry | After each use |
Lubricate joints | Monthly |
Inspect for damage | Before each use |
Store your baton in a cool, dry place away from extreme temperatures and moisture. Taking these steps will help you get the most out of your baton, keeping it in top shape and ready for action whenever you need it.
Training for Effective Use
To get the most out of your expandable baton, focusing on training is essential. Start by familiarizing yourself with the baton's mechanics; practice extending and retracting it smoothly.
Work on your grip to guarantee control during use. Basic striking and blocking techniques should be a priority—drill these movements until they become second nature.
Consider enrolling in self-defense classes or workshops that emphasize baton use; real-world scenarios can enhance your skills. Regular practice helps build confidence, improving your reaction time in potential confrontations.
Always train in a safe environment, using appropriate protective gear. Remember, effective use of your baton hinges on your preparedness and ability to respond swiftly and decisively when needed.
Enhancing Personal Safety Strategies
Personal safety is a priority for everyone, and enhancing your strategies can greatly boost your confidence and preparedness.
Start by evaluating your environment; stay aware of your surroundings and trust your instincts. Carry an expandable baton as a self-defense tool, guaranteeing you're familiar with its use through regular practice.
Consider enrolling in self-defense classes to learn techniques that complement your baton skills. Establish a personal safety plan, including safe routes and emergency contacts.
Engage in community safety programs to stay informed about local crime trends. Remember, maintaining a confident demeanor can deter potential threats.
Frequently Asked Questions
Can Expandable Batons Be Used for Everyday Carry?
Yes, you can use expandable batons for everyday carry, but check local laws first. They're compact and easy to deploy, offering a non-lethal self-defense option that requires practice for effective use and confidence.
Are Expandable Batons Effective Against Multiple Attackers?
Expandable batons can be effective against multiple attackers if used correctly. You'll need practice to improve your skills, ensuring you can strike swiftly and maintain control. Always stay aware of your surroundings for maximum safety.
What Is the Average Lifespan of an Expandable Baton?
Imagine a knight wielding a trusty sword; similarly, an expandable baton can last several years with proper care. You'll find that regular maintenance, like cleaning and lubrication, greatly extends its lifespan and reliability.
Can I Customize My Expandable Baton's Design?
You can customize your expandable baton's design through grips, colors, or finishes, depending on the manufacturer. Just verify any modifications maintain functionality and comply with local laws regarding self-defense tools. Your safety's the priority!
Are There Non-Metal Options for Expandable Batons?
Yes, there are non-metal options for expandable batons, typically made from durable materials like high-impact plastic or composite. These alternatives can be lighter and still effective, but confirm you verify their legality in your area.
Conclusion
In a world where safety is often just an afterthought, investing in an expandable baton might seem a bit dramatic—until you find yourself in a situation where it's needed. It's ironic, really; you might think you'll never need one, but being prepared can turn the tide in your favor. So, why not embrace the idea of being the unexpected hero? With the right baton and a bit of practice, you'll be ready to face whatever comes your way.
Survivalism
Master Canning Ravioli for Emergency Preparedness
Master the art of canning ravioli for emergency preparedness and learn essential tips that will ensure your meals are ready when you need them most.
Mastering canning ravioli is a smart move for emergency preparedness. Start with fresh or frozen uncooked ravioli and a pressure canner, which is essential for safely processing low-acid foods. Use a flavorful broth or sauce as your canning liquid. Verify your jars are sterile and filled with ravioli, leaving a 1-inch headspace. Seal jars properly and process them at 240°F for safety. Once cooled, store sealed jars in a cool, dark place. With your ravioli ready, you'll have meals on hand when you need them most. Stick around to discover more handy tips and techniques!
Key Takeaways
- Use fresh or frozen uncooked ravioli and a flavorful broth or sauce for optimal taste and preservation during canning.
- Ensure a pressure canner reaches 240°F (116°C) to safely process low-acid foods like ravioli.
- Sterilize jars and lids thoroughly to prevent spoilage; inspect for cracks before use.
- Store sealed jars in a cool, dark place and label with date and contents for easy access.
- Regularly check sealed jars for spoilage after canning to ensure food safety during emergencies.
Understanding the Canning Process
Understanding the canning process is essential for safely preserving ravioli and other low-acid foods. Canning involves placing food in airtight jars and using heat to create a sterile environment, which prevents spoilage and foodborne illnesses.
For ravioli, you'll need to use a pressure canner, as it guarantees the internal temperature reaches 240°F (116°C), essential for low-acid foods. Start with fresh or frozen uncooked ravioli and prepare a flavorful canning liquid, like broth or sauce.
Fill the jars with ravioli, maintaining a 1-inch headspace, and release air bubbles. Properly process the jars for the recommended time to guarantee safety.
Necessary Equipment for Canning
When you're ready to can ravioli, having the right equipment is vital for success.
You'll need sturdy canning jars and fresh lids to guarantee a proper seal. A pressure canner is essential for safely processing low-acid foods like ravioli.
Here's a quick list of what you should gather:
- Canning Jars: Use pint or quart-sized jars, making sure they're free from cracks.
- Pressure Canner: This maintains the necessary temperature to avoid spoilage.
- Jar Lifter: Important for safely handling hot jars right out of the canner.
With these tools in hand, you're set to start the canning process efficiently and safely, making sure your ravioli is preserved for future meals.
Ensuring Safety During Canning
Safety is always a top priority during the canning process. To prevent foodborne illness, always use tested recipes from reliable sources.
When working with low-acid foods like ravioli, make sure you use a pressure canner to reach the necessary temperature for safe preservation. Inspect your jars and lids for any cracks or imperfections before starting; faulty equipment can lead to spoilage.
Utilize a jar lifter to handle hot jars, minimizing the risk of burns. Keep your workspace clean and organized to avoid contamination.
Regularly check the pressure during processing, and if it drops, restart the timing. Finally, inspect sealed jars after cooling for any signs of spoilage, such as bulging lids or off odors.
Sterilization of Jars and Lids
To guarantee your canning process is successful, proper sterilization of jars and lids is essential. Start by washing your jars in hot, soapy water, rinsing thoroughly.
Then, immerse the jars in a boiling-water canner for at least 10 minutes to eliminate any contaminants. For the lids, soak them in hot water (not boiling) to soften the sealing compound, assuring a tight seal.
Here's what you need to remember:
- Use clean, undamaged jars to prevent spoilage.
- Boil jars for 10 minutes to assure sterilization.
- Soak lids in hot water to enhance sealing effectiveness.
Proper Sealing Techniques
Proper sealing techniques are essential for guaranteeing the longevity and safety of your canned ravioli. Start by wiping the rims of your jars with a clean, damp cloth to remove any food particles. This step prevents contamination and guarantees a tight seal.
Next, use a magnetic wand to place sterilized lids onto each jar, followed by screwing on the bands until they're fingertip tight. Be careful not to overtighten, as this can interfere with the sealing process.
Once filled and sealed, process your jars immediately in a pressure canner according to your recipe instructions. Proper sealing keeps your ravioli safe and flavorful for years, so take the time to do it right!
Cooling and Storing Canned Ravioli
After processing your jars, let them cool down completely on a wire rack or a clean dishtowel for 12 to 24 hours.
Once cooled, check the seals by pressing down in the center of each lid; if it pops back, your seal is good.
To guarantee your canned ravioli stays fresh, follow these storage tips:
- Store sealed jars in a cool, dark place (50°F to 70°F).
- Keep jars away from direct sunlight to prevent spoilage.
- Label each jar with the date and contents for easy reference.
Creative Cooking Ideas
Canned ravioli opens up a world of culinary creativity that you can easily explore in your kitchen. You can transform this convenient staple into a variety of delicious dishes.
Try making a hearty casserole by layering ravioli with marinara sauce, cheese, and your favorite vegetables. For a unique twist, stuff bell peppers with ravioli and bake them with a sprinkle of cheese on top.
If you're craving soup, combine canned ravioli with broth, fresh herbs, and vegetables for a quick meal. Elevate your dish by adding gourmet toppings like freshly grated Parmesan or a drizzle of pesto.
With a bit of imagination, your canned ravioli can shine in countless delightful ways!
Frequently Asked Questions
How Long Can Canned Ravioli Be Stored Safely?
Canned ravioli can safely be stored for 1 to 2 years if kept in a cool, dark place. Check seals regularly and discard any jars with bulging lids or off odors to guarantee safety.
Can I Reuse Canning Lids for Sealing?
You can't reuse canning lids for sealing. They're designed for one-time use to guarantee a proper seal. Always use new lids to maintain food safety and quality in your canning process.
What Are the Signs of Spoiled Canned Ravioli?
You might think canned ravioli lasts forever, but look for bulging lids, off odors, or unusual colors. If you notice any of these signs, discard the jars to guarantee your safety. Always check before consuming!
Can I Can Homemade Ravioli Instead of Store-Bought?
Yes, you can homemade ravioli! Just make certain they're fresh and uncooked for the best texture. Follow proper canning techniques, using a pressure canner to guarantee safety and prevent spoilage. Enjoy your delicious creations!
Is It Safe to Can Ravioli With Meat Fillings?
Yes, it's safe to can ravioli with meat fillings if you use a pressure canner. Make certain you follow tested recipes and proper processing times to avoid foodborne illnesses and guarantee safe preservation.
Conclusion
By mastering the art of canning ravioli, you're not just storing food; you're crafting a safety net for your future. Like a treasure chest brimming with culinary delights, your pantry will become a source of comfort and nourishment in challenging times. With the right techniques and a bit of practice, you'll enjoy the satisfaction of having delicious, homemade meals at your fingertips. So roll up your sleeves, get started, and savor the rewards of your efforts!
Survivalism
Essential Flood Survival Kit: Be Prepared
Be ready for unexpected floods with an essential survival kit that ensures your safety and security—discover what to include for maximum preparedness.
A flood survival kit is essential for your safety, ensuring you're prepared when emergencies arise. Start by packing non-perishable food and at least one gallon of water per person per day for three days. Don't forget waterproof clothing and sturdy boots for protection; also include a NOAA weather radio for real-time alerts. Prepare evacuation supplies like a first aid kit and keep important documents handy. Regularly check and update your kit to maintain its effectiveness. By being proactive and prepared, you can better face flooding challenges. For more tips on assembling the perfect kit, you'll want to keep exploring.
Key Takeaways
- Pack non-perishable food and at least one gallon of water per person per day for three days in your survival kit.
- Include waterproof clothing, sturdy boots, and essential gear for protection against flooding conditions.
- Equip your kit with communication tools like NOAA weather radios and portable generators for power outages.
- Familiarize yourself with local evacuation routes and pack important documents and first aid supplies for emergencies.
- Regularly maintain and update your survival kit to ensure all items are fresh and functional.
Importance of Flood Survival Kits
Flood survival kits are essential for ensuring your safety and well-being during emergencies. When you live in flood-prone areas, being prepared can make all the difference.
By customizing your kit, you address specific challenges you might face during a flood, such as power outages or lack of clean water. Create a checklist to include items that meet your unique needs, like medications or personal documents.
Assess local flood risks and familiarize yourself with available emergency resources. Regularly evaluate and update your kit, keeping it ready for any situation.
Engaging with your community can enhance your understanding of local flood risks, while collaborating with neighbors strengthens your support network during emergencies.
Being prepared is your best defense against flooding.
Essential Food and Water Supplies
When preparing your flood survival kit, essential food and water supplies should be a top priority. Pack non-perishable food items like canned goods, energy bars, and waterproof ration bars to guarantee you have enough nutrition during emergencies.
Don't forget to include a minimum of one gallon of water per person per day, aiming for at least three days' worth. Water purification tablets or reliable survival water filters are vital for securing clean drinking water.
Consider portable cooking devices for meal preparation if conditions allow. Always check expiration dates on food supplies and replace them as needed.
Being proactive with food and water will help keep you and your loved ones nourished and hydrated during a flood situation.
Personal Clothing and Gear
Packing the right personal clothing and gear is essential for staying safe and comfortable during a flood emergency. Focus on waterproof clothing, including a rain poncho and quick-drying materials, to keep you dry and warm.
Don't forget sturdy, waterproof boots; they'll protect your feet from contaminated water and debris. Layering is key, so pack lightweight clothing that can be easily removed or added based on changing weather conditions.
Consider bringing gloves and a hat for added protection. A waterproof backpack can help keep your essentials dry.
Additionally, pack items like shovels or sandbags, which can assist in flood prevention efforts. Being equipped with the right clothing and gear will help you navigate through challenging flood situations more effectively.
Communication and Detection Tools
Equipping yourself with reliable communication and detection tools is essential for staying informed and safe during a flood emergency. Invest in a NOAA weather radio to receive real-time alerts about impending floods.
Keep an emergency contact list handy, making sure family members can reach each other. Water alarms can help you detect localized flooding early, giving you a heads-up to act quickly.
Don't forget smartphone apps that provide weather updates and alerts from emergency services for added convenience. If power goes out, a portable generator can keep essential devices running.
Evacuation Supplies and Planning
In the event of a flood, having the right evacuation supplies can make all the difference in guaranteeing your safety and quick relocation.
First, familiarize yourself with local evacuation routes and plan your escape ahead of time. Pack essential items like a first aid kit, flashlight, and portable phone charger in an easily accessible bag.
Don't forget important documents and an emergency contact list. Consider including a NOAA weather radio for real-time updates.
If you have pets, make sure you have leashes, carriers, and pet supplies ready. Signal flares can help alert rescuers if needed.
Regularly review your evacuation plan with your family, so everyone knows what to do when disaster strikes. Being prepared can save lives.
Maintaining Your Survival Kit
Regular maintenance of your survival kit is essential to ascertain it's always ready when you need it most. Keeping your supplies fresh and functional ascertains you're prepared for any emergency. Check your kit at least every season, updating as necessary.
Item | Frequency of Check | Notes |
---|---|---|
Water Purification | Every 6 months | Replace filters as needed |
Non-Perishable Food | Annually | Rotate stock for freshness |
First Aid Supplies | Every 3 months | Check expiration dates |
Emergency Tools | Every season | ascertain they're in working order |
Including Pets in Emergency Plans
When planning for emergencies like floods, don't forget about your pets; they rely on you for safety and well-being.
Make sure to include essential supplies for them in your flood survival kit. Pack at least three days' worth of food and water, along with portable bowls.
Don't forget leashes, carriers, and any medications they might need. Identification tags and microchips are vital for their safe return if you get separated.
Create a pet-friendly evacuation plan, including designated pet-friendly shelters or hotels.
Regularly check and update your pet supplies, ensuring everything's in good condition.
Frequently Asked Questions
How Can I Customize My Flood Survival Kit for Specific Needs?
You can customize your flood survival kit by evaluating your specific needs, including food preferences, medical requirements, and local risks. Regularly review and update your supplies to guarantee they meet your family's unique circumstances.
What Are the Best Portable Cooking Devices for Emergencies?
For emergencies, consider portable cooking devices like camping stoves, solar cookers, or compact propane grills. They're lightweight, easy to use, and guarantee you can prepare meals even when traditional cooking methods aren't available.
How Do I Create a Community Flood Preparedness Plan?
Think of your community as a puzzle; each piece represents a neighbor. To create a flood preparedness plan, gather everyone, share resources, assess risks, and build a supportive network that can withstand any flood challenge together.
What Should I Do With Important Documents During a Flood?
During a flood, secure important documents in waterproof bags or containers. Store them high up, away from potential water damage. Make digital copies too, ensuring you can access them easily if needed.
How Can I Ensure My Pets Remain Calm During Emergency Evacuations?
To keep your pets calm during evacuations, create a familiar environment by bringing their favorite toys and blankets. Practice short trips beforehand, and use soothing voices to reassure them while maintaining a steady pace.
Conclusion
As you gather your flood survival kit, remember that every item could make a difference when the waters rise. Imagine facing an unexpected flood without the essentials—what would you wish you'd prepared? Don't leave your safety to chance; take action now. Update your supplies, involve your loved ones, and make certain your pets are included in your plans. When the moment comes, you'll be ready to face the uncertainty with confidence and resilience. Don't wait—prepare today!
Survivalism
Top Picks for Food Preservation Essentials
Incredible food preservation essentials await you, ensuring your ingredients stay fresh and flavorful—discover the must-have tools that can transform your kitchen!
When it comes to food preservation essentials, you'll want quality tools that enhance freshness and extend shelf life. Start with a reliable vacuum sealer to keep air out, and consider Mylar bags with oxygen absorbers for long-term storage. Canning jars work perfectly for fruits and sauces, while food dehydrators help create healthy snacks by removing moisture. Don't forget the importance of airtight containers to prevent spoilage. Regularly monitor your food storage conditions and replace oxygen absorbers as needed to maintain quality. Stick with these tips, and you'll enjoy fresher food for longer—stay tuned for more insights!
Key Takeaways
- Opt for quality vacuum sealers to keep air out and extend the life of perishables for 1-3 years.
- Invest in Mylar bags with oxygen absorbers for long-term storage, preserving food for 5-30 years.
- Use canning jars for effective preservation of fruits, vegetables, and sauces in airtight conditions.
- Employ food dehydrators to remove moisture, creating long-lasting and nutritious snacks.
- Choose airtight containers to prevent moisture and pests, maintaining food quality over time.
Importance of Food Preservation
While you mightn't think about it daily, food preservation is essential for ensuring the safety, quality, and longevity of the food you consume. By preventing spoilage and extending shelf life, you reduce waste and save money.
Proper preservation methods keep harmful bacteria and mold at bay, lowering the risk of foodborne illnesses. Additionally, maintaining flavor, texture, and nutritional value is vital for a satisfying eating experience.
As you store food, consider how preservation techniques can enhance your meals and protect your family's health. With effective food preservation, you're not just prolonging shelf life; you're also ensuring that the food you eat remains delicious and safe, making every bite a pleasure.
Key Preservation Techniques
Food preservation methods are varied and effective, each serving a specific purpose to keep your food safe and tasty.
You can utilize techniques like freezing, which halts bacterial growth and keeps your food fresh for months.
Canning is another great option, preserving food in airtight jars to guarantee longevity.
Dehydrating removes moisture, preventing spoilage while maintaining flavor and nutrients.
Fermentation not only preserves but also enhances taste and health benefits.
Finally, pickling involves soaking food in brine or vinegar, offering a zesty twist while extending shelf life.
Each method has its advantages, so choose the ones that best suit your needs and preferences to enjoy your food for longer.
Essential Food Preservation Tools
A variety of essential food preservation tools can make a significant difference in how you store and maintain your food.
First, investing in quality vacuum sealers helps keep air out, extending the life of your perishables. Mylar bags are another great option, especially when paired with oxygen absorbers, as they prevent oxidation and spoilage.
Don't forget about canning jars; they're perfect for preserving fruits, vegetables, and sauces. A dependable food dehydrator can also help you make snacks while reducing moisture content.
Best Practices for Food Storage
Effective food storage practices are essential for maintaining the quality and safety of your food. To maximize freshness, follow these guidelines:
Storage Method | Ideal Temperature | Shelf Life Extension |
---|---|---|
Refrigeration | 32°F – 40°F | 1-4 weeks |
Freezing | 0°F or lower | 6 months – 1 year |
Vacuum Sealing | Room Temperature | 1-3 years |
Mylar Bags with O2 Absorbers | Room Temperature | 5-30 years |
Keep your food in airtight containers to prevent moisture and pests. Label items with dates and contents for easy identification. Regularly check for spoilage and rotate stock to use older items first. Following these practices will help you enjoy fresher, safer food.
Evaluating Food Preservation Products
When it comes to preserving your food, selecting the right products can make a significant difference in maintaining quality and extending shelf life.
Start by evaluating the specific needs of your food items; consider factors like moisture content, storage duration, and packaging type. For instance, if you're using oxygen absorbers, verify they're appropriate for the size of your containers and the type of food.
Look for reputable brands that offer clear absorption capacities and include indicators for replacement. Don't forget to assess compatibility with your chosen storage materials, such as Mylar bags or vacuum-sealed containers.
Common Preservation Mistakes
Many home preservers overlook critical steps that can jeopardize their efforts. One common mistake isn't sealing containers properly. If there's any air left, oxidation can occur, leading to spoilage.
Another error is using insufficient oxygen absorber sizes for large quantities of food. This can result in inadequate preservation, diminishing your food's shelf life.
Ignoring storage conditions, like temperature and humidity, is also a significant oversight. High humidity can lead to spoilage, especially with certain foods.
Finally, don't forget to check expiration dates on your oxygen absorbers. Using expired products won't provide the protection you need.
Maintaining Food Quality Over Time
Maintaining food quality over time is essential for enjoying your stored items at their best. To achieve this, consider using oxygen absorbers in your packaging. They effectively absorb oxygen, preventing spoilage and extending shelf life.
Pair these absorbers with Mylar bags or vacuum-sealed containers for ideal results. Always store your oxygen absorbers in airtight containers and seal them immediately after use.
Be cautious not to use them with high-humidity foods, as this could lead to spoilage. Regularly monitor storage conditions and replace absorbers when you open containers for extended periods.
Frequently Asked Questions
How Do Oxygen Absorbers Work in Food Preservation?
Oxygen absorbers work by absorbing oxygen within sealed packaging, which prolongs food freshness and shelf life. They inhibit bacteria and mold growth, keeping your food safe and flavorful while preventing spoilage and reducing waste.
Can Oxygen Absorbers Be Reused After Opening?
When it comes to reusing oxygen absorbers, you can't have your cake and eat it too. Once opened, they lose effectiveness, so it's best to use fresh ones for ideal food preservation.
What Foods Should Not Be Stored With Oxygen Absorbers?
You shouldn't store high-humidity foods like fruits, vegetables, and certain cheeses with oxygen absorbers. They can absorb moisture, leading to spoilage and health risks. Always check food compatibility before using absorbers for preservation.
How Long Do Oxygen Absorbers Last Once Opened?
Once opened, oxygen absorbers last about 4-6 hours before losing effectiveness. To maximize their lifespan, store them in airtight containers immediately after use, ensuring you seal them tightly to prevent moisture from spoiling their function.
Are There Any Safety Concerns With Using Oxygen Absorbers?
Yes, there are safety concerns with using oxygen absorbers. You should guarantee they're used appropriately, avoiding high-humidity foods and sealing containers properly. Always monitor storage conditions to prevent spoilage and potential foodborne illnesses.
Conclusion
In summary, mastering food preservation can feel like wielding a magic wand that transforms your kitchen into a waste-free wonderland. By choosing the right tools and techniques, you can guarantee your favorite ingredients stay fresh and flavorful for what seems like an eternity. Remember to follow best practices and avoid common pitfalls to truly elevate your food storage game. Embrace these essentials, and enjoy the satisfaction of knowing your food is well-protected and your waste is minimized!
-
Survivalism4 months ago
Meal Preppers Near Me: Find Local Services and Tips!
-
Survivalism4 months ago
Preppers Pack Crossword: Test Your Knowledge of Survival Gear!
-
Survivalism4 months ago
Inside the Secret World of Doomsday Preppers: Are You Ready?
-
Survivalism4 months ago
AI Doomsday Scenario: Understanding the Potential Risks
-
Vetted4 months ago
15 Best Satellite Phones for Preppers: Stay Connected Anywhere, Anytime
-
Survivalism3 months ago
Preppers List of Items: Essential Gear for Every Survivalist!
-
Survivalism4 months ago
Mastering Hurricane Preparedness: Your Essential Guide
-
Vetted3 months ago
15 Essential Survival Gear Items You Need to Stay Prepared in the Wild